Quantcast
Channel: Envato Tuts+ Code
Viewing all 5160 articles
Browse latest View live

23 Best Flutter Mobile App Templates on CodeCanyon

$
0
0

Do you want to build and deploy fast, beautiful mobile apps for both Android and iOS? 

Then you should consider creating a Flutter app. Using Flutter you can write apps for both Android and iOS using a single codebase. And a Flutter app template makes it easy to get started.

What is Flutter? 

Flutter is now one of the most popular frameworks for developing cross-platform mobile apps. In addition to being a first-class platform for Material Design, developers consider it to be a great alternative to popular cross-platform frameworks like React Native, Ionic and so on.

Flutter widgets abstract all critical platform differences such as scrolling, navigation, icons, and fonts to provide full native performance on both iOS and Android.

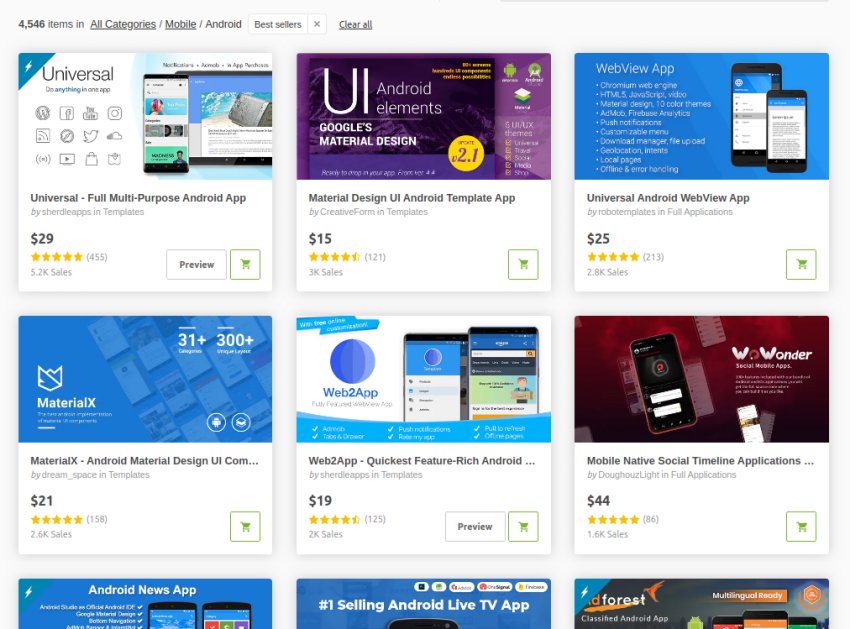
On CodeCanyon you will find tools you need to start building your app with Flutter. 

FluxStore Multivendor

Flutter app templates significantly reduce the development time of a mobile application. In many cases, they give you a completely coded app, ready to upload to the App Store and  Play Store—all you need to do is customize the branding!

25 Best Flutter App Templates on CodeCanyon 

Grab one of these bestselling Flutter app templates and kickstart your next app!

Bestselling Flutter Mobile App Templates on CodeCanyon

Let us look at some of the most popular flutter app templates on CodeCanyon.

1. Bestselling: FluxStore Pro—WooCommerce, Magento, OpenCart

FluxStorePro

FluxStore Pro is a drag and drop mobile app builder that converts your online store into a mobile app. So if your business already has a website built on WooCommerce, Magento or Opencart, then it is easy to integrate with Fluxstore. 

This fast loading Flutter e-Commerce app template has a clean, elegant and professional design. It supports social login and registration as well as guest checkout. It comes with unlimited pre-made layouts, multi-level product categories, a quick product filter, and keyword searches. 

The download package includes the full source code, designs, documents, videos and many more resources.

Some notable features include: 

  • easy customization and while-labeling 
  • offline images caching to speed up loading performance 
  • instant synchronization from mobile to the server and vice versa
  • supports smart chat and works with Messenger, WeChat, Whatsapp… 

2. Bestselling: FluxStore WooCommerce

fluxstore WooCommerce

Fluxstore WooCommerce converts your WooCommerce store website into a fully functioning mobile app in just a few steps. 

It comes with an advanced product detail view configuration with options to show safe area, video, thumbnail gallery, hero effect, and image height. In addition, it has a smart recent product view helps you track your view history. 

There is also deep link support to help route visitors from your website or another outside channel to your app. 

Other features include:

  • powerful map picker that makes it easy to fill in the billing address
  • multiple payment gateways 
  • smart chat
  • order tracking

3. Digital Download Products Store 

Selling downloadable digital products like e-books, magazines, videos, photography, graphics, apps, and time-cards requires a robust digital download platform app. 

As a developer you can build one for your client using Digital Download Products Store.

This flutter digital download store template supports both Android and iOS with a single PHP back-end.

Features:

  • create your own custom product collection
  • advanced product search and sort categories 
  • multiple login systems that include email login, phone login and social login
  • share an item as a free download but users will need to register in order to get it
  • local caching system so you can access data while offline

4. Delivoo: All-in-One eCommerce Flutter App Template 

Delivoo

Deliver almost anything with Delivoo. 

Delivoo is an all in one eCommerce delivery app template that allows user to receive delivery of anything they want—be it grocery, food, medicine, or something else. You can also use it as a courier app. 

It contains 3 apps: the user app, the delivery app, and and the seller app. It is easy to customize and to integrate with any back-end. 

5. MeetAir—Video Conferencing App for Live Classes etc 

MeetAir - Video Conferencing App for Live Classes etc

MeetAir is complete video meeting system that you can use to start your online meeting platform. You can use it for: video meetings, live classes, webinar, online training, web conference. It has a powerful admin panel to manage meetings, history, notification, analytics, app configuration, and more. 

Using this Flutter app template you can build your own web, Android, and iOS video conference app. No coding is required to use this video conferencing Flutter app template. 

Other impressive features include:

  • lock-protected rooms to control access to your conferences with a password
  • schedule and add the meeting to your calendar.
  • chat and message with your team during meetings
  • high quality audio and video delivered with the clarity and richness of Opus and VP8

6. ProKit Flutter UI Kit  

ProKit

Prokit has everything you will need for a faster workflow and outstanding results. You save a lot of time and efforts with these well-thought-out ultimate library of pre-designed app templates combined into high-quality UI kit. 

This flutter app UI design template kit comes with screens galore: walkthrough screen, login screen, signup screen, profile screen, dashboard screen, side menu screen, bottom navigation screen, listing screen, description screen, and image slider screen. 

You can design different screens easily by customizing templates, by combining and editing any UI element, text or image. 

7. Flutter AdMotors for Car Classified

Flutter AdMotors for Car Classified

The Flutter AdMotors app is a ready-made, complete classified platform application like Olx, Mercari, Offerup and Carousell. But it is specific to the used car niche. It is easy to setup and no coding is required. It supports both iOS and Android with a single back-end.

8. FluxNews—Flutter Mobile App for WordPress 

FluxNews is an app that converts your WordPress website into a mobile true native app with customized contents. No coding skill is required. It comes with a very clean design that is easy to customize. Using it, you can build your own app by using over 50 resuable widgets.  

FluxNews maximizes your customer’s experience and usability through UX flow in both Android and iOS. 

Additional features include:

  • offline images caching to speed up the loading performance 
  • instant synchronization for smooth data update without downtime
  • support social login, SMS login by Facebook

9. Courier One: Courier Delivery App 

Courier One Courier Delivery Appgo

The CourierOne app is an all-in-one courier delivery app for restaurants, groceries, personal items, etc. CourierOne is an online, all-in-one courier booking app which allows users to send anything anywhere and anytime.

The food delivery and grocery delivery features allow users to order from nearby restaurants and grocery stores. The awesome looking app can be used for both Android and iOS platforms. It's code is optimized and easy to customize.

10. FluxStore Multi Vendor

FluxStore Multivendor

If you're looking to build a comprehensive e-commerce marketplace that is similar to Amazon then you have an ally in FluxStore Multi Vendor

Fluxstore Multi-Vendor comes as a complete solution loaded with cutting edge eCommerce features, impressive UX design, and smooth performance on both iOS and Android devices.

If your business has already had a the website based on the WooCommerce site with the Dokan or WCFM plugin, it is easy to integrate Fluxstore Multi-Vendor in just a few steps. Then you can quickly release the final app to both the App Store and Google Play store. 

The download package includes the full source code and many related resources—like designs, documents, and videos—that help you with a smooth install.

11. Flutter App for WooCommerce

Flutter App for Woocommerce

Using Flutter App for WooCommerce you can convert your WooCommerce store into a Flutter app to reach customers using both iOS and Android platforms and give them a unique experience every day. 

This WooCommerce Flutter app has a dynamic admin panel which allows you to easily manage the app design in the following ways:  

  • create hundreds of layouts with simple settings 
  • add banners, categories, and product blocks
  • link a banner to any category, product, or post
  • send targeted messages and notifications

It is translation ready, supports multiple currencies and also social login through Google and Facebook. 

12. Flutter eCommerce UI Kit Template 

Futter eCommerce UI Kit Template

The Flutter eCommerce UI Kit Template has all the tools you need to start building an eCommerce app with flutter. The beauty of this eCommerce UI kit is that it saves you time on any front-end layout. The components you need have already been coded for you!

You have 32 screens to select from, each with a different type of UI layout. And you can easily customize them to reflect your clients' brands. 

The design is clean and the code is well commented. It even supports multiple languages. 

13. Food Delivery Flutter and PHP Laravel Admin 

This food delivery Flutter mobile app comes together with a back-end powered by Laravel. It is easy to customize and restyle the themes to suit your branding. It also comes with ready-to-use animations: hero animations and parallax animations, as well as sliding and swiping animations.

The admin side of this app includes a multiple language admin panel with dashboard and statistics, multiple roles and permissions including restaurant manager and clients, social media authentication, and integrated media and file managers. 

The food delivery app side includes: a restaurants directory management system, Google maps for location and directions to restaurants, multiple payment gateways including Stripe, RazorPay, and Paypal. Cash on delivery and payment on pickup methods are also available. 

14. FluxStore Shopify

FluxStore Shopify

Fluxstore Shopify converts your Shopify store into a mobile app. It is a complete and universal eCommerce Flutter app that is compatible with the latest editions of Shopify. And you can customize all components to reflect your brand!

This Flutter template comes loaded with full eCommerce features including a shopping cart, order tracking, refunds, wishlists, multi-currency support, and order history. 

The homepage has banner sliders, banner groupings, flexible product column views, and Instagram photos.

The excellent UX design has of quick product filters, multiple layout designs, and keyword search history. 

15. Flutter Chat App With Node.js

This Flutter chat app template is a versatile mobile chat system developed with the  Dart language and Node.js for the back-end to make the app run quickly and securely.

Admin accounts can delete posts and comments. They can also add and delete public chat rooms. Users can search for other users using email, and read or send messages. 

The app template comes with full Flutter source code, full Node.js back-end code, and extensive documentation including screenshots. 

16. FlutterFire Social: Chat and Messenger 

FlutterFire Social is a fully functional Flutter social messaging app template with Firebase a back-end, Users can post, like, comment, chat, and more.

Other features include:

  • Firebase email authentication
  • real-time chat with online users
  • a group chat system including the ability to create and edit groups
  • admins can post, edit, and delete, as well as block and unblock users

17. Hookup4U—Complete Flutter Dating App

Hookup4U is a complete flutter dating app template. Admins have a detailed user viewer to search users, block users, and more. In addition, admins can create packages that include free and paid subscriptions.

Other features include: 

  • authentication with Facebook or phone number (OTP-based)
  • settings for profile visibility
  • like or unlike other profiles pics based on settings 
  • show matches 
  • one to one text chat 
  • one on one audio and video chat (Agora-based) 

18. TikStar—TikTok Clone App UI in Flutter UI Template 

TikStar

TikStar is a TikTok clone and short video streaming mobile app template. TikStar is developed using Flutter. That means that UI is compatible with both Android and iOS. 

This Flutter social media app template, has clean, well-formatted code that is easy to understand.

Features you will find in this amazing app include:

  • login, signup, and forgot password screens
  • login with phone number and OTP verification  
  • carousel slider
  • animations

19. Listar Flux 

Listar Flux

Listar Flux is mobile classified directory listing app template built in Flutter. It’s suitable for many kind of mobile directory listings like store locators, city guides, event and attraction places, and  property directories.

20. AeroMeet—Flutter Video Conference and One-to-One Chat 

AeroMeet - Flutter Video Conference  One-on-One Chat App

AeroMeet is an online meeting platform to manage your video conference, live class, meeting, webinar, online training. It uses Agora SDK behind the scenes, which is fast-growing platform for video calling. 

Some features of this highly configurable platform include:

  • secure and encrypted calls
  • hosting and joining meetings from mobile
  • unauthorized meeting ID protection
  • meetings history

21. Connect—Video Conferencing App 

Connect is a secure video conferencing platform template where anyone can create an account and get connected to their loved ones without worrying about data theft.

This Flutter video conference app supports up to 70 people in a single conference call. You can create meetings with extra secure passcodes provided by Google. In addition, you can receive feedback from users on your desired email account. 

22. Flutter Buy and Sell 

Flutter BuySell Classified

Flutter Buy and Sell is a readymade complete classified platform application like Olx, Mercari, Offerup, or Carousell. It is easy to setup and no coding required.

23. FluxStore Listing 

FluxStore Listing

Fluxstore Listing is a powerful flutter listing app that makes it quick and easy to create a seamless, beautiful and functional listing directory for your business including eCommerce, impressive UX design. and smooth performance on both iOS and Android devices. 

With a Fluxstore listing you can create, manage, organize and monetize any listing business with ease. You can connect to your Listeo, Listing Pro, or MyListing website and Google Spreadsheet.  

Take Advantage of the Mobile App Templates Available on CodeCanyon Now!

If you are looking to create a more visually appealing and feature-rich mobile app that gives you customers the best possible user experience, then head on over to CodeCanyon and browse our library of eye-catching and user-friendly mobile UI kits

Bestselling Flutter Mobile App Templates on CodeCanyon

These high-quality mobile UI kits allow you to integrate a modern UI kit that can compete with others in your industry.

While you are on CodeCanyon, check out the thousands of mobile app UI kits and templates available.

Learn Flutter for Free

The learn Google Flutter From Scratch series here on Envato Tuts+ will help you learn to  code apps using Google flutter: 


How to Build a WooCommerce Store With Elementor

$
0
0

Elementor and WooCommerce make it easy to create an online store. In this tutorial, I'll show you how to use WooComerce, WordPress, and Elementor to build an online store complete with products, categories, and an Amazon-style dropdown menu.

Why WooCommerce?

WordPress is one of the world’s most popular blogging platforms, but countless businesses also use WordPress to sell their products and services.

With a little help from the WooCommerce ecommerce plugin, you can use WordPress to sell digital and physical goods, and collect payments via popular payment gateways including PayPal and Stripe. 

Today, 29% of the top million websites use WooCommerce, and big names such as the All Blacks, L.A. Weekly and AeroPress all rely on this popular WordPress eCommerce plugin.

While WordPress and WooCommerce provide everything you need to launch a successful eCommerce store, you may want more control over how your store looks.

In this two-part series, I’ll show you how to build a professionally-designed online store using WordPress, WooCommerce and Elementor. 

In this post, we'll setup Elementor and WooCommerce, and create an online store complete with products, categories, and an Amazon-style dropdown menu. Then, in the next post, we'll redesign WooCommerce's product archive and product pages, using your choice of Elementor Pro templates.

By the end of this tutorial, you'll be ready to go live with a professionally-designed eCommerce store. 

What We’ll Be Building

Elementor is a flexible tool that gives you several ways to design your eCommerce store. You could use one of Elementor Pro’s built-in templates, upload additional third-party templates, or even build your own eCommerce template from scratch. In this series, we’ll be covering all three options!

By the end of this tutorial, you’ll have created a custom product page and product archive, using Elementor Pro’s built-in templates. 

Navigate to any product to see your new design in action

The product page and product archive are two pages that WooCommerce generates automatically, but the stock design should be adapted to suit your store's branding and features. I’ll show you how to quickly and easily customize these default pages, using Elementor Pro’s built-in templates. 

In the follow-up post, we'll use a themed collection of templates to create unique product pages, a product archive, and a themed header that appears across your entire eCommerce store. 

If you have a specific vision in mind, then I'll also show you how to bring that vision to life, by creating your own Elementor template. 

Elementor: Build an eCommerce Store With Zero Code

The first step is adding Elementor to your WordPress website. 

The core Elementor plugin is free to download and provides access to more than 40 widgets and over 30 templates. However, since we’re working with WooCommerce you’ll need to invest in an Elementor Pro subscription

Unlike the free version of Elementor, Elementor Pro provides a dedicated WooCommerce Builder, plus some important ecommerce-themed widgets such as Add to Cart, Product Rating and Related Products.

If you want to stick with the free Elementor plugin, then this tutorial will help you master the Elementor user interface and the core workflows you’ll need to build beautifully-designed pages, websites, blogs and online stores. However, you will need an Elementor Pro subscription in order to complete all sections of this tutorial. 

How to Add Elementor to Your WordPress Website

Elementor Pro requires the free version of Elementor. If you haven’t already installed this free plugin, then you’ll need to add it to your website:

  • Log into your WordPress account, if you haven’t already. 
  • In WordPress’s left-hand menu, select Plugins > Add New.
  • Search for the Elementor plugin.
  • When the plugin appears, select Install Now > Activate.

We can now upgrade to Elementor Pro:

  • Head over to the Elementor website, and purchase Elementor Pro, if you haven’t already. You should receive a purchase confirmation email. 
  • On the Elementor website, log into your account using the details contained in your confirmation email. 
  • Select Download plugin, and Elementor Pro will be downloaded as a ZIP file. 
  • Log into your WordPress website. 
  • In the left-hand menu, select Plugins > Upload Plugin.
  • Click Choose file and then select the ZIP file you just downloaded.
  • Select Install Now > Active.
  • When prompted, click Connect & Activate and follow the onscreen instructions to activate your Elementor Pro license.

Elementor Pro is now ready for you to use! 

WooCommerce: How to Install WordPress’ Free eCommerce Plugin 

Next, I’ll show you how to design, build and launch an online eCommerce store, using Elementor and WooCommerce.

If you haven’t already added the free WooCommerce plugin to your website, then now’s your chance:

  • Log into your WordPress website.
  • Navigate to Plugins > Add New.
  • Search for WooCommerce. When this plugin appears, select Install Now > Activate.
  • You should now see the Welcome to WooCommerce screen; click Yes please to start the setup process.
  • On the subsequent screen, enter your postal address and then click Continue.
  • WooCommerce will now ask some questions about your industry and products, and whether you already have an online or physical store. 

After answering all of WooCommerce’s questions, you can choose a theme for your online store. We’ll be customizing our store using Elementor, so just select any free theme and then click Continue.

You’ll now be prompted to activate the Jetpack and WooCommerce Services plugin. This plugin will help protect your website against brute force attacks, and can also deliver a performance boost, so it’s recommended that you activate Jetpack unless you have a specific reason not to.

Congratulations, you’ve just successfully installed WooCommerce! 

WooCommerce has lots of settings, including some that are essential for running a successful online store, such as specifying whether you accept PayPal, Stripe, or Direct Bank Transfer.

Configuring your WooCommerce store is beyond the scope of this tutorial, but you can explore all of WooCommerce’s settings, by selecting WooCommerce > Settings from WordPress’ left-hand menu.

For some extra guidance, you may also want to check out our free Beginner's Guide to Using WooCommerce course, or Getting Started with WooCommerce series. 

Stock Those Shelves: Creating Your First WooCommerce Product

In this tutorial, we’ll be creating various layouts so it’s important you test these layouts as you’re building them.

If you already have a catalog of WooCommerce products, then you can use these products to see exactly how your store will look once it’s fully-stocked. However, if you’re building your very first store, then I’d recommend taking a few minutes to create a handful of products that you can use in your layouts.

To create a product, select Products > Add New from WordPress’ left-hand menu. 

You can now open the Product data dropdown and specify the kind of product that you want to create: 

  • Simple product. This is any product that’s shipped and has no options. 
  • Grouped Product. This is a collection of related products that all fall into the simple product category. 
  • External/Affiliate product. This is a product that’s sold elsewhere, but is featured on your website
  • Variable product. This is a product that has variations, for example a jacket that’s available in different sizes and colors. 

For the purposes of this tutorial, I’ll be creating a Simple Product:

  • Give your product a name and write a short description. 

You can now assign this product to a product category, for example if you’re creating a clothing store then your categories might include Hoodies & SweatshirtsOccasionwear, and Shoes & Boots. Assuming that you want to create a new category, scroll to the Product categories section and select Add new category.

You can assign WooCommerce products to multiple product categories
  • Give your category a name, and then click Add new category.
  • In the Product categories section, select the category that you just created.

Already know all the categories that you want to feature on your website? You can implement all of these categories in advance, by repeating the above steps. You may also want to separate your categories into parent and child categories, for example I’m creating a Kitchen parent category and assigning it the following child categories: Bar stools, Dining chairs and Kitchen stools.

Im creating a Kitchen parent category and assigning it the following child categories Bar stools Dining chairs and Kitchen stools
  • In Product tags, enter all the tags that you want to use, and then click Add.
  • Next, add a featured image by scrolling to Product Image and then selecting Set product image.
  • Choose the image that best represents your product. 

Do you have multiple images that you want to use for this particular product? You can create a product gallery, by scrolling to the Product gallery section, selecting Add product gallery images, and then choosing the images that you want to use. 

  • In the Product Data section, make sure General is selected.
To test your Elementor layouts youll need to create at least one product
  • In Regular price, enter how much this product should cost. 
  • Next, select the Inventory tab. 
  • In SKU, enter this product’s Stock Keeping Unit, which is the number you’ll use to track this product in your inventory. 
  • Select the Enable stock management at product level checkbox.
Find the Manage stock checkbox and click to select
  • In Stock quantity, enter the number of units that you currently have in stock. 
  • WooCommerce can email you when you’re running low on stock. If you want to receive these low stock notifications, then enter the desired value into Low stock threshold. You’ll now receive an email as soon as your stock reaches this threshold.  
  • In the left-hand menu, select Shipping.
  • In Weight, enter this product’s weight. 
  • In Dimensions, enter the product’s length, width and height. 
  • When you’re happy with the information you’ve entered, click Publish.

To see the product you’ve just created, select View Product.

Ive created a simple WooCommerce product using the Single Product settings

Rinse and repeat to create multiple products. To really put your layouts to the test, you should try to create a variety of products, spanning multiple categories. 

Organize Your Store With Product Categories

After creating all your products, it’s worth taking a few minutes to review your product categories.

By taking stock of all the categories you've created, you can identify any categories that need grouping into a parent category, or you might realize that you’ve forgotten to create a few important categories.

To review your categories, select Product > Categories from WordPress’ left-hand menu.

I’ve already created a Kitchen parent category that features my Bar stools, Dining chairs and Kitchen stools child categories, but now I’m going to create some additional parent categories: Office, Bedroom, Living Room and Garden.

To create a parent category:

  • In Add New Category, enter the name of the parent category that you want to create.

At this point you may want to review the parent and child categories that youve created
  • Make sure Parent category is set to None.
  • Click Add new category.
  • Find the first child category that you want to assign to this parent category, and then select the child’s accompanying Edit link.
  • Open the Parent category dropdown and select the parent category that you just created.
You can assign any WooCommerce child category to a parent category
  • Click Update.

Rinse and repeat for every child category that you want to assign, and every parent category that you want to create. 

Creating an Amazon-Style Product Menu

Next, I’m going to give customers the ability to filter products based on product category. In this section, we’ll build a dropdown menu, where selecting a parent category displays all the child categories associated with that parent.

Help visitors explore your online store with an Amazon-style dropdown menu

This kind of parent/child product menu is a staple of many eCommerce sites, including heavyweights such as Amazon and eBay. By adding this kind of product menu to your eCommerce site, you can give visitors a familiar way to explore everything that your store has to offer. 

By default, it’s not possible to add product categories to a WordPress menu. Before building our menu, we need to edit these default settings: 

  • In WordPress’ left-hand menu, select Appearance > Menus.
  • Towards the top of the screen, find the Screen options section, and click to expand.  
  • Find Product categories, and select it.

You can now add product categories to your menus, so let’s create our menu:

  • Give your menu a name, and then click Create new menu.
  • Click to expand the Product categories section.
You can add product categories to your WordPress dropdown menu
  • Select all the product categories that you want to add to your menu.
  • Click Add to menu. All of the selected parent and child categories will now be added to the Menu structure section. 
  • Since we’re creating a dropdown menu, you need to grab each child category and drop it beneath its associated parent category.
  • Next, grab each child category and drag it slightly to the right, so that it appears indented beneath its parent. Release the child category, and it should now be permanently indented.
  • Repeat this indenting process for every child category. 
Drag categories to the right to create an indented effect
  • If you want to change where an item appears in your menu, then grab it in Menu structure and drop it into a new location. 
  • When you’re happy with how your menu is setup, click Save Menu.
  • To place this menu on your website, click the Manage Locations tab. 
  • Assuming that you want this menu to appear across your entire website, open the Top Menu dropdown and select the menu that you just created.
  • Click Save Changes.

This parent/child menu will now appear across your eCommerce store, making it easy for customers to explore your product categories. 

Designing a WooCommerce Store With Elementor Pro

At this point, you have all the elements that you need for a successful eCommerce store: a WooCommerce installation, some products, and a menu that visitors can use to explore your store.

However, there’s one final piece of setup that we need to perform. By default, you can only use Elementor to design posts and pages, and not products. 

Before we move onto the next section, we need to extend Elementor’s capabilities to include WooCommerce products: 

  • In WordPress’ left-hand menu, select Elementor > Settings.
  • In Post Types, select Products.
Give Elementor access to your Products post types
  • Select Save Changes.

You can now use Elementor to design customized product pages—so let’s get started! 

Using Elementor Pro’s Ready-Made Templates

Elementor provides a range of templates that can give your website a completely new look and feel, and sometimes even add extra functionality. These professionally-designed templates can take much of the work out of building an eCommerce store, so let’s start by exploring these pre-built templates. 

In this section, I’ll show you how to customize two pages that WooCommerce creates automatically: your product archive and product pages. 

Redesigning WooCommerce’s Single Product Page

Product pages are how visitors view and ultimately purchase your products, so it’s vital they look good and provide all the functionality your customers need. 

Elementor Pro has a range of product page templates, so let’s put these templates to good use:

  • In WordPress’ left-hand menu, select Templates > Theme Builder.
  • Select the Add New button.
  • Open the Template type dropdown and select Single Product.
  • Give your template a name, and then click Create Template.
  • Elementor Pro will now display all the available Single Product templates; select the template that you want to use.
Elementor Pro provides a range of professionally-designed single product pages that you can use in your WooCommerce store

This template will now open in the Elementor editor. At this point, you can make changes to your chosen template, but for now we’ll just go ahead and publish our chosen template: 

  • In the Elementor Panel, select Publish.
  • In the subsequent popup, open the Include dropdown and make sure Products is selected. 
Youll need to apply your chosen single product template to all of your Product pages
  • Click Save & Close.

This template will now be rolled out across all your product pages. 

Building a Custom WooCommerce Product Archive

The product archive is a list containing all your products in a single location. When you setup WooCommerce, this plugin added a product archive to your website automatically, although the archive’s look and feel will vary depending on your WordPress theme. 

You can also use Elementor to re-design your Product Archive page which WooCommerce creates automatically

Not a fan of this automatically-generated product archive? You can quickly and easily give it a makeover, using any of Elementor’s product archive templates:

  • In WordPress’ left-hand menu, select Templates > Theme Builder.
  • Select the Add New button.
  • Open the Template type dropdown and select Product Archive.
  • Give your template a name, and then click Create Template.

Elementor Pro will now display all the available Product Archive templates; select the template that you want to use.

If youre using Elementor Pro then youll have access to a range of professionally-designed Product Archive templates
  • Your chosen template will now open in the Elementor editor.
  • If you’re happy with your chosen template, then you can publish it by clicking the green Publish button. 
  • In the subsequent popup, open the Include dropdown and select All Product Archives
  • Click Save and close.

This updated product archive will now appear on your website. 

Conclusion 

In post, we created a complete online store. This WooCommerce site has everything you need to start selling products, all wrapped up in your choice of Elementor Pro's professionally-designed templates. 

If you're not entirely happy with your site's look and feel, then why not try a different Elementor Pro template? Or, you could check out our follow-up post, where I'll show you how to use Elementor Template Kits, and how to create your own template from scratch. 

23 Best Flutter Mobile App Templates on CodeCanyon

$
0
0

Do you want to build and deploy fast, beautiful mobile apps for both Android and iOS? 

Then you should consider creating a Flutter app. Using Flutter, you can write apps for both Android and iOS using a single codebase. And a Flutter app template makes it easy to get started.

What Is Flutter? 

Flutter is now one of the most popular frameworks for developing cross-platform mobile apps. In addition to being a first-class platform for Material Design, developers consider it to be a great alternative to popular cross-platform frameworks like React Native, Ionic, and so on.

Flutter widgets abstract all critical platform differences such as scrolling, navigation, icons, and fonts to provide full native performance on both iOS and Android.

On CodeCanyon, you will find all the tools you need to start building your app with Flutter. 

FluxStore Multivendor

Flutter app templates significantly reduce the development time of a mobile application. In many cases, they give you a completely coded app, ready to upload to the App Store and  Play Store—all you need to do is customize the branding!

25 Best Flutter App Templates on CodeCanyon 

Grab one of these bestselling Flutter app templates and kickstart your next app!

Bestselling Flutter Mobile App Templates on CodeCanyon

Let's look at some of the most popular Flutter app templates on CodeCanyon.

1. Bestselling: FluxStore Pro—WooCommerce, Magento, OpenCart

FluxStorePro

FluxStore Pro is a drag-and-drop mobile app builder that converts your online store into a mobile app. So if your business already has a website built on WooCommerce, Magento, or OpenCart, then it is easy to integrate with FluxStore. 

This fast-loading Flutter e-Commerce app template has a clean, elegant, and professional design. It supports social login and registration as well as guest checkout. It comes with unlimited pre-made layouts, multi-level product categories, a quick product filter, and keyword searches. 

The download package includes the full source code, designs, documents, videos, and many more resources.

Some notable features include: 

  • easy customization and while-labeling 
  • offline image caching to speed up loading performance 
  • instant synchronization from mobile to the server and vice versa
  • supports smart chat and works with Messenger, WeChat, WhatsApp, etc.

2. Bestselling: FluxStore WooCommerce

fluxstore WooCommerce

FluxStore WooCommerce converts your WooCommerce store website into a fully functioning mobile app in just a few steps. 

It comes with an advanced product detail view configuration, with options to show safe area, video, thumbnail gallery, hero effect, and image height. In addition, it has a smart recent product view that helps you track your view history. 

There is also deep link support to help route visitors from your website or another outside channel to your app. 

Other features include:

  • powerful map picker that makes it easy to fill in the billing address
  • multiple payment gateways 
  • smart chat
  • order tracking

3. Digital Download Products Store 

Digital Download Products Store

Selling downloadable digital products like e-books, magazines, videos, photography, graphics, apps, and time-cards requires a robust digital download platform app. 

As a developer, you can build one for your client using Digital Download Products Store.

This Flutter digital download store template supports both Android and iOS with a single PHP back-end.

Features:

  • create your own custom product collection
  • advanced product search and sort categories 
  • multiple login systems that include email login, phone login, and social login
  • share an item as a free download, but users will need to register in order to get it
  • local caching system so you can access data while offline

4. Delivoo: All-in-One eCommerce Flutter App Template 

Delivoo

Deliver almost anything with Delivoo. 

Delivoo is an all-in-one eCommerce delivery app template that allows users to receive delivery of anything they want—be it groceries, food, medicine, or something else. You can also use it as a courier app. 

It contains three apps: the user app, the delivery app, and the seller app. It is easy to customize and to integrate with any back-end. 

5. MeetAir—Video Conferencing App for Live Classes etc 

MeetAir - Video Conferencing App for Live Classes etc

MeetAir is a complete video meeting system that you can use to start your online meeting platform. You can use it for video meetings, live classes, webinars, online training, or web conferences. It has a powerful admin panel to manage meetings, history, notification, analytics, app configuration, and more. 

Using this Flutter app template, you can build your own web, Android, and iOS video conference app. No coding is required to use this video conferencing Flutter app template. 

Other impressive features include:

  • lock-protected rooms to control access to your conferences with a password
  • schedule and add the meeting to your calendar.
  • chat and message with your team during meetings
  • high-quality audio and video delivered with the clarity and richness of Opus and VP8

6. ProKit Flutter UI Kit  

ProKit

ProKit has everything you will need for a faster workflow and outstanding results. You save a lot of time and effort with this well-thought-out library of pre-designed app templates combined into a high-quality UI kit. 

This Flutter app UI design template kit comes with screens galore: walkthrough screen, login screen, signup screen, profile screen, dashboard screen, side menu screen, bottom navigation screen, listing screen, description screen, and image slider screen. 

You can design different screens easily by customizing templates, by combining and editing any UI element, text, or image. 

7. Flutter AdMotors for Car Classified

Flutter AdMotors for Car Classified

The Flutter AdMotors app is a ready-made, complete classified platform application like Olx, Mercari, Offerup, and Carousell. But it is specific to the used car niche. It is easy to set up, and no coding is required. It supports both iOS and Android, with a single back-end.

8. FluxNews—Flutter Mobile App for WordPress 

FluxNewsFlutter Mobile App for WordPress

FluxNews is an app that converts your WordPress website into a mobile true native app with customized contents. No coding skill is required. It comes with a very clean design that is easy to customize. Using it, you can build your own app by using over 50 reusable widgets.  

FluxNews maximizes your customer’s experience and usability through UX flow in both Android and iOS. 

Additional features include:

  • offline image caching to speed up the loading performance 
  • instant synchronization for smooth data update without downtime
  • support social login and SMS login by Facebook

9. Courier One: Courier Delivery App 

Courier One Courier Delivery Appgo

The CourierOne app is an all-in-one courier delivery app for restaurants, groceries, personal items, etc. CourierOne is an online, all-in-one courier booking app which allows users to send anything, anywhere, anytime.

The food delivery and grocery delivery features allow users to order from nearby restaurants and grocery stores. The awesome-looking app can be used for both Android and iOS platforms. Its code is optimized and easy to customize.

10. FluxStore Multi Vendor

FluxStore Multivendor

If you're looking to build a comprehensive e-commerce marketplace that is similar to Amazon, then you have an ally in FluxStore Multi Vendor

Fluxstore Multi-Vendor comes as a complete solution loaded with cutting-edge eCommerce features, impressive UX design, and smooth performance on both iOS and Android devices.

If your business has already had a website based on WooCommerce with the Dokan or WCFM plugin, it is easy to integrate Fluxstore Multi-Vendor in just a few steps. Then you can quickly release the final app to both the App Store and Google Play store. 

The download package includes the full source code and many related resources—like designs, documents, and videos—that help you with a smooth install.

11. Flutter App for WooCommerce

Flutter App for Woocommerce

Using Flutter App for WooCommerce, you can convert your WooCommerce store into a Flutter app to reach customers using both iOS and Android platforms and give them a unique experience every day. 

This WooCommerce Flutter app has a dynamic admin panel which allows you to easily manage the app design in the following ways:  

  • create hundreds of layouts with simple settings 
  • add banners, categories, and product blocks
  • link a banner to any category, product, or post
  • send targeted messages and notifications

It is translation ready, supports multiple currencies, and allows social login through Google and Facebook. 

12. Flutter eCommerce UI Kit Template 

Futter eCommerce UI Kit Template

The Flutter eCommerce UI Kit Template has all the tools you need to start building an eCommerce app with Flutter. The beauty of this eCommerce UI kit is that it saves you time on any front-end layout. The components you need have already been coded for you!

You have 32 screens to select from, each with a different type of UI layout. And you can easily customize them to reflect your clients' brands. 

The design is clean, and the code is well commented. It even supports multiple languages. 

13. Food Delivery Flutter and PHP Laravel Admin 

Food Delivery Flutter and PHP Laravel Admin

This food delivery Flutter mobile app comes together with a back-end powered by Laravel. It is easy to customize and restyle the themes to suit your branding. It also comes with ready-to-use animations: hero animations, and parallax animations, as well as sliding and swiping animations.

The admin side of this app includes a multiple language admin panel with dashboard and statistics, multiple roles and permissions including restaurant manager and clients, social media authentication, and integrated media and file managers. 

The food delivery app side includes a restaurant directory management system, Google maps for location and directions to restaurants, and multiple payment gateways including Stripe, RazorPay, and PayPal. Cash on delivery and payment on pickup methods are also available. 

14. FluxStore Shopify

FluxStore Shopify

Fluxstore Shopify converts your Shopify store into a mobile app. It is a complete and universal eCommerce Flutter app that is compatible with the latest editions of Shopify. And you can customize all the components to reflect your brand!

This Flutter template comes loaded with full eCommerce features including a shopping cart, order tracking, refunds, wishlists, multi-currency support, and order history. 

The homepage has banner sliders, banner groupings, flexible product column views, and Instagram photos.

The excellent UX design includes quick product filters, multiple layout designs, and keyword search history. 

15. Flutter Chat App With Node.js

This Flutter chat app template is a versatile mobile chat system developed with the Dart language and Node.js for the back-end to make the app run quickly and securely.

Admin accounts can delete posts and comments. They can also add and delete public chat rooms. Users can search for other users using email, and read or send messages. 

The app template comes with full Flutter source code, full Node.js back-end code, and extensive documentation including screenshots. 

16. FlutterFire Social: Chat and Messenger 

FlutterFire Social Chat and Messenger

FlutterFire Social is a fully functional Flutter social messaging app template with a Firebase back-end. Users can post, like, comment, chat, and more.

Other features include:

  • Firebase email authentication
  • real-time chat with online users
  • a group chat system including the ability to create and edit groups
  • admins can post, edit, and delete, as well as block and unblock users

17. Hookup4U—Complete Flutter Dating App

Hookup4UComplete Flutter Dating App

Hookup4U is a complete Flutter dating app template. Admins have a detailed user viewer to search users, block users, and more. In addition, admins can create packages that include free and paid subscriptions.

Other features include: 

  • authentication with Facebook or phone number (OTP-based)
  • settings for profile visibility
  • like or unlike other profile pics based on settings 
  • show matches 
  • one-to-one text chat 
  • one-on-one audio and video chat (Agora-based) 

18. TikStar—TikTok Clone App UI in Flutter UI Template 

TikStar

TikStar is a TikTok clone and short video streaming mobile app template. TikStar is developed using Flutter. That means that the UI is compatible with both Android and iOS. 

This Flutter social media app template has clean, well-formatted code that is easy to understand.

Features you will find in this amazing app include:

  • login, signup, and forgot password screens
  • login with phone number and OTP verification  
  • carousel slider
  • animations

19. Listar Flux 

Listar Flux

Listar Flux is a mobile classified directory listing app template built in Flutter. It’s suitable for many kinds of mobile directory listings, like store locators, city guides, event and attraction places, and property directories.

20. AeroMeet—Flutter Video Conference and One-to-One Chat 

AeroMeet - Flutter Video Conference  One-on-One Chat App

AeroMeet is an online meeting platform to manage your video conference, live class, meeting, webinar, or online training. It uses Agora SDK behind the scenes, which is a fast-growing platform for video calling. 

Some features of this highly configurable platform include:

  • secure and encrypted calls
  • hosting and joining meetings from mobile
  • unauthorized meeting ID protection
  • meetings history

21. Connect—Video Conferencing App 

ConnectVideo Conferencing App

Connect is a secure video conferencing platform template where anyone can create an account and get connected to their loved ones without worrying about data theft.

This Flutter video conference app supports up to 70 people in a single conference call. You can create meetings with extra secure passcodes provided by Google. In addition, you can receive feedback from users on your desired email account. 

22. Flutter Buy and Sell 

Flutter BuySell Classified

Flutter Buy and Sell is a readymade complete classified platform application like Olx, Mercari, Offerup, or Carousell. It is easy to set up, with no coding required.

23. FluxStore Listing 

FluxStore Listing

Fluxstore Listing is a powerful Flutter listing app that makes it quick and easy to create a seamless, beautiful, and functional listing directory for your business, including eCommerce, an impressive UX design, and smooth performance on both iOS and Android devices. 

With Fluxstore Listing, you can create, manage, organize, and monetize any listing business with ease. You can connect to your Listeo, Listing Pro, or MyListing website and Google Spreadsheet.  

Take Advantage of the Mobile App Templates Available on CodeCanyon Now!

If you are looking to create a more visually appealing and feature-rich mobile app that gives your customers the best possible user experience, then head on over to CodeCanyon and browse our library of eye-catching and user-friendly mobile UI kits

Bestselling Flutter Mobile App Templates on CodeCanyon

These high-quality mobile UI kits allow you to integrate a modern UI kit that can compete with others in your industry.

While you are on CodeCanyon, check out the thousands of mobile app UI kits and templates available.

Learn Flutter for Free

The learn Google Flutter From Scratch series here on Envato Tuts+ will help you learn to  code apps using Google Flutter: 


Create a Contact Form in PHP

$
0
0


No matter what type of website you own or manage, you probably need a contact form. The contact form can help your visitors request a quote, ask for information, or share any tips or problems they're facing while using your website.

In this tutorial, our focus will be on creating a fully functional contact form in PHP from beginning to end. We will begin with the markup of all the fields that we need to add and the basic styling of the contact form. After that, we will move on to the PHP code to implement its functionality.

Of course, the easiest way to create a contact form is to download a professional contact form script from CodeCanyon.

But if you want to learn about how a contact form is created, read on! It might just be easier than you think.

Markup of Our HTML Contact Form

The first step towards creating our own contact form is to code the markup. We will start doing that once we have a list of all the elements that we want inside our form. We'll need an input field for the name of the person who is contacting us, and we'll need a field for their email address so that we can send a reply back to them if the need arises. We'll also need an input field for the reason people are contacting you and a textarea where users can type their message.

If the website you are managing is very popular, you'll be getting a lot of emails through the contact form. To make sure that the right people get to read those emails and respond quickly, you need a couple more fields. For instance, you could add a field that can determine which department the visitor wants to contact like marketing, support, or billing. This information can later be used to route the email appropriately. Ultimately, that might help you reply more quickly and sort the emails more efficiently.

How many fields you add to the contact form depends on the type of website you run, but make sure you don't overdo it. Forcing visitors to fill out too many details might discourage them from contacting you altogether.

Let's write the HTML code to add all the fields I just mentioned into our contact form.

Before proceeding any further, I would like to quickly summarize the meaning of some important attributes in the above markup. The action attribute in the form determines where the form data needs to be sent. If you don't have an action attribute, the data is sent back to the same URL. Here we've used contact.php, so the form data will be sent to that script.

The name attribute for different input elements in the form is used to access the element values on the server side. For example, in the above form, you can get the name of the visitor contacting you using $_POST['visitor_name'] in contact.php.

We use the placeholder attribute to give users a basic idea of the expected input for each field in the form. The required attribute ensures that no important field is left blank before the user hits the submit button on the form. 

The pattern attribute is used to enforce some rules on the kinds of values that can go inside certain fields. In our case, we only allow users to use letters and the space character in the names they submit. We also limit the total number of acceptable characters to anything from 3 to 20 inclusive. The pattern that you use will depend on the type of input that you want from users.

The following CodePen demo shows us what our contact form looks like with the above markup and a little bit of CSS.

Making Our HTML Contact Form Functional Using PHP

Right now, our form doesn't do anything useful. Visitors can fill it out and hit the send message button, but we won't receive anything because there is no server-side code to handle the information provided by the form. In this section, we'll make our contact form functional using PHP.

Begin by creating a contact.php file and putting the following code inside it.

We have already done some client-side validation of user input. However, it's always safer to do server-side validation as well. We use the filter_var() function to sanitize the name provided by the user. In a similar fashion, we also sanitize the value of $email_title and $concerned_department. You can use the filter_var()function to validate or sanitize all types of user input. We also use the htmlspecialchars() function to encode all the special HTML characters in the visitor message sent to us.

The value of $recipient is based on the value of the variable $concerned_department. This way, we make sure that only people who are actually supposed to look into the matter receive the email.

Also, we've used the $email_body variable to format the email body which will be the main content of the email. As we are sending an email in the HTML format, we've used HTML to format the email body content.

Finally, we use the mail() function to send an email which includes the information the visitor wanted us to know. Upon successful delivery of the email, we let the visitors know that we have received their email and that they will be contacted soon.

Security is paramount when you are dealing with user data or input. Whether you should validate or sanitize the user input depends on what the input is and how you want to use it. Validation simply checks if the user input follows a certain set of rules. For example, validation could check that the name of a person does not contain any numbers. Sanitization is used to remove any offending characters that pose a security risk. For example, a malicious user trying to contact you through the form might add a script tag in the textarea to get you to download a harmful script. This is particularly worrisome when your website has public forums accessible by everyone.

However, you have to be very careful when getting rid of unwanted characters in user input. For example, you might decide to use filter_var($user_input, FILTER_SANITIZE_STRING); on some input to strip all tags and encode special characters. However, this flag also strips harmless character input by legitimate users. Here is an example:

If your website has a lot of maths-related topics, it will be relatively common for users to write < or > in contact forms or forum posts. Using the FILTER_SANITIZE_STRING flag with the filter_var() function will strip necessary information from the message in this case.

The point I am trying to make is that even though you should always validate or sanitize user data, make sure that you are not stripping away crucial information in the process.

Final Thoughts

Creating a basic contact form in PHP is pretty simple. You begin by writing the HTML needed to create input elements for information like the user's name, email address, phone number, etc. The next step is writing CSS to make sure the contact form blends in perfectly with the rest of the website. The final step involves writing the PHP code that will take the information from the contact form and securely mail it to you.

The aim is to make sure that different form elements are laid out in a way that does not confuse people and the user input is sanitized and validated before you mail it to concerned parties. If all this is new to you or if you don't want to spend a lot of time creating a professional-looking contact form, you should definitely check out these top-rated contact form PHP scripts.

If you have any questions, feel free to let me know in the comments. My next tutorial will show you how to implement your own CAPTCHA to help keep contact form spam in check. 

If you're interested in professional-quality PHP form scripts that you can start using on your site today, check out some of our other posts.


The 30 CSS Selectors You Must Memorize

$
0
0

Learn CSS: The Complete Guide

We've built a complete guide to help you learn CSS, whether you're just getting started with the basics or you want to explore more advanced CSS.

CSS Selectors

So you learned the base idclass, and descendant selectors—and then called it a day? If so, you're missing out on an enormous level of flexibility. You owe it to yourself to commit these advanced CSS and CSS3 selectors to memory.

Basic Selectors

1. *

Let's knock the obvious ones out, for the beginners, before we move onto the more advanced selectors.

The star symbol will target every single element on the page. Many developers will use this trick to zero out the margins and padding. While this is certainly fine for quick tests, I'd advise you to never use this in production code. It adds too much weight on the browser, and is unnecessary.

The * can also be used with child selectors.

This will target every single element that is a child of the #container div. Again, try not to use this technique very much, if ever.

2. #X

Prefixing the hash symbol to a selector allows us to target by id. This is easily the most common usage, however be cautious when using id selectors.

Ask yourself: do I absolutely need to apply an id to this element in order to target it?

id selectors are rigid and don't allow for reuse. If possible, first try to use a tag name, one of the new HTML5 elements, or even a pseudo-class.

3. .X

This is a class selector. The difference between ids and classes is that, with the latter, you can target multiple elements. Use classes when you want your styling to apply to a group of elements. Alternatively, use ids to find a needle-in-a-haystack, and style only that specific element.

4. X

What if you want to target all elements on a page, according to their type, rather than an id or classname? Keep it simple, and use a type selector. If you need to target all unordered lists, use ul {}.

Live Demo of Basic Selectors

Combinator Selectors

5. X Y

The next most common selector is the descendant selector. When you need to be more specific with your selectors, you use these. For example, what if, rather than targeting allanchor tags, you only need to target the anchors which are within an unordered list? This is specifically when you'd use a descendant selector.

Pro-tip: If your selector looks like X Y Z A B.error, you're doing it wrong. Always ask yourself if it's absolutely necessary to apply all of that weight.

6. X + Y

This is referred to as an adjacent selector. It will select only the element that is immediately preceded by the former element. In this case, only the first paragraph after each ul will have red text.

7. X > Y

The difference between the standard X Y and X > Y is that the latter will only select direct children. For example, consider the following markup.

A selector of #container > ul will only target the uls which are direct children of the div with an id of container. It will not target, for instance, the ul that is a child of the first li.

For this reason, there are performance benefits in using the child combinator. In fact, it's recommended particularly when working with JavaScript-based CSS selector engines.

8. X ~ Y

This sibling combinator is similar to X + Y, however, it's less strict. While an adjacent selector (ul + p) will only select the first element that is immediately preceded by the former selector, this one is more generalized. It will select, referring to our example above, any p elements, as long as they follow a ul.

Live Demo of Combinator Selectors

Attribute Selectors

9. X[title]

Referred to as an attributes selector, in our example above, this will only select the anchor tags that have a title attribute. Anchor tags which do not will not receive this particular styling. But, what if you need to be more specific? Check out the next example!

10. X[href="foo"]

The snippet above will style all anchor tags which link to https://code.tutsplus.com; they'll receive our branded green color. All other anchor tags will remain unaffected.

Note that we're wrapping the value in quotes. Remember to also do this when using a JavaScript CSS selector engine. When possible, always use CSS3 selectors over unofficial methods.

This works well, though, it's a bit rigid. What if the link does indeed direct to Envato Tuts+, but, maybe, the path is code.tutsplus.com rather than the full URL? In those cases we can use a bit of the regular expressions syntax.

11. X[href*="foo"]

There we go; that's what we need. The star designates that the proceeding value must appear somewhere in the attribute's value. That way, this covers tutsplus.comcode.tutsplus.com, and even webdesign.tutsplus.com.

Keep in mind that this is a broad statement. What if the anchor tag linked to some non-Envato site with the string tutsplus in the URL? When you need to be more specific, use ^ and $, to reference the beginning and end of a string, respectively.

12. X[href^="http"]

Ever wonder how some websites are able to display a little icon next to the links which are external? I'm sure you've seen these before; they're nice reminders that the link will direct you to an entirely different website.

This is a cinch with the carat symbol. It's most commonly used in regular expressions to designate the beginning of a string. If we want to target all anchor tags that have a href which begins with http, we could use a selector similar to the snippet shown above.

Notice that we're not searching for https://; that's unnecessary, and doesn't account for the URLs that begin with https://.

Now, what if we wanted to instead style all anchors which link to, say, a photo? In those cases, let's search for the end of the string.

13. X[href$=".jpg"]

Again, we use a regular expressions symbol, $, to refer to the end of a string. In this case, we're searching for all anchors which link to an image—or at least a URL that ends with .jpg. Keep in mind that this won't capture GIF and PNG images.

14. X[data-*="foo"]

How do we compensate for all of the various image types? Well, we could create multiple selectors, such as:

But, that's a pain, and is inefficient. Another possible solution is to use custom attributes. What if we added our own data-filetype attribute to each anchor that links to an image?

Then, with that hook in place, we can use a standard attributes selector to target only those anchors.

15. X[foo~="bar"]

Here's a special one that'll impress your friends. Not too many people know about this trick. The tilde (~) symbol allows us to target an attribute which has a space-separated list of values.

Going along with our custom attribute from number fifteen, above, we could create a data-info attribute, which can receive a space-separated list of anything we need to make note of. In this case, we'll make note of external links and links to images—just for the example.

With that markup in place, now we can target any tags that have either of those values, by using the ~ attributes selector trick.

Pretty nifty, huh?

Live Demo of Attribute Selectors

Pseudo Selectors

16. X:visited and X:link

We use the :link pseudo-class to target all anchors tags which have yet to be clicked on.

Alternatively, we also have the :visited pseudo class, which, as you'd expect, allows us to apply specific styling to only the anchor tags on the page which have been clicked on, or "visited".

17. X:checked

This pseudo class will only target a user interface element that has been checked—like a radio button, or checkbox. It's as simple as that.

18. X:after

The before and after pseudo classes are great. Every day, it seems, people are finding new and creative ways to use them effectively. They simply generate content around the selected element.

Many were first introduced to these classes when they encountered the clear-fix hack.

This hack uses the :after pseudo class to append a space after the element, and then clear it. It's an excellent trick to have in your tool bag, particularly in the cases when the overflow: hidden; method isn't possible.

For another creative use of this, refer to my quick tip on creating shadows.

According to the CSS3 Selectors specification, you should technically use the pseudo element syntax of two colons ::. However, to remain compatible, the user-agent will accept a single colon usage as well. 

19. X:hover

Oh come on. You know this one. The official term for this is "user action pseudo class". It sounds confusing, but it really isn't. Want to apply specific styling when a user hovers over an element? This will get the job done!

Keep in mind that older version of Internet Explorer don't respond when the :hover pseudo class is applied to anything other than an anchor tag.

You'll most often use this selector when applying, for example, a border-bottom to anchor tags, when hovered over.

Pro-tipborder-bottom: 1px solid black; looks better than text-decoration: underline;.

20. X:not(selector)

The negation pseudo class is particularly helpful. Let's say I want to select all divs, except for the one which has an id of container. The snippet above will handle that task perfectly.

Or, if I wanted to select every single element (not advised) except for paragraph tags, we could do:

21. X::pseudoElement

We can use pseudo elements (designated by ::) to style fragments of an element, such as the first line, or the first letter. Keep in mind that these must be applied to block-level elements in order to take effect.

A pseudo-element is composed of two colons: ::

Target the First Letter of a Paragraph

This snippet is an abstraction that will find all paragraphs on the page, and then sub-target only the first letter of that element.

This is most often used to create newspaper-like styling for the first letter of an article.

Target the First Line of a Paragraph

Similarly, the ::first-line pseudo element will, as expected, style the first line of the element only.

"For compatibility with existing style sheets, user agents must also accept the previous one-colon notation for pseudo-elements introduced in CSS levels 1 and 2 (namely, :first-line:first-letter:before and :after). This compatibility is not allowed for the new pseudo-elements introduced in this specification."—W3C Selectors Specs

Live Demo of Pseudo Selectors

Nth Child and Type Selectors

22. X:nth-child(n)

Remember the days when we had no way to target specific elements in a stack? The nth-child pseudo class solves that!

Please note that nth-child accepts an integer as a parameter, however, this is not zero-based. If you wish to target the second list item, use li:nth-child(2).

We can even use this to select a variable set of children. For example, we could do li:nth-child(4n) to select every fourth list item.

23. X:nth-last-child(n)

What if you had a huge list of items in a ul, and only needed to access, say, the third to the last item? Rather than doing li:nth-child(397), you could instead use the nth-last-child pseudo class.

This technique works almost identically from number sixteen above, however, the difference is that it begins at the end of the collection, and works its way back.

24. X:nth-of-type(n)

There will be times when, rather than selecting a child, you instead need to select according to the type of element.

Imagine markup that contains five unordered lists. If you wanted to style only the third ul, and didn't have a unique id to hook into, you could use the nth-of-type(n) pseudo class. In the snippet above, only the third ul will have a border around it.

25. X:nth-last-of-type(n)

And yes, to remain consistent, we can also use nth-last-of-type to begin at the end of the selectors list, and work our way back to target the desired element.

26. X:first-child

This structural pseudo class allows us to target only the first child of the element's parent. You'll often use this to remove borders from the first and last list items.

For example, let's say you have a list of rows, and each one has a border-top and a border-bottom. Well, with that arrangement, the first and last item in that set will look a bit odd.

Many designers apply classes of first and last to compensate for this. Instead, you can use these pseudo classes.

27. X:last-child

The opposite of first-childlast-child will target the last item of the element's parent.

last-child Selector Example

Let's build a simple example to demonstrate one possible use of these classes. We'll create a styled list item.

For the markup, there's nothing special: just a simple list.

Here's the CSS:

This styling will set a background, remove the browser default padding on the ul, and apply borders to each li to provide a bit of depth.

Styled List

To add depth to your lists, apply a border-bottom to each li that is a shade or two darker than the li's background color. Next, apply a border-top which is a couple shades lighter.

The only problem, as shown in the image above, is that a border will be applied to the very top and bottom of the unordered list - which looks odd. Let's use the :first-child and :last-child pseudo classes to fix this.

Fixed

There we go; that fixes it!

28. X:only-child

Truthfully, you probably won't find yourself using the only-child pseudo class too often. Nonetheless, it's available, should you need it.

It allows you to target elements which are the only child of its parent. For example, referencing the snippet above, only the paragraph that is the only child of the div will be colored, red.

Let's assume the following markup.

In this case, the second div's paragraphs will not be targeted; only the first div. As soon as you apply more than one child to an element, the only-child pseudo class ceases to take effect.

29. X:only-of-type

This structural pseudo class can be used in some clever ways. It will target elements that do not have any siblings within its parent container. As an example, let's target all uls, which have only a single list item.

First, ask yourself how you would accomplish this task? You could do ul li, but, this would target all list items. The only solution is to use only-of-type.

30. X:first-of-type

The first-of-type pseudo class allows you to select the first siblings of its type.

A Test

To better understand this, let's have a test. Copy the following mark-up into your code editor:

Now, without reading further, try to figure out how to target only "List Item 2". When you've figured it out (or given up), read on.

Solution 1

There are a variety of ways to solve this test. We'll review a handful of them. Let's begin by using first-of-type.

This snippet essentially says, to find the first unordered list on the page, then find only the immediate children, which are list items. Next, filter that down to only the second list item in that set.

Solution 2

Another option is to use the adjacent selector.

In this scenario, we find the ul that immediately proceeds the p tag, and then find the very last child of the element.

Solution 3

We can be as obnoxious or as playful as we want with these selectors.

This time, we grab the first ul on the page, and then find the very first list item, but starting from the bottom! 

Live Demo of Nth Child and Type Selectors

Conclusion

If you're compensating for older browsers, like Internet Explorer 6, you still need to be careful when using these newer selectors. But, please don't let that deter you from learning these. You'd be doing a huge disservice to yourself. Be sure to refer here for a browser-compatibility list. Alternatively, you can use Dean Edward's excellent IE9.js script to bring support for these selectors to older browsers.

Secondly, when working with JavaScript libraries, like the popular jQuery, always try to use these native CSS3 selectors over the library's custom methods/selectors, when possible. It'll make your code faster, as the selector engine can use the browser's native parsing, rather than its own.

It’s great that you’re spending time learning web design fundamentals, but if you need a quick solution, one of our ready-to-use CSS templates might be a good option. We also have a few premium CSS items for you to consider.


Customize Your WooCommerce Store With Elementor Template Kits

$
0
0

Elementor Pro’s built-in templates are a great way to style an individual page, but why customize your online store on a product-by-product basis, when you can use Elementor Template Kits to design your entire eCommerce site? 

Countless businesses use WordPress to sell their products and services, thanks to the popular WooCommerce plugin. In the previous post, we built a complete eCommerce store, using WordPress, WooCommerce and Elementor Pro.

In this follow-up post, I'll show you how to redesign your entire online store, using Elementor Template Kits. We'll also create a header that features all of your store's contact information. Alternatively, if you have a very specific vision in mind, then I'll show you how to create your own Elementor template from scratch—giving you complete creative control over your eCommerce site. 

What We’ll Be Building

Elementor is a flexible tool that gives you several ways to design your eCommerce store.  In the previous post, I showed you how to redesign WooCommerce's product archive and product pages, using any of Elementor Pro's ready-made templates. In this follow-up post, we'll be exploring some additional ways that you can create a professionally-designed eCommerce store using Elementor. 

By the end of this tutorial, you'll have created: 

  • A complete eCommerce store, using Envato Elements Template Kits. We’ll install a themed collection of templates that contain designs for all the pages your WooCommerce site could possibly need. By the end of this section, you’ll have overhauled your product page, product archive page, and created a themed header that appears across your entire store. To ensure you’re happy with the finished product, I’ll also show you how to customize your chosen template kit with your own widgets, contact information and links. 
WooCommerce generates a Product Archive page automatically you can customize this page using Elementor
  • A product page without a template! Have a specific design in mind? Or want to experiment with a few different potential designs? I'll show you how to build a product page without using a template. By the end of this section, you'll have created the following design:
A product page created with a completely custom Elementor Pro template

We have lots to cover, so let's get started! 

Using Envato Elements Template Kits With WooCommerce

Elementor Pro’s built-in templates are a great way to style an individual page—but why customize your site on a page-by-page basis, when you can use a single template kit that styles your entire website? 

Elementor Template Kits are themed collections of templates, including eCommerce kits that are designed specifically with online stores in mind. 

Elementor Template Kits

Template kits can take the pain out of designing and building an online store. Simply choose your kit, apply a template to each of your pages, make any desired changes—and congratulations, you have a professionally-designed WooCommerce site!

These template kits also provide stand-alone blocks that you can combine into your own page layouts. Using these blocks, you can create pages that are unique to your website, but also consistent with your chosen template kit.  

In this section, I’ll show you how to overhaul your single product page and product archive, customize your default templates with extra widgets, and even how to build a complete eCommerce store using your chosen Elementor Template Kit. 

Install an eCommerce Elementor Template Kit

Envato Elements provides a wide range of professionally-designed Template Kits, ranging from flexible, multipurpose templates to industry-specific kits.

The Envato Elements website has an entire section dedicated to shopping and ecommerce, but you’ll also find templates designed with your specific business in mind, whether that’s photographytravelreal estate, or fitness

You can spend some time browsing all the available options, and decide which template is the best fit for your website. I’m using the Shoppix kit in all of my screenshots. 

Once you’ve chosen your kit, you just need to upload that kit to your website: 

  • On the Envato Elements website, select the template that you want to use and then click Download.
  • You can now either add this kit to an existing project, or create a new project. Make your choice, and your kit will be downloaded automatically. 
  • Head over to your WordPress website. 
  • In WordPress’ left-hand menu, select Templates > Add New.
  • Select Import Templates.
  • Click Choose file and then select the zip file that you just downloaded. 
  • Select Import Now.

Your Envato Elements Template kit will now be uploaded to your WordPress site, ready for you to use. 

Apply Your Elementor Template Kit

In this section, I’ll show you how to overhaul your product page, using an Envato Elements template.

All of the Elementor templates on Envato Elements are professionally-designed, but if your chosen template isn’t quite right for your specific website, then these templates are also easy to customize. 

In this section, I’ll show you how to easily add new functionality to any template, using a selection of Elementor widgets.

Let’s start by applying a template:

  • In WordPress’ left-hand menu, select Templates > Add New.
  • Open the Template type dropdown and select Single Product.
  • Give your template a name, and then select Create template.
  • In the subsequent window, select the My Templates tab.
  • Choose the template that you want to use. In my screenshots I’m using Single Product 1.

Whenever you choose a template, Elementor will prompt you to import the document settings for that template, which will override the page’s current settings. Unless you have a specific reason not to, you’ll generally want to import the document settings for your chosen template. 

Your template will now open in the Elementor editor.

The Elementor editor will now display your chosen template

This template already has everything your product page needs, but what if you want to add some extra functionality? 

In the following sections, I’ll show how to customize your product page template, using several popular Elementor widgets.

Facebook, Twitter, Instagram, & More: Adding Social Sharing Icons

You should make it easy for visitors to share all your content on social mediaincluding your products.

Although it’s not as common as sharing content such as blog posts or articles, visitors may sometimes feel the need to share your products, for example if you’re running a particularly noteworthy discount, or your site features some interesting or unusual products.  

You can add social sharing icons to your product pages, using Elementor’s Share Buttons widget:

  • In the Elementor Panel, find the Share Buttons widget.
  • Drag and drop this widget into the section where you want to display your social sharing buttons. 
You can add social sharing buttons to your product listing using the Share Buttons widget
  • In the Elementor Panel, make sure the Content tab is selected.
  • By default, this widget displays icons for Facebook, Twitter and LinkedIn. If you want to remove any of these icons, then click its accompanying X.
  • You can add more social media platforms to this widget by selecting Add Item and then using Network to select the social media platform in question.
Elementor Pro supports a long list of social media networks including Tumblr Digg and Skype
  • Rinse and repeat for every additional platform that you want to include in your widget. 
  • Next, you can tweak the look and feel of your social sharing buttons. Open the View dropdown and choose whether these buttons should feature an icon, text, or an icon andtext. 
You can style your social sharing buttons using Elementors Style tab

You may also want to change the size of these icons, or the size of the sharing buttons in general, using the Style tab.

In this section, we covered a few different ways that you can customize the Social Sharing widget, but there’s plenty more changes that you can make. 

It’s well worth taking the time to explore the Elementor Panel’s various tabs and settings, until you’re completely happy with your Social Sharing widget.

Add to Cart: Customizing This Essential Widget 

Since it’s such an integral part of the online shopping experience, most product page templates feature a built-in Add to Cart widget. However, you may want to customize this default widget, or even replace it with Elementor’s Custom add to cart widget. 

The Shoppix template is no exception, as it features a built-in cart widget. However, its Add to Cart button is grey, which means it blends into the rest of my site.

To ensure potential customers don’t struggle to locate my Add to Cart button, I’ve decided to customize this widget with a bolder, brighter color:

  • In the live preview canvas, click to select the Add to Cart widget.
  • In the Elementor Panel, click the Background color swatch, which launches the color picker. 
  • Use the color picker to select the color that you want to use. I’m opting for a bright color that contrasts (but doesn’t outright clash) with my site’s color scheme. 

Alternatively, Elementor provides a Custom add to cart widget. This widget features the familiar Add to Cart button, plus an optional text field where visitors can specify how many products they’re adding to their cart. 

Suspect your customers might want to purchase products in bulk? In this scenario, a Custom add to cart may be a good alternative to the standard cart widget.

To replace your template’s Add to Cart widget with Elementor’s Custom add to cart, you’ll need to delete the existing Add to Cart widget. In Elementor’s live preview canvas, click to select the cart widget, and then press the Delete key on your keyboard. 

In the Elementor Panel, find the Custom Add to Cart widget, drag it onto the live preview canvas and then drop this widget into position. 

You can now customize the look and feel of your Custom Add to Cart widget, by clicking to expand the Button section in the Elementor Panel. 

You can customize your templates built-in Add to Cart widget or replace it with Elementors Custom Add to Cart widget

To change the button’s color, open the Type dropdown and choose from the various options. 

You may also want to change the text that appears on the Add to Cart button, using the Text field. 

The Custom Add to Cart widget can also display an optional Quantity text box, which is perfect for visitors who want to add multiple items to their cart. To add this Quantity box, click to expand the Product section in the Elementor panel. 

Elementors Custom Add to Cart widget can display an optional Quantity text box
  • Open the Product dropdown and select the product that you’re currently viewing. 
  • Drag the Show Quantity slider into the Show position. 

Unlike some other cart widgets, Elementor’s Custom add to cart widget doesn’t feature a product stock count. If you want to display this information on your product page, then you’ll need to use Elementor Pro’s Product stock widget, which you’ll find in the Elementor Panel. 

Boost Your Revenue, With an Upsell Strategy

As an eCommerce business, you should always be pushing customers towards bigger and better products—upselling is one sales tactic that’s popular with businesses of all shapes and sizes.

Once you’ve implemented an upsell strategy, your website will automatically encourage visitors to dig a little deeper into their pockets. For example, if a customer is viewing the latest MacBook Air, then your website can tempt them to splash more cash, by displaying the latest MacBook Pro in the sidebar. Bonus points if you highlight the fact that the Pro is on sale, for this week only!

To implement an upsell strategy, you’ll need to link all your related products in the WordPress admin area, and then add Elementor’s Upsell widget to your product page template. 

Since we already have the Elementor editor open, let’s add our Upsell widget: 

  • In the Elementor Panel, find the Upsell widget.
  • Drag and drop this widget into the desired location in your live preview canvas. 

Before any upsell content appears on your website, you’ll need to link all related products in the WordPress admin area. Once you’ve published your product page template, you’ll need to perform the following: 

  • In the WordPress dashboard, select Products > All Products.
  • Find the first product that you want to link to its more expensive counterpart, and then open this product for editing, as normal. 
  • Scroll to the Product data section, and then select the Linked Products tab.
You can boost your revenue using WordPress Linked Products feature
  • In Upsells, enter the product that you want to recommend as a more expensive alternative. 
  • Click Update.

You can now repeat the above steps, for all the products that you want to link.

Now, everytime someone views my Contemporary double-bed, WordPress will present the Contemporary king-sized double bed as a potential upgrade—and hopefully earn us some extra revenue in the process! 

Whenever you view product WordPress will now display a You may also like section

By tempting your customers with more luxurious, high-end alternatives, you can ensure you’re getting maximum revenue from each and every sale. 

How to Publish Your Elementor Template Kit Site

Once you’re happy with your customized product page template, it’s time to roll it out across your eCommerce store:

  • In the Elementor Panel, select Publish.
  • In the subsequent popup, open the Include dropdown and make sure Products is selected. 
  • Click Save and Close.

All of your product pages will now feature this brand-new layout.

Moving Beyond a Single Template: How to Build an eCommerce Store

Elementor Template Kits provide all the templates you need to create a complete eCommerce store. 

If you opted for a kit that was designed specifically for eCommerce stores, such as Shoppix, then you’ll have access to templates covering all the major eCommerce pages, including a product archive template.

To create a consistent look and feel across your website, you’ll typically use multiple templates from the same template kit. In the following sections, we’ll move beyond a single page and apply multiple templates to our website, including a header template that’ll appear across our entire eCommerce store.

How to Update WooCommerce’s Product Archive 

To start, I’m going to apply Shoppix's product archive template to my site: 

  • In WordPress’ left-hand menu, select Templates > Theme Builder.
  • Select the Add New button.
  • Open the Template type dropdown and select Product Archive.
  • Give your template a name, and then click Create Template.
  • Elementor will now display all the available templates; click to select the Product Archive template that you want to use. 

Your chosen template will now open in the Elementor editor. 

At this point, you can customize your template by adding and removing widgets, or editing the widgets that come built into your template.

Once you’re happy with your template, it’s time to hit Publish:

  • Click the green Publish button in the Elementor Panel.
  • In the subsequent popup, open the Include dropdown and select All Product Archives.
  • Click Save and Close.

The updated product archive will now be rolled out across your website. 

How to Create a Header for Your eCommerce Site

At this point, you’re using multiple templates from the same Elementor Template Kit, which is perfect for giving your website a consistent look and feel. However, many websites use recurring elements such as headers and sidebars, to help tie their pages together and create a stronger brand identity. 

In the following sections, we’ll use your chosen template kit to create a header that’ll appear across your eCommerce store. I’ll also show you how to customize the header template with your contact information and links to the most important areas of your online store.

To start, let’s choose a header template:

  • In WordPress, select Templates > Theme Builder.
  • Click Add New.
  • Open the Select the template type… dropdown and choose Header.
  • Give this template a descriptive name. 
  • Select Create Template > My Templates.

Depending on your chosen theme, you may have a choice of header templates, for example my Shoppix theme provides Header Menu - Light and Header Menu - Dark templates.

In my screenshots, I’m using Header Menu - Dark.When prompted, opt to import the document settings.

Your chosen header template will now open in the Elementor editor.

In this section well add a header to our online store

There’s lots of ways that you can customize a header template, but I’ll be covering two of the most popular: adding contact information and adding links. 

Help Potential Customers Contact You

By including contact details in your header, you can encourage potential customers to reach out with any questions they might have. Providing easy access to your contact information can also make your business seem more trustworthy, as potential customers will already know how to contact you if they encounter any problems. 

In Elementor, contact information is typically displayed via the Icon List widget. If your chosen template already includes an Icon List, then you can customize this widget with your own contact information: 

  • Click to select your template’s Icon List widget. 

You can add your contact details using Elementors Icon List widget
  • In the Elementor Panel, click to expand the Icon List section.
  • Click to expand the section of text that you want to edit. 
  • Enter your text into the Text field.
  • Add an optional link and icon, if required. 
  • If you want to add more information to your Icon List, then click Add Item and customize this item with your own text, plus any icons or links that you want to use.

If your chosen template doesn’t already feature an Icon List, then you can find this widget in the Elementor Panel, and then drag and drop it onto your live preview canvas. 

How to Add Links to Your Site’s Header

Headers are a great way to provide easy access to all of your site’s most important content, and many header templates already contain placeholder links. 

Envato’s Shoppix template is no exception, as it already provides placeholders for ChatContact UsLog in and Register pages, as part of its built-in Icon List widget. I’m going to customize these placeholders to link to different areas of my website.

If your template doesn’t provide similar placeholder links, but it does feature an Icon List, then you can add your links as new items: 

  • In the live preview canvas, click to select your existing Icon List widget.
  • Click the Add Item button.

Alternatively, you can add a new Icon List by locating this widget in the Elementor Panel, and then dropping it onto your live preview canvas.

For the sake of simplicity, I’m going to assume you have an Icon List widget that you want to customize with your own links: 

  • In the live preview canvas, click to select the Icon list widget.
  • In the Elementor Panel, find the item that you want to turn into a link, and then click to expand this section.
You can add links to your websites header using the Icon List widget
  • In the Link field, either copy/paste or type your link. 
  • If required, change the text that appears in the header, by editing the Text field. 

Rinse and repeat for every link that you want to add to your header. 

By default, my header has a placeholder for a Contact Us page. Currently, my website doesn’t actually have this page, but Shoppix does have a dedicated Contact Us template. 

If you want to add a Contact Us page to your eCommerce store, then you can use this template to quickly and easily generate a Contact Us page that compliments the rest of your website. 

Want to quickly and easily add a Contact Us form to your page Shoppix has a Contact Us template that you can use with your ecommerce store

You can then reference this Contact Us page in your header.

The Shoppix header also contains placeholders for Log in and Register pages. If your site doesn’t have membership functionality, then we have a list of 22 free and premium membership plugins that you can add to your WordPress website. Alternatively, we’ve published a step-by-step guide to building a membership site, using the Ultimate Membership Pro (UMP) plugin. 

Perfecting Your Header: Remove Unwanted Links

If your header contains placeholders that you don’t want to use, then it’s easy to remove them:

  • Click to select your Icon List widget.
  • The Elementor Panel will now update to display all the items included in this widget.
  • To delete an item, click its accompanying X icon. 

Using these techniques, you can craft a header that contains links to all your website’s most important pages. 

Roll Out Your Custom WooCommerce Header

Happy with how your header is setup? Then it’s time to hit Publish:

  • In the Elementor Panel, click Publish.
  • Open the Include dropdown and select Entire Site.
  • Click Save & Close

Your new header is now live, and should appear across your entire eCommerce site. 

Click Publish  Entire Site  Save  Close and your header will appear across your ecommerce website

Designing an eCommerce Site, Using Elementor’s Theme Builder

In this tutorial, we’ve seen how you can create a stylish eCommerce site, using a range of ready-made templates, including the dozens of professionally-designed template kits available from Envato Elements. 

But what if you want to design a Woocommerce site, without using a template?

Perhaps you have a specific design in mind; maybe you need to ensure your eCommerce site stands out from the crowd, or maybe you want to mock up various designs, using an intuitive page builder? 

Transforming a blank slate into an Elementor template does require some time and effort, particularly compared to using a ready-made template. However, you’ll be working with many of the same widgets, so building an eCommerce template shouldn’t feel too dissimilar to customizing a ready-made eCommerce template.

In this final section, I’ll show you how to build a product page without using a template. To keep things interesting, I’ll use some widgets that we haven’t previously covered, including the WooCommerce breadcrumbs widget, which help keep customers orientated as they explore your various product categories. 

How to Create Your Own Elementor Template

To create a blank template:  

  • In WordPress’ left-hand menu, select Templates.
  • Give the Add New button a click.
  • Open the Template type dropdown and select Single Product.
  • Give your template a descriptive name.
  • Click Create template.
  • Elementor’s template library will now open automatically. Since we’re not using a template, you can close this window. 

You should now have a completely blank slate to work with. 

Build a Product Page, Without Using a Template

Let’s start from the top, by creating a space for our product title: 

  • In the Elementor Panel, grab the Product Title widget and drop it onto the live preview canvas. 
  • You can now use the Elementor Panel to change the title’s appearance, including altering the size of the text and its alignment.  
  • In the Elementor Panel, select the Style tab. Here, you can change the product title’s color and font, add a shadow, and make other stylistic changes. Spend some time experimenting, to see what effects you can create.
  • Next, we need to show potential customers what they’re purchasing. In the Elementor Panel, find the Product Images widget and drag it onto the live preview canvas. 
Make sure customers can see what theyre purchasing using the Product Images widget

Every product needs a description! I want to display my product description alongside the product image, so I'm going to add a second column. To add a column, click the section that contains the Product Image widget. This section should now be outlined in blue. Then, in the section's upper-left corner, Control-click the Column icon.

You can add more columns to any section by Control-clicking the sections Column icon
  • Select Add New Column. You should now have a section consisting of two columns.

Weve added a second column to our section
  • In the Elementor Panel, find the Product Data Tabs widget, and drag and drop it onto the column you just created. 

You can display information about your product using Elementors Product Data Tabs widget
  • Now we need to add the price. In the Elementor Panel, find the Product Price widget and drag and drop it onto the canvas. 
  • By default, the Product Price widget is on the smaller side, so I’m going to adjust the size of its font. In the Elementor Panel, select the Style tab. 
  • Find Typography and click its accompanying Edit icon. 
  • In the subsequent popup, increase the size of the font.
  • Next up is the Add to Cart feature. In the Elementor Panel, find Add to Cart and drag and drop this widget onto the canvas.
Make sure visitors can purchase your products using the Add to Cart widget

Next, I want to add breadcrumbs so that visitors can see the categories and subcategories this product belongs to, such as Furniture, Electronics, or Gardening. In the Elementor Panel, grab the WooCommerce breadcrumbs widget and drop it onto the canvas. 

Help visitors navigate your ecommerce store using the WooCommerce breadcrumbs widget

Finally, I want to encourage visitors to purchase additional items, by creating a Related Products area. In the Elementor Panel, grab the Product Related widget and drop it onto the canvas.

These are all the widgets I’m adding to my product page, but you may want to add extra widgets, such as the Social Sharing or Upsell widgets we covered earlier. 

You can also style your widgets, by selecting them in the canvas and then opening the Styles tab in the Elementor Panel. Finally, you can change your template’s layout, by grabbing any widget in the canvas and dropping it into a new location.

When you’re happy with your template, you can publish it by selecting Publish > Include > Products > Save and Close. Every product page across your website will now feature this new design. 

You can repeat this process to create templates for any ecommerce page, or even design an element that’ll appear across your online store, similar to the header we created earlier. The possibilities are endless! 

Conclusion 

In this series, we covered three ways that you can build a WooCommerce store using Elementor. If you’ve been following along, then you’ll have created multiple eCommerce templates, including product archives, product pages, and headers. You should also be familiar with all of Elementor’s most important eCommerce widgets.

Elementor Template Kits are themed collections of templates, including eCommerce kits that are designed specifically with online stores in mind.

Elementor Template Kits

Template kits can take the pain out of designing and building an online store. Simply choose your kit and apply a template to each of your pages to get a professionally-designed WooCommerce site!

Hosting WordPress With SiteGround: Pros and Cons and How To

$
0
0

There are countless WordPress hosting providers on the market, but which one is right for you?

Find the provider that’s the best possible fit for your website, and you can look forward to faster loading times, improved SEO, protection against the latest security threats, and all the storage and bandwidth your website could ever need. Choose the wrong provider, and you'll be facing an uphill struggle before you've even created your first post! 

Previously, we weighed up the pros and cons of choosing Amazon as your hosting provider, and in this article we’ll be deep-diving into one of the most popular and highest rated hosting providers in the WordPress community. 

By the end of this article, you’ll know exactly how to get WordPress up and running using SiteGround.

Pros of Hosting Your Website Using SiteGround

Let’s start positive, and look at the reasons why you may want to opt for SiteGround over competing WordPress hosting providers. 

1. It’s Recommended by WordPress.org

There are countless hosting providers on the market, but SiteGround is one of only three companies that’s officially recommended by WordPress.org.

“Just like flowers need the right environment to grow, WordPress works best when it’s in a rich hosting environment... We’ve dealt with more hosts than you can imagine; in our opinion, the hosts below (SiteGround, DreamHost and BlueHost) represent some of the best and brightest of the hosting world.” — WordPress Web Hosting

2. One-Click Installation and Automatic Updates

Why go to the effort of downloading, installing and configuring WordPress manually, when SiteGround provides a straightforward, click-and-install solution?

Later in this tutorial, I’ll show you how to install all the WordPress software and plugins your website needs, in just a few clicks. Once you have this software installed, SiteGround’s auto-updater can install any new releases automatically, so you’ll always have access to the latest bug fixes, patches and features. 

3. A Speedier WordPress Website 

To improve your website’s loading speeds, SiteGround uses SSD, a custom PHP handling setup that's optimized with an OPCache extension, the CloudFlare Content Delivery Network (CDN), and a unique SuperCacher feature that caches your WordPress website on three different levels. 

SiteGround also frees up RAM for dynamic content caching, by using NGINX Direct Delivery to remove static content from the server memory.

For users who want an additional performance boost, SiteGround also offers a SG Optimizer plugin that’s been proven to deliver a 20-30% performance boost even for websites that are already optimized. 

4. Staging: Test Changes and New Content in Private 

Do you want to test experimental changes or new features in private, before sending them out into the world? 

SiteGround lets you create a staged copy of your WordPress website with a single click, so you can test your changes without disrupting your live website. Once you’re happy with your changes, SiteGround makes it easy to roll them out to your users.

5. Protect Your Site Against the Latest Hacks and Exploits 

In 2018, WordPress accounted for 90% of all hacked CMS sites, and security continues to be a major concern for the entire WordPress community. 

To help protect your WordPress installation, SiteGround manages the overall security of your application at the server and firewall level. Since new security threats are emerging all the time, SiteGround frequently adds new rules that are designed to help protect your website against the latest security threats. 

6. Technical Support: Your Issues Resolved Within 5 Minutes 

All of SiteGround’s plans come with technical support as standard. 

Regardless of whether you purchase the StartUp or GoGeek subscription, you’ll have access to 24/7 technical support over the phone, via instant message, or using SiteGround’s ticketing system, with SiteGround aiming to resolve the majority of serious issues within 5 minutes.

If you invest in SiteGround’s GoGeek plan, then you’ll also get advanced priority support, where all your queries are automatically assigned to the most experienced support agent available. 

You’ll find a detailed breakdown of all the WordPress subscription plans over at the SiteGround website. 

7. Easily Migrate an Existing WordPress Website

Do you already have a WordPress website, but are unhappy with your current hosting provider?

The prospect of migrating your entire website can be daunting, but SiteGround’s Migrator plugin lets you securely migrate all your content, while keeping your WordPress configuration intact. 

Cons of Hosting Your Website Using SiteGround

No hosting provider is perfect, so before you sign up for your SiteGround account let’s explore the potential drawbacks of choosing SiteGround as your hosting provider.

1. Restrictions Across All Subscription Plans 

Regardless of whether you opt for SiteGround’s StartUp, GrowBig or GoGeek plan, SiteGround has caps and restrictions in place, particularly when it comes to web space. The StartUp plan has a limit of 10 GB, but even if you invest in the higher-end GoGeek plan, you’ll still be limited to 40 GB of space.

Before committing to any WordPress hosting provider, you should identify the resources your website currently needs, and the resources it’s likely to require in the future. You can then use this information to identify the provider who offers you the best possible value for money in the long-term.

2. A Minimum One Year Subscription 

SiteGround’s subscriptions may work out at between £2.95 and £24.95 per month, but you can't make payments on a month-by-month basis. Regardless of which plan you opt for, you'll need to purchase an annual or multi-year subscription in advance. 

Yearly subscriptions aren’t unusual among WordPress hosting providers, but a 12 month contract is a substantial commitment—especially if you’re testing out a new idea that you may not even pursue in the long-term!

How to Launch Your WordPress Website With SiteGround

Now you have a high-level overview of SiteGround’s standout features, let’s look at how you can use this platform to create, configure and launch your WordPress website.

Don’t Already Have a SiteGround Subscription? 

If you haven’t already invested in a hosting plan, then head over to SiteGround’s website and choose the plan that’s right for you

You’ll also need a domain name. There are countless domain registrars to choose from, but some of the most popular include:

Alternatively, you can purchase a domain name directly from SiteGround

Create a Website in Just a Few Clicks

You can quickly and easily setup a new WordPress website, using SiteGround’s Account Setup wizard:

You can quickly and easily create a WordPress website using SiteGrounds Account Setup wizard
  • Select New website > Start New Website.

To create a new WordPress website select Start New Website

Assuming you’re using a domain name you previously purchased, select Existing domain, enter the domain name that you want to use, and then click Continue. Alternatively, select New domain and then follow the onscreen instructions to register a domain name. 

SiteGround lets you add a new name register an existing domain or setup a temporary domain

Under Choose application, select WordPress.

SiteGround supports a range of applications including WordPress

Enter your email address, create a password, and then click Continue > Finish.

Change Your Domain’s Name Servers

SiteGround should now display a selection of name servers. 

To transfer management to SiteGround, you’ll need to add these name servers to your domain name’s registrar. This process can vary, so you should check your provider’s official documentation or blog for more information, but as a general overview you'll need to:

  • Copy the SiteGround name servers.
  • Log into your DNS hosting provider’s website. 
  • Find your hosting provider’s name servers, and delete them.
  • Paste SiteGround’s name servers into your provider’s account.
  • Save your changes. 

For example, here's how I changed the domain name serves for my GoDaddy account: 

You can change GoDaddys domain name servers via the Domain Control Center
  • Choose Manage DNS.
  • In the Nameservers section, select Change.
  • Select the I'll use my own nameservers checkbox.
  • Delete all of GoDaddy’s default name servers.  
  • Select Add nameserver.
  • Copy/paste SiteGround’s name servers into the GoDaddy console, and then click Save.

How to Install WordPress With SiteGround

You can now install WordPress with just a few clicks. To start, go to your SiteGround account, select the Websites tab followed by the Site tools button. In the left-hand menu, navigate to WordPress > Install & Manage.

In the Install New WordPress section, select WordPress. Then, in Application Setup, make sure the Install with WordPress Starter checkbox is selected, as this includes a collection of tools and themes that you can use to kickstart your WordPress website. 

Assuming you want to install WordPress on your main domain, leave the Installation Path blank. In Admin info, enter the login details that you’ll use to access your WordPress admin dashboard. 

Click Install and SiteGround will now install all of the required WordPress software.

Putting the Finishing Touches onto Your WordPress Website 

You’re nearly ready to launch your website! In this section, we’ll perform the final few bits of configuration, including selecting a WordPress theme:

  • Head over to the Site Tools page
  • In the left-hand menu, navigate to WordPress > Install & Manage.
  • Under Manage Installations, find your WordPress installation and click its accompanying Log in to Admin Panel icon (circled in the following screenshot).
You can setup and manage your WordPress website by selecting the Log in to Amin Panel icon

SiteGround’s Welcome to Your WordPress Site wizard will now open in a new tab; select Start Now.

SiteGround will now guide you through the final bit of setup

Choose the WordPress theme that you want to use.

At this point you may be prompted to install some additional plugins, such as WooCommerce and Elementor. If you want to add these plugins to your WordPress installation, then click Confirm > Complete.

Once SiteGround has finished installing your software, select Go to Dashboard and you’ll be taken to the familiar WordPress dashboard—complete with some extra goodies, courtesy of SiteGround!

You can now build your website using the standard WordPress dashboard

If you load your domain name, then you’ll see that your WordPress website is up and running—you’re now ready to start building your website!

Conclusion

In this article, we explored the pros and cons of hosting your WordPress website with SiteGround. If you were swayed by the pros, then I also showed you how to setup, configure and launch a WordPress website, using the SiteGround service.

Discount for WordPress Hosting

If you decide to go with a WordPress.org site, take a look at SiteGround. It comes with an easy installer, free support, and automatic updates. We're happy to be able to offer a huge discount of 70% off self-managed WordPress hosting, thanks to our partnership with SiteGround.

Managed WordPress Hosting From SiteGround


9 React Native App Templates for You to Study and Use

$
0
0

Are you looking for the best resources to create cross-platform mobile apps with native-like performance?

React Native is an awesome way to create cross-platform mobile apps with native-like performance and a single JavaScript codebase. In this post, I'll share 9 React Native app templates to make your mobile app development easier.

MStore Pro

Why Should I Use React Native?

The React library is a powerful collection of code on its own, but React Native takes it a step further.

When building native applications, for many years it was necessary to create entirely separate apps, with their own code bases and sometimes even different languages.

React Native acts as a wrapper for each of these native applications, allowing you to use a single code base to deploy to multiple devices. This drastically cuts down on costs, time, and maintenance when it comes to building your app. And you can build everything using JavaScript instead of a handful of disparate languages.

Getting started can be a bit rough, but there are plenty of apps, templates, and tutorials to help get you up to speed.

Pairing something you want to build with a good template and resource material is a recipe for React application success.

The Best React Native App Templates on CodeCanyon

CodeCanyon has the best React Native app templates on the internet, with nearly 200 currently available. Ratings and reviews help to make sure you pick the right template for your project, and the extended support makes the template developers available to you should you need any assistance.

React Native app templates available on CodeCanyon

Check out all of the available templates on CodeCanyon now.

9 React Native App Templates for You to Study and Use

Here are nine React Native mobile app templates to boost your projects and your skills.

1. Bestseller: MStore Pro—Complete React Native Template for eCommerce

MStore Pro

Nothing can be quite as difficult as organizing and presenting eCommerce apps. Taxonomies and collections are complex at best. Each item requires a high baseline of repetitive data depending on what is being sold. Variations can quickly get overwhelming, with data such as sizes, quality, inventory, color, versions, etc.

Now in its third version, MStore Pro (formerly called BeoStore) is a beautiful example of a React Native application for eCommerce.

Features include:

  • two product list modes
  • flexible product filter
  • user profiles
  • and more

The UI of this app template is top notch. When you consider the depth of data that is being sorted and presented—not to mention the fundamental feature set—this is a React application worth looking at closely.

The MStore Pro app template is amazing. You can learn more about what it can do with our tutorial on creating an eCommerce app with MStore Pro.

2. Antiqueruby React Native Material Design

Antiqueruby
Antiqueruby

If you're just starting with React Native, Antiqueruby is one of the best tools you can have. With a collection of over 200+ screens, this kit gives you a ton of drop-in components for almost any scenario.

With direct access to the code behind the components, you can also use Antiqueruby to learn about each part of what goes into a React Native app, using small, self-contained components.

There are a ton of components to learn from, including:

  • user profiles
  • logins, sign-ups, and registrations
  • advertising displays and handling
  • complex navigation handlers
  • third-party app integrations

If you're looking to improve your skills when it comes to modular components and front-end development, this kit will help you close the gap! 

Learn more about the Antiqueruby React Native component library with our tutorial.

3. BeoNews Pro—React Native Mobile App for WordPress

BeoNews Pro

BeoNews is an app that does magic for your website by converting your WordPress website into mobile true native app with customized contents.

There's hardly a better example of funneling your WordPress-based website into a React mobile app.

Easily get your WordPress site into mobile app form and onto the AppStore and Google Play with BeoNews Pro.

Features include:

  • easy Facebook integration
  • swipe gestures and animated UI/UX
  • multiple layouts
  • and more

If you're digging deeper into React or you want to get your WordPress-powered website into a mobile app store, this is an excellent place to start.

The BeoNews Pro React Native mobile app template for WordPress ticks all the right boxes.

4. BeoUI—Complete Mobile UI Template for React Native

This is another beautiful UI with plenty of styles that can be used in many different applications.

The BeoUI UI template will let you create great-looking apps for iOS and Android.

Features include:

  • flat design mixed with wonderful animation and parallax scrolling
  • multiple menu styles
  • WordPress support
  • and more

This reactive application template packs plenty of punch. With good looks and flexibility, you can build just about anything with the BeoUI UI template for React Native.

5. Best React Native App Builder: React App Builder

React App Builder
React App Builder

React Native app builders make it easy to create any kind of React Native mobile app. These are multipurpose tools that save development time and make it possible for even non-developers to build an app for iOS and Android. 

React App Builder is a multipurpose React Native app builder that helps developers and non-developers alike create any kind of iOS or Android app they want—chat apps, event apps, recipe apps, shopping apps, restaurant apps, etc. 

All you need to do is choose one of the available React Native templates, edit and reorder the app’s more than 30 sections, customise the design, colours, and layout, add your content, and your app is ready to publish on Google Play and the App Store. 

And for beginning developers, studying the code of this app template, unpacks tricks of the trade that will flatten your learning curve and help you advance faster. 

6. Listar: Listing Directory React Native App Template 

Listar - Listing Directory React Native App Template

Directory listing apps templates are multi-faceted and contain a wide variety of possibilities in one single app. 

Listar is a mobile React Native app template for the classified directory listing industry. It is suitable for many kinds of mobile directory listings, like store locators, city guides, events and attractions, and even real estate applications. 

The design is quite simple. Its components were made with pure React Native, without using extra libraries, so you can easily customize it for your business.

When you download the source code, open to study how the app has been written. Then you can practice customizing it to your own preferences and build some mobile apps with it. 

7. Food Delivery: React Native Template

Food Delivery App

Food Delivery is a component-based application template for React Native. The application has more than 25 components and 50 screen containers, and the visual design can easily be customized.

You can choose from two versions of the application:

  • Food Delivery Pro: built with React Native CLI 0.62
  • Food Delivery Expo: built with Expo SDK 37

This powerful React Native starter kit saves you hours of development so you can focus on what makes your app unique. You can look under the hood of each template and learn how it is code and how it helps you save hours of development. 

Note: this is just a mobile app—no back-end functionality is included.

8. GoFit Fitness App Template

GoFit
GoFit

If you want to create your own fitness app that covers all aspects of a get fit plan from nutrition to exercise, check out the GoFit app template. 

This React Native app template features a signup and login screen, main menu, workouts, exercise, recipes, blog, levels and goals, body parts diagrams, and equipment—in other words, everything you need to create the best fitness app.

You can examine every screen in this react native fitness app template and see how they've been put together. 

9. Myyaow Realtor


Myyaow Realtor is a React Native real estate mobile app that allows agents to post properties and customers to search through those properties according to their budget and required amenities.

It is the perfect React Native app template for developing apps for the real estate industry. 

Here are features you will find very useful:
  • builds for iOS and Android (though requires a Mac for development)
  • more than 20 screens designed for the real estate niche
  • screens for complex forms and search functions
  • React Native components users and agents

Choose Your React Native App Template 

React Native app templates available on CodeCanyon

If none of these templates are quite what you're looking for, you can find more on CodeCanyon. And if you want to learn more about React Native app development, check out some of our other posts. 

Get a good overview of the React Native templates and tools that are available, and then check out how to use a React Native template in your own project.

Become a React Native Pro!

Using, studying, and applying these React Native applications and strategies is one of the best ways to become a React pro. Digging into completed code, examining UI and UX choices, and using existing building blocks provides insight that is difficult to come across when starting from scratch.

If you're looking for other ways to improve your React Native chops, check out:


12 Best CRM & Project Management PHP Scripts (+ 3 Free)

$
0
0

Do you want your customers to have confidence in you? Do you want to keep them happy and coming back?

The good news is that with PHP CRM and project management scripts, you can build effortless relationships with your customers. 

A business cannot survive without CRM and project management software—you need it to manage customer contacts, track leads, and manage your projects and finances. A CRM system can help you streamline your business systems and have all your customer details in one place.

What Are PHP CRM Scripts?

CRM (customer relationship management) software is a tool that helps automate and manage the relationship between your customers and the sales and marketing department. It serves to consolidate every aspect of the relationship with customers, hence improving performance and increasing productivity.

One of the biggest challenges that a business owner faces is managing their multiple projects and tasks. Also, they have to track client and staff activities, plan upcoming events, and a lot more.

Luckily, this doesn't have to be complicated. CodeCanyon offers hundreds of CRM and project management PHP scripts, which can help simplify this process.

Ora School Suite Ultimate School Management System

Best CRM and Project Management PHP Scripts on CodeCanyon in 2020

Here are some of the best-selling PHP CRM scripts and PHP project management scripts on CodeCanyon for 2020.

Best selling PHP scripts

At CodeCanyon, you will find the right CRM software for freelancers, as well as any business that requires this type of software. Some of the features of these CRM and project management software packages include: 

  • proposals and invoices 
  • expense tracking
  • receiving payments with just one click
  • chat systems for communicating with staff and clients 
  • reports
  • payment systems

A good CRM system will allow you to:

  • know every customer's name, contact info, interests, and even address
  • see what products and services a client is interested in based on their inquiries, searches, or purchases
  • prioritize business leads
  • automate repetitive processes

These features will help you build confidence in your customers, keeping them happy and coming back. The payoffs are enormous. 

9 Best CRM and Project Management Scripts on CodeCanyon

Let's look at some of the trending CRM and project management scripts available at CodeCanyon.

Best Selling: Perfex: Powerful Open Source CRM

Perfex Powerful Open Source CRM

Perfex is the perfect solution to organize tasks and send out invoices, all from one place. One of the outstanding features of this CRM is that you can set up an auto backup of your database each X days to prevent data loss, and you also get encryption for your data.

Some of the best features of Perfex include:

  • built-in calendar where you can view tasks, contracts, and invoices in one place
  • full-featured customer area
  • project proposal creation tool 
  • goal tracking and reporting all in one place
  • lead management tool
  • reporting, invoicing system, and electronic signatures
  • ticketing system
  • payment systems such as PayPal, Stripe, Mollie, Authorize.net, 2Checkout, PayU Money, Braintree, etc.

Let's take a look at some of the screens from the dashboard. On this screen from the reports panel of the dashboard, you can see a detailed lead report that shows weekly conversions and where the leads came from. 

Perfex Powerful Open Source CRM

And here is a look at the projects dashboard, which shows which projects are open, in progress, on hold, or finished. 

Perfex Powerful Open Source CRM

Try the live demo of this best-selling powerful CRM software.  

Freelance Cockpit 3: Project Management and CRM

Freelance Cockpit3 Project Management and CRM

Freelance Cockpit 3 is a simple CRM script that allows you to stay organized so that you have the time to focus on getting work done. Freelance Cockpit provides a lot of features such as:

  • messaging platform
  • invoicing
  • supports ticketing for clients
  • Gantt charts for every project
  • dedicated client portal where clients can view the status of their projects and invoices
  • calendar that supports Google integration
  • email notifications
  • payment methods such as PayPal and Stripe
  • ability to assign different states for projects (On Hold, Not Started, Started, or Ended)

Ekushey Project Manager CRM

Ekushey Project Manager CRM

Ekushey is a powerful PHP customer management system and project management system. This PHP CRM script allows you to manage projects, team tasks, and client communication in a single place, in a convenient way. 

  • clients can view the status of their projects, make payments, and get developer support
  • staff will manage assigned projects 
  • perform assigned tasks and provide client support

Some of the notable features of this tool include:

  • informative dashboard which shows your business summary, including an event calendar, as well as financial analysis 
  • utility sidebar where you can note down and manage emergency to-dos
  • client and staff manager
  • project progress system and project discussion wall
  • internal messaging and private notes 
  • per-project payment reports

RISE: Ultimate Project Manager

Rise Ultimate Project Manager

Rise is a multipurpose software package which can cater to all types of organizations. You can use it to manage projects, tasks, clients, invoices, teams, support tickets, or estimates. If you are looking to stay organized while managing your business, this is the right tool for you. It includes all the essential tools to manage your business and stay organized.

Features include:

  • online payment where you can send invoices and get payments
  • project activity logs allow you to check the activities of your team, clients, and members
  • track expenses, and view graphical reports
  • ability to enable or disable modules to fit your business
  • chat feature where you can chat with your clients and team members
  • multiple languages support

Ora School Suite: Ultimate School Management System

Ora School Suite Ultimate School Management System

Managing a school is a Herculean project, with many staff and continuously changing students. Luckily, there is the Ora School Suite. Ora is school management at your fingertips, 24/7 on the web and mobile devices. Everything to do with managing a school is included.

From the dashboard, you can manage:

  • employees, teachers, and students 
  • schedules, including calendars of events and vacations 
  • chat with students, parents, or potential customers
  • sending SMS notifications
  • invoices and payments 

Just take a look at some of the screens from the dashboard. On this screen, you can see the invoice panel of the dashboard, with other panels showing news and messages to be answered

Ora School Suite Invoice panel

And here is a look at the inquiries dashboard, which lets you manage and respond to any incoming leads or questions.

Ora School Suite Inquiries dashboard

Give it a try for yourself in the live demo!

Ultimate Project Manager CRM Pro

Ultimate Project Manager CRM Pro

If you need a comprehensive, all-in-one solution that brings together CRM, human resources management, and project management, Ultimate Project Manager CRM Pro is the best choice. 

Project components include:

  • proposals
  • estimates
  • expenses
  • time tracking
  • invoicing
  • project reporting 

Human resources management components include:

  • recruitment
  • payroll
  • salary template
  • leave management

All this comes with a complete client management package!

Other great features include a powerful file manager and a knowledge base section where you can curate articles that are useful to your clients. 

It also supports eight different payment gateways, including PayPal, Stripe, Authorize, Mollie, Braintree, CCAvenue, and more.

WORKSUITE Project Management System

WORKSUITE Project Management System

WORKSUITE can be accessed on a laptop, mobile, or tablet. Its responsive design ensures clear data visibility on all types of devices.

Some features of this system include:

  • teams and departments can share knowledge and keep organized
  • real-time messaging helps team members to communicate
  • reports to analyze what's working and what's not
  • integrated with Slack, Google Drive, Dropbox, AWS, and PayPal 
  • can be accessed on laptop, mobile, or tablet

TITAN Project Management System

TITAN Project Management System

TITAN has many powerful features designed to allow you to manage unlimited projects, teams of users, essential tasks, and so much more.

Some features of this leaning project management PHP script include:

  • live chat with your team
  • assign tasks for individual team members and receive alerts when tasks are complete
  • plan the progression of your project 
  • use templates to set up recurring invoices and invoices for one-off payments  
  • ticket system where clients can request customer support 

Converting leads to clients has never been easier since Titan lets you build custom forms to send to clients and receive valuable feedback. Their responses are then stored in the Titan Project Management System

Ciuis CRM

Ciuis CRM

Ciuis CRM is a simple CRM tool that allows you to create projects as well as proposals. When it comes to invoicing, Ciuis CRM will enable you to invoice your projects by working hours. It also allows you to track your payments and it features a simple design that makes it super easy to use.

Other features include:

  • reports to keep track of your financial situation
  • voice notification
  • fully responsive design and mobile-friendly interface
  • ability to create and track expenses
  • reports for invoices, customers, support and sales
  • create and share invoices by email

Free CRM & Project Management WordPress Plugins

Premium CRM and project management PHP scripts are more advanced in terms of features and performance. However, I have put together a collection of free WordPress CRM and project management plugins that can be of help if you are not yet sure or are on a budget.

WP-CRM Customer Relations Management for WordPress

WP-CRM Customer Relations Management for WordPress

WP-CRM allows you to organize and manage your users using custom attributes and filters, as well as keeping track of correspondence. This free PHP customer management system can effectively manage all parties in your business.

Features include:

  • ability to export users via CSV
  • excellent user organization
  • invoice integration
  • multiple add-ons to enhance functionality
  • dynamic charts 

Zero BS WordPress CRM

Zero BS WordPress CRM

Zero BS Wordpress CRM is a simple CRM perfect for ecommerce sites, agencies, freelancers, and small businesses. In addition, Zero BS is adaptable and extendible to other kinds of groups.

WP ERP

WP-ERP

WP ERP is the first full-fledged Enterprise Resource Planning (ERP) system through which you can manage your WordPress site and business from a single platform. It provides three core modules: HR, CRM, and Accounting.

Features of the CRM module include:

  • contacts with life stages and contact groups
  • filter contacts
  • schedule calls meetings and directly
  • make notes for each customer
  • activity logs
  • CRM activity reports such as customers and business growth

The Best PHP Scripts on CodeCanyon

Explore thousands of the best and most useful PHP scripts ever created on CodeCanyon. With a low-cost one-time payment, you can purchase one of these high-quality WordPress themes and improve your website experience for you and your visitors.

If you want to learn more about the best-selling and up-and-coming PHP scripts available on CodeCanyon for 2020 check out the following articles: 


How to Use AJAX in PHP and jQuery

$
0
0

Today, we’re going to explore the concept of AJAX with PHP and JavaScript. The AJAX  technique helps you to improve your application's user interface and enhance the overall end user experience.

If want to learn JavaScript, check out our free online course on JavaScript fundamentals!

What Is AJAX?

AJAX stands for Asynchronous JavaScript and XML, and it allows you to fetch content from the back-end server asynchronously, without a page refresh. Thus, it lets you update the content of a web page without reloading it.

Let’s look at an example to understand how you could use AJAX in your day-to-day application development. Say you want to build a page that displays a user's profile information, with different sections like personal information, social information, notifications, messages, and so on.

The usual approach would be to build different web pages for each section. So for example, users would click the social information link to reload the browser and display a page with the social information. This makes it slower to navigate between sections, though, since the user has to wait for the browser to reload and the page to render again each time.

On the other hand, you could also use AJAX to build an interface that loads all the information without refreshing the page. In this case, you can display different tabs for all sections, and by clicking on the tab it fetches the corresponding content from the back-end server and updates the page without refreshing the browser. This helps you to improve the overall end-user experience.

The overall AJAX call works something like this:

Ajax Call

Let’s quickly go through the usual AJAX flow:

  1. First, the user opens a web page as usual with a synchronous request.
  2. Next, the user clicks on a DOM element—usually a button or link—that initiates an asynchronous request to the back-end server. The end user won’t notice this since the call is made asynchronously and doesn’t refresh the browser. However, you can spot these AJAX calls using a tool like Firebug.
  3. In response to the AJAX request, the server may return XML, JSON, or HTML string data.
  4. The response data is parsed using JavaScript.
  5. Finally, the parsed data is updated in the web page's DOM.

So as you can see, the web page is updated with real-time data from the server without browser reloading.

In the next section, we’ll how to implement AJAX using vanilla JavaScript.

How AJAX Works Using Vanilla JavaScript

In this section, we’ll see how AJAX works in vanilla JavaScript. Of course, there are JavaScript libraries available that make it easier to do AJAX calls, but it’s always interesting to know what’s happening under the hood.

Let’s have a look at the following vanilla JavaScript code which performs the AJAX call and fetches a response from the server asynchronously.

Let’s go through the above code to understand what’s happening behind the scenes.

  1. First, we initialize the XMLHttpRequest object, which is responsible for making AJAX calls.
  2. The XMLHttpRequest object has a readyState property, and the value of that property changes during the request lifecycle. It can hold one of four values: OPENEDHEADERS_RECEIVEDLOADING, and DONE.
  3. We can set up a listener function for state changes using the onreadystatechange property. And that’s what we’ve done in the above example: we’ve used a function which will be called every time the state property is changed.
  4. In that function, we’ve checked if the readyState value equals 4, which means the request is completed and we’ve got a response from the server. Next, we’ve checked if the status code equals 200, which means the request was successful. Finally, we fetch the response which is stored in the responseText property of the XMLHttpRequest object.
  5. After setting up the listener, we initiate the request by calling the open method of the XMLHttpRequest object. The readyState property value will be set to 1 after this call.
  6. Finally, we’ve called the send method of the XMLHttpRequest object, which actually sends the request to the server. The readyState property value will be set to 2 after this call.
  7. When the server responds, it will eventually set the readyState value to 4, and you should see an alert box displaying the response from the server.

So that’s how AJAX works with vanilla JavaScript. The method here, using "callback functions" is the traditional way to code AJAX, but a cleaner and more modern way is with Promises.

In the next section, we'll see how to use the Promise object for AJAX.

How to Use JavaScript Promises For AJAX

Promises in JavaScript provide a better way to manage asynchronous operations and callbacks that are dependent on other callbacks. In JavaScript, Promise is an object which may have one of the three states: pending, resolved or rejected. Initially, the Promise object is in the pending state, but as the asynchronous operation is completes, it may evaluate to the resolved or rejected state.

Let's quickly revise the previous example with the Promise object.

When the AjaxCallWithPromise function is called, it returns the promise object and it's in the pending state initially. Based on the response, it'll call either the resolve or reject function. 

Next, we use the then method which is used to schedule callbacks when the promise object is successfully resolved. The then method takes two arguments, the first argument is a callback which will be executed when the promise is resolved, and the second argument is a callback for the rejected state.

So that's how you can use JavaScript Promises for AJAX. In the next section, we’ll see how to use the jQuery library to perform AJAX calls.

How AJAX Works Using the jQuery Library

In the earlier section, we discussed how you could perform AJAX calls using vanilla JavaScript. In this section, we’ll use the jQuery library to demonstrate this. I'll assume that you’re aware of the basics of the jQuery library.

The jQuery library provides a few different methods to perform AJAX calls, although here we’ll look at the standard ajax method, which is the most often used.

Take a look at the following example.

As you already know, the $ sign is used to refer to a jQuery object.

The first parameter of the ajax method is the URL that will be called in the background to fetch content from the server side. The second parameter is in JSON format and lets you specify values for some different options supported by the ajax method.

In most cases, you will need to specify the success and error callbacks. The success callback will be called after the successful completion of the AJAX call. The response returned by the server will be passed along to the success callback. On the other hand, the failure callback will be called if something goes wrong and there was an issue performing the AJAX call.

So as you can see, it's easy to perform AJAX operations using the jQuery library. In fact, the process is more or less the same, irrespective of the JavaScript library with which you choose to perform AJAX calls.

In the next section, we’ll see a real-world example to understand how this all works with PHP.

A Real-World AJAX Example With PHP

In this section, we’ll build an example that fetches JSON content from a PHP file on the server side using AJAX.

For demonstration purposes, we'll build an example which performs user login using AJAX and jQuery. To start with, let's make the index.php file, as shown in the following snippet which renders a basic login form.

The index.php file is a pretty standard HTML form which contains username and password fields. It also contains a jQuery JavaScript snippet, which follows the outline we saw above.

We've used the submit event of the form element, which will be triggered when a user clicks on the submit button. In that event handler, we've initiated the AJAX call, which submits the form data to the login.php file using the POST method asynchronously. Once we receive a response from the server, we parse it using the parse method of the JSON object. And finally, based on the success or failure, we take the appropriate action.

Let's also see what login.php looks like.

The login.php file contains the logic of authenticating users and returns a JSON response based on the success or failure of login.

Using Promises for AJAX With jQuery

Apart from this, the $.ajax method supports JavaScript Promises as well. It provides different methods like thendonefail and always that you could use in the context of Promises.

Let's quickly revise the jQuery snippet which we've used in our example to show how to use it with the then method.

Conclusion

In this tutorial, we discussed the basics of AJAX and how it works with a PHP app. In the first half of the article, we looked at how AJAX works in vanilla JS and in the jQuery library. In the latter half, we built a real-world example which demonstrated how you can use AJAX to fetch server-side PHP content

Learn PHP With a Free Online Course

If you want to learn PHP, check out our free online course on PHP fundamentals!

In this course, you'll learn the fundamentals of PHP programming. You'll start with the basics, learning how PHP works and writing simple PHP loops and functions. Then you'll build up to coding classes for simple object-oriented programming (OOP). Along the way, you'll learn all the most important skills for writing apps for the web: you'll get a chance to practice responding to GET and POST requests, parsing JSON, authenticating users, and using a MySQL database.

You can also learn JavaScript for free on Envato Tuts+! JavaScript is the language of the web. If you want to code for the web, you need to know JavaScript inside and out. From humble beginnings, JavaScript has grown to a powerful and complex language with features such as classes, promises, arrow functions, generators, string templates, and many others.

In this course, you'll learn all of the essential concepts of the JavaScript language. That's right: all of them!

15 Best Flutter Mobile App Templates for Communication

$
0
0

Do you want to build and deploy fast, beautiful social media or communication apps for both Android and iOS? 

Then you should consider creating a Flutter app. Using Flutter, you can write apps for both Android and iOS using a single codebase. And a Flutter app template makes it easy to get started.

What Is Flutter? 

Flutter allows developers to build  beautiful, natively compiled apps from a single codebase for both Android and iOS.

Flutter is now one of the most popular frameworks for developing cross-platform mobile apps. In addition to being a first-class platform for Material Design, developers consider it to be a great alternative to popular cross-platform frameworks like React Native, Ionic, and so on.

Flutter widgets abstract all critical platform differences such as scrolling, navigation, icons, and fonts to provide full native performance on both iOS and Android.

On CodeCanyon, you will find all the tools you need to start building your app with Flutter. With a Flutter app templates, all the coding has been done beforehand, you just need to concentrate on what makes your app unique. 

TikStar

Best Flutter App Templates for Communication

Communication apps have become crucial in today's world. On CodeCanyon you will find templates that will help you build apps that meet every communication needs. 

Here are some of the best-selling Flutter mobile app templates to download on CodeCanyon for 2020.

Bestselling Flutter Mobile App Templates on CodeCanyon


15 Best Flutter Mobile App Templates for Communication

Let us have a look at some of the best Flutter mobile app templates for communication available on CodeCanyon.

I have divided them into the following categories: social media apps, video conferencing apps, dating apps, chat apps, and news apps. 

Flutter Social Media App Templates 

1. Trending: TikStar—TikTok Clone App UI in Flutter UI Template 

TikStar

TikStar is a TikTok clone and short video streaming mobile app UI template. TikStar was developed using Flutter. That means that the UI is compatible for both Android and iOS. 

This social media Flutter mobile app has clean, well-formatted code that is easy to understand.

Features you will find in this amazing app include:

  • login, signup, and forgot password screens
  • login with phone number screen 
  • OTP verification screen 
  • carousel slider
  • animation

2. QVid—TikTok Clone App Flutter Template 

QVid - TikTok Clone App Flutter Template

Qvid is a social media video app for creating and sharing quick short personal, musical, comedy, and talent videos. This awesome looking social media Flutter mobile app comes with over 30 screens to choose from. It is easy to customize and reskin. 

As a TikTok clone Flutter app template, it can also be used to build clones that closely resemble other popular apps.

3. Flutter Storyteller—Social Media Platform 

Flutter Storyteller - Social Media Platform

Flutter Storyteller is a social media platform Flutter template which can help you build your own social app. It has a beautiful UI that is easy to customize thanks to the clean and reliable code of this Flutter social app.  

Built using Flutter and with Laravel on the back-end, it comes with full, easy-to-use, step-by-step documentation.

4. HeyP—Flutter Social App 

HeyP Flutter Social App

HeyP is an elegant Flutter social app that to helps uses connect with family and friends. 

It comes with more than 16 screens and 40 widgets to help you customize your app. 

The back-end is based on Node.js, and uses Firebase for push notifications. The same code is used for both iOS and Android.

Flutter Video Conferencing App Templates

5. MeetAir—Video Conferencing App for Live Classes 

MeetAir - Video Conferencing App for Live Classes etc

MeetAir is complete video meeting system that you can use to start your online meeting platform. You can use it for: video meetings, live classes, webinar, online training, web conferences, and more. It has a powerful admin panel to manage meetings, history, notification, analytics, and app configuration. 

Using this Flutter app template you can build your own web, Android, and iOS video conference apps. No coding is required to use this video conferencing Flutter app template. 

Other impressive features include:

  • lock-protected rooms to control access to your conferences with a password
  • schedule and add the meeting to your calendar.
  • chat and message with your team during meetings
  • high quality audio and video delivered with the clarity and richness of Opus and VP8

6. AeroMeet—Flutter Video Conference

AeroMeet - Flutter Video Conference  One-on-One Chat App

AeroMeet is an online meeting platform to manage video conferences, live classes, meetings, webinars, and online training. It uses Agora SDK which is very popular for video calling and is a fast growing platform. 

Some features of this highly configurable platform include:

  • secure and encrypted call.
  • host and join meeting from mobile.
  • mandatory login enable/disable.
  • unauthorized meeting ID protection.
  • meetings history

7. Connect—Video Conferencing App

Connect is a secure video conference platform where anyone can create an account and get connected to their loved ones without worrying of data theft.

This Flutter video conference app supports up to 70 people in a single conference call. You can create meetings with extra secure passcodes provided by Google. In addition, you can receive feedback from users on your desired email account. 

Flutter Chat App Templates 

8. Flutter Firebase Chat

Flutter Firebase Chat

Flutter Firebase Chat is a real time chatting app with video calling support based on Flutter, Firebase, and Agora.io. This Flutter chat mobile app template integrates a chat functionality into any existing Flutter app. Also you can easily customize and refine it for yourself, since it uses the BLoC pattern.

Main features of this app include:

  • one-to-one chat and video calls via Agora.io
  • group chat
  • image sharing
  • email authentication

9. Flutter Chat App With Node and MongoDB 

This Flutter chat app is a versatile mobile chat system developed in the Dart language using Node.js for the back-end.

Admin accounts can delete posts and comments. They can also add and delete public chat rooms. Users can search for other users using email, read messages, and send text or images. 

This app template comes with full Flutter source code, full Node.js back-end code, and extensive documentation including screenshots. 

10. FlutterFire Social: Chat and Messenger

FlutterFire Social is a fully functional Flutter social messenger app with a Firebase back-end, You can post, like, comment and chat with people and more.

Other features include:

  • Firebase email authentication
  • realtime chat with online users
  • a group chat system including the ability to create and edit groups
  • admins can post, edit and delete
  • block and unblock users

Flutter Dating App Templates 

11. Hookup4U—Complete Flutter Dating App

Hookup4U is a complete Flutter dating app template. Admins can change usernames and passwords, and have a detailed user viewer to search users, block users, and more. In addition, admins can create packages that include free and paid subscriptions.

Other features include: 

  • authentication with Facebook and phone number (OTP based)
  • settings for profile visibility
  • like or unlike other profile pics based on settings 
  • show matches 
  • one-to-one text chat 
  • one-on-one audio and video chat (Agora based) 

12. Hookup4U—Tinderlike Flutter Dating UI kit

Hookup4u is a hybrid mobile dating app template in Flutter. It has all the UI you will find in a regular dating app. You can use this Flutter app template to create a fully functional dating app. 

Some screens you will find in this UI kit include:

  • welcome
  • splash screen
  • login using Facebook and phone 
  • verify OTP

Flutter News App Templates

13. Deco News Flutter App for WordPress 

DecoNews

News apps are very popular but not everybody has the time and resources to build their own news app from scratch. 

The Deco News Flutter Mobile App for WordPress converts your WordPress website into a native app that delivers news content on both Android and iOS. 

14. FluxNews—Flutter Mobile App for WordPress

FluxNews is an app converts your Wordpress website into a mobile true native app with customized contents. No coding skill is required. It comes with a very clean design that is easy to customize. You can build your own app by using over 50 resuable widgets.  

FluxNews maximizes your customer’s experience and usability through UX flow in both Android and iOS. 

Additional features include:

  • offline images caching to speed up the loading performance 
  • instant synchronization for smooth data update without downtime
  • support social login, SMS login by Facebook

15. News Hour—Flutter News App with Admin Panel 

News Hour - Flutter News App with Admin Panel

News Hour is complete news app with admin panel that is developed in Flutter. 

It comes beautiful interactive user interface. There are 40 screen layouts to choose from. It has animation on every screen, making it one of the most user-friendly Flutter news app templates. 

Users can login using Google and Facebook, search news categories, bookmark content, and also leave comments. 

Build Your Flutter Mobile App Now! 

A complete app developed from scratch will have a lot of components, screens, and functionality representing many hundreds or thousands of hours of developer time. That's a lot of time and effort on your part! The Flutter mobile apps templates available on CodeCanyon will shortcut this process and greatly save on development cost.

Bestselling Flutter Mobile App Templates on CodeCanyon

Google Flutter From Scratch Series

If you want to get started coding apps with Flutter, check out the Google Flutter From Scratch series on Envato Tuts+: 

And if you want even more Flutter app templates, check out my other post here on Envato Tuts+.


20 Useful Laravel Packages Available on CodeCanyon (and 5 Free)

$
0
0

Laravel is a web application framework that many developers say is a dream to work with. That’s because it aims to take the tedium out of routine web project tasks like authentication, routing, sessions, and caching, making the development process simple and straightforward without sacrificing application functionality.

If you’re not familiar with the Laravel framework, then it’s time to discover what you’ve been missing by checking out these 20 popular Laravel tools and packages to be found at CodeCanyon.

Laravel Packages on CodeCanyon

Laravel is the most popular PHP framework today. It is a great time saver all by itself. However, by using some premium packages that have been built to solve your particular problem, you can speed up your development even more. 

This is where CodeCanyon shines. CodeCanyon is a marketplace for plugins, scripts and libraries, and has a great collection of Laravel packages.

Laravel Packages on CodeCanyon

Right now, there are over 500 Laravel packages on CodeCanyon. They offer all kinds of functionality from booking and travel to eCommerce and education.

Best Laravel Packages on CodeCanyon

1. MTDb—Ultimate Movie and TV Database

MTDb is a multi-purpose PHP script based on the Laravel framework that you can use to quickly create a movie or TV series website. The site can offer different kinds of functionality based on what you intend to do with it.

MTDb Movie Database

Key features:

  • easy installation
  • customizable homepage
  • content management
  • dark mode
  • payment gateways
  • and many more features

You can use it to create a website similar to IMDb or a streaming service like Netflix. You can also create an aggregator website that links to free streaming links all over the web.

2. Buzzy

Buzzy is another Laravel package option for those who want to create their own media sharing sites. It offers users unlimited widgets, pages, categories and the ability to create featured posts, lists, polls, videos, and more. All media can be tracked daily, weekly, or monthly so that the site admin knows what is most popular and interesting to visitors. 

Buzzy

Key features: 

  • customisable layouts
  • a back-end administration panel
  • integration with various social media channels
  • and more

User Phalon says:

“This script is truly amazing. Professionally coded and looked after well.”

3. Ora School Suite

If you run a school or your own private classes, Ora School Suite is a powerful school management system that can help you get and stay organised. Schoex allows users to organise students by academic year or any other category, and helps manage class schedules, attendance, vacation and homework assignments, as well as online exams, mark sheets, and reports. Once set up, the systems administrator can assign roles to teachers, students and parents so that they can access relevant areas of the system and keep updated with news and events. 

Ora School Suite

Key features:

  • control information access based on user roles
  • manage class schedules, exams, etc.
  • upload and share images, videos, news, and events
  • and more

User debojyotidas says:

“This template has the best support, hands down! The developer is very helpful and has handled every bit of small or medium problem I had with the script.”

4. Acelle

A self-hosted email marketing web application written in Laravel 5, Acelle allows users to send a high volume of marketing emails via their own server or through other email service providers. This means that users have full control of their entire email marketing system and can replace costly email marketing services like MailChimp. 

Acelle

Key features:

  • manage list and subscribers 
  • integration with your own SMTP server
  • fully featured automation and autoresponder
  • and more

User jab1000 says:

“Acelle Email Marketing has allowed us to ditch our previous Mailchimp campaigns (and high monthly fees) while still delivering the same results and giving us far more features! Really excited about this!”

5. Josh

Josh is a user-friendly Laravel admin template that has every component necessary for making beautiful back-end applications. The template comes with more than 100 pages, but if you need only a few pages for your application, the template includes a handy starter kit which includes the most necessary pages like login, register, forgot password, and user management. If you require additional pages beyond those provided in the starter kit, you can easily get them from the main version of Josh.  

Josh

Key features:

  • back-end and front-end pages with master layouts
  • login, register functionality
  • blog module with comments
  • and more

User daveke7 says:

“I got great help with my problems. The creator really took his time to solve the issues I had. I highly advise buying this Admin panel.”

6. Vanguard 

Vanguard is a login and user management app that allows website owners to quickly add and enable user authentication and authorisation features to their website. It provides an easy-to-use interactive dashboard, a powerful admin panel, and an unlimited number of user roles. It also comes with a fully documented JSON API which allows you to easily authenticate users using your favourite mobile device.

Vanguard

Key features:

  • secure user registration and login
  • social authentication using Facebook, Twitter, and Google+
  • password reset
  • Google reCAPTCHA on registration
  • and more

User Apiening says:

“Very nice package to get authentication and permission system up and running. Saves tons of work compared to custom implementation.”

7. Classic Invoicer

A web-based invoicing and client management system, Classic Invoicer allows users to create custom invoices and send them to clients directly. It also produces detailed reports which are useful in managing and tracking income. 

Classic Invoicer

Key features: 

  • responsive design 
  • stores client information for each invoice
  • handles estimates within the app
  • manages various payment types
  • and more

User Philomenas says: 

“Great features, probably wont use them all. The customer support is fast, friendly and they will make it work for you whatever problems you have.”

8. BeDrive

If you're looking to create your own version of Dropbox or Google Drive, then check out BeDrive. This Laravel package allows you to create your own self-hosted file sharing and hosting website in minutes with no coding knowledge.

BeDrive

Key features:

  • intuitive dashboard
  • configurable and easy-to-use subscriptions system
  • admin panel
  • Google Analytics integrated
  • and more

User King123456 says:

This is the best file hosting script that i have ever used. Great design and great features. I definitely recommend people to buy this.

9. eClass Learning Management System

This eClass LMS is a great way for you to start creating a selling courses online. It comes with a lot of fantastic features. This learning management system has been optimized for both performance and for search engines.

eClass LMS

Key features:

  • customer friendly
  • responsive design
  • admin, instructor and student dashboard
  • zoom integration
  • payment gateways
  • and more

10. Chandra

One of our best-rated Laravel packages, Chandra may be just what you need if you’re looking for the perfect admin back-end application for your site. 

Chandra

Key features:

  • six colour schemes
  • different layout options
  • over 40 pages included
  • multi-level menu
  • and more

11. GamePort

With video games ever growing in popularity, creating a site dedicated specifically to selling, buying and trading video games is simply genius, and if you’re looking to create such a site, GamePort is a great choice. 

GamePort

Key features:

  • create trade lists 
  • powerful search and add function
  • support for over 15 platforms and digital distributors
  • social login 
  • and more

User mafikes says:

“Quality code and no bugs. Customer Support is really perfect! I can recommend it."

12. SmartEnd

SmartEnd provides developers with an admin dashboard containing all the options needed to build any type of website. It contains a front-end site preview with a flexible RESTful API and uses open source code that is easy to update. 

SmartEnd

Key features:

  • dashboard with four different colours and styles
  • responsive admin panel
  • responsive Bootstrap flat design
  • dynamic menus and pages
  • and more

User abeaventh says:

“A nice, clean step-by-step guide to customise things. Documentation, design, features, flexibility and code quality are top notch.”

13. Fundme

Fundme is a crowdfunding platform that can be used to raise funds for any cause. The administrator adds users who can each create unlimited campaigns to support their causes.

Fundme

Key features:

  • members can create unlimited campaigns 
  • social sharing
  • option to delete account
  • PayPal integrated
  • and more

User reliablewebhosting says:

“This script is powerful. I like the fact that the installation documentation was direct and to the point. It takes just a few minutes to install. Most developers will sell a similar crowdfunding script for thousands of dollars. Thanks for a great software - I love it.”

14. Geo POS

Geo POS is a complete point of sale solution for people who are looking for something that provides support for both Customer Relationship Management (CRM) and Human Resources Management (HRM). It is available in 21 different languages and supports multiple payment gateways.

Geo POS

Key features:

  • subscriptions
  • invoicing
  • inventory management
  • customer management
  • ticket based support system

15. Filepicker

A file-uploader script that allows users to upload multiple files to a server easily and quickly, Filepicker also includes three plugins for pagination, taking pictures with the webcam, and image cropping. It also makes use of the Intervention Image library, allowing for advanced image editing options. 

Filepicker

Key features:

  • multi-file upload
  • file list display
  • webcam plugin
  • multiple image versions
  • and more

User warrio4 says:

“Amazing plugin. Simple but yet complex and efficient. Just what you'd need.”

16. Laravel eCommerce

This Laravel eCommerce package is full of features that let you sell all kinds of products. You will be able to create fully functional websites with responsive themes and an advanced CMS panel. The package has been developed to be as SEO friendly as possible. There are also multiple home screens so you can pick the ones you like most.

Laravel eCommerce

It uses Laravel and PHP on the back-end and Bootstrap and Sass on the front-end.

Key features:

  • support for multiple languages
  • support for multiple currencies
  • multiple admin roles
  • multiple payment gateways
  • push notifications with One Signal
  • and more

17. Botble

Botble is a Laravel content management system that allows you to create, modify and manage any kind of digital content you want. The system accommodates a multilingual admin back-end, has two ready-made themes that can be modified as you like, and has many great features like a gorgeous photo gallery and integrated Google Analytics.

Botble

Key features:

  • theme and widget management
  • powerful permission system
  • social login
  • blog and news theme included
  • and more

User martinbeek says

"This is a great product for a very reasonable price. The best in it’s category in my opinion. Thoroughly coded and feature packed. This author has given me the best support to date. Fast response, always polite and helpful and can be reached through Skype."

18. Booking Core

Booking Core is great choice for people who are looking for something that provides all necessary features for creating a fully functional travel website for your business. You can use it to provide services such as a marketplace, resort rental, Room BnB, Travel agency and more.

Booking Core

Key features:

  • admin dashboard
  • page and menu builder
  • reviews management
  • payment ready
  • built-in localization
  • and more

19. Jobs Portal

This Jobs Portal package based on Laravel is designed to help both employers and job seekers. Companies can use the website to post available jobs and people can apply to fill these vacancies. Besides the companies and applicants filling out their information, the package allows you complete control over the content of the website as an admin.

Jobs Portal

Key features:

  • free registration
  • employer and employee profiles
  • search ability
  • admin panel
  • and more

20. Themeqx Classified

Themeqx Classified is a Laravel classified ads content management system with many powerful features like a built-in social login, Amazon S3, SEO, and a free blog with multi-language support. Users can add YouTube video or Vimeo video to every ad to help attract more customers.

Themeqx Classified

Key features:

  • easy setup wizard
  • regular and premium ads available
  • ability to monetise
  • PayPal and Stripe supported
  • and more

User PremierDigitalMarketing says:

"Outstanding script! I am really impressed with it and the support was fantastic in helping me resolve an issue with my server (which wasn't even their fault). Highly recommended. I will keep an eye out for your future releases."

Free Laravel Packages

If you want to try out some free Laravel packages before you purchase a premium one, we have got you covered. I have listed five free Laravel packages in this section to cover common use cases.

1. Laravel Shopping Cart

This is a simple shopping cart implementation based on Laravel. While it isn't a complete eCommerce solution, it will help you get started in the right direction.

2. Laravel Admin

This Laravel Admin package is an Admin Interface builder. You can use it to quickly set up a CRUD backend with a few lines of code.

3. Laravel Boilerplate

This Laravel Boilerplate package gives you a head start in a variety of projects. It already comes with features such as Two factor authentication, User/Role management etc.

4. Laravel Permission

The Laravel Permission package allows you to manage user permissions and roles in a database.

5. Charts

This is a Laravel library to help you create charts using Chartisan. It basically abstracts all the functionality and makes it easier for you to use Laravel to create these charts.

Finding the Best Laravel Package for You

There are so many choices available when it comes to picking a Laravel package that it can get confusing. One of the best ways to get started is to figure out the features that you want in your project or application. This will narrow down the list of items. Next, take a look at the reviews and ratings of different items. The last thing that you need to check if how often a package is updated.

Choose a package that scores satisfactorily for all these points and you won't be disappointed. The list of Laravel packages in this post already contains items that were updated recently and have good reviews. Your job now is just to figure out which of them meets your needs best.

For example, schools and educational institutes are more likely to benefit from the features offered in Ora School Suite and people or business which want to sell different kinds of courses to people should try out eClass LMS.

Similarly, the Laravel Ecommerce package is great for building website where you sell things and Geo POS is ideal for business which want to track their financials etc.

Conclusion

Over the years, Laravel has grown from a budding PHP framework into something that's used across the industry as a solid foundation for building PHP-based web applications.

Laravel Packages on CodeCanyon

The 20 Laravel packages featured here just scratch the surface of options available at CodeCanyon that aid developers in building mature, robust solutions for their clients. So if none of them catch your fancy, there are plenty of other great options there to hold your interest.


Understanding the Image Component in React Native

$
0
0

Images are an essential aspect of any mobile app. This tutorial will introduce you to the image component and show you how to use images in your React Native app. You will also learn how to create your own photo gallery!

Prerequisites to Create a React Native App

We will use the Expo CLI for this project. With Expo, developers can create React Native apps without all the frustrations that come with installing and configuring software dependencies such as Android Studio, Xcode, or all the other tools which are needed to develop and run a React Native app. If you want to learn more about Expo, check out our post on how Expo makes React Native app development easier.

If you don't already have Expo CLI, first ensure you have Node.js installed. Then install the Expo CLI (command line interface) globally on your machine:

Then, use the expo command to initialize a new project

If you need to use images when testing, add them to the assets folder of the project. 

Add Images to a React Native App

To add images in the application, you first need to import the Image component from react-native The React Native image component allows you to display images from different sources, such as:

  • network images
  • static resources
  • temporary local images and 
  • local disk images ie. from the camera roll

To import the Image component, add it to the import statement at the top of app.js, as shown below.

Display Static Images

To display a static image, the first thing is to add is the image file in the assets folder of the project. Static images are loaded by providing the image path. The code for displaying a static image will look something like this:

Here is the result.

Displaying a static image in React Native

Displaying Web-Based Images or URI Data Images

Displaying an image from a network or web-based source is similar to displaying a static image. Within the Image component, use the source attribute and set the path of the image in an object with the uri key, as shown below. 

You'll also need to to add the dimensions of the image with a style attribute, just like you would in HTML.  Here is the final result for both images.


Network image and static image

You can also display images via a data URI, in which case all the image data is actually encoded in the URI. This is only recommended for very small or dynamic images. For a URI-encoded image, you'll provide the image data with a source attribute like source={{  uri:'data:image/png;base64,iVBOR...=='}}

Don't forget that for network and URI-encoded images, you will need to manually specify the dimensions of your image.

Background Images

You can also use an image as the background for your screen. To do so, get a background image of your choice and add it to the assets folder. Next, import the ImageBackground component from react-native as shown below.

The ImageBackground component wraps and displays a background for whatever elements are inside it. In this case, we will replace the View tag with the ImageBackground tag and wrap it around all the content in the app.

Create a Photo Gallery

In this section, I'll show you how to display a grid of photos in a FlatList. This component are used to display large quantities of scrollable content and can scroll horizontally or vertically. 

FlatLists use the renderItem prop to render each item in their input data. The renderItem prop is a function that takes an item from the data array and maps it to a React element.  Each item in the data needs a unique id, this is found in item.key by default, though you can specify another way to find or build the id by using the keyExtractor function prop.

We will use useState to append to an array of images. The useState hook can store any type of value: a number, a string, an array, an object, etc. Add the following code to app.js.

Note that you'll need to have these images in the assets folder. 

Next, we'll return a FlatList that renders those images:

We set up the FlatList element to use the images array as its data source. Then we defined a custom render function that takes an item in the images array and generates an Image component to display it. 

Here is the complete photo gallery:

photo gallery

Conclusion

As you have seen, working with images in React Native is very easy!

If you want to jump start your next React Native app, or to learn from a professionally-built app, check out the mobile app templates on CodeCanyon. CodeCanyon is an online marketplace that has hundreds of mobile app templates—for Android, iOS, React Native, and Ionic. You can save days, even months, of effort by using one of them.

CodeCanyon mobile app template bestsellers

If you have trouble deciding which template on CodeCanyon is right for you, these articles should help: 


How to Implement Email Verification for New Members

$
0
0


Have you ever created an account with a website, and were required to check your email and click through a verification link sent by the company in order to activate it? Doing so highly reduces the number of spam accounts. In this lesson, we'll learn how to do this very thing!

Looking for a Shortcut?

This tutorial teaches you to build an email verification script from scratch, but if you want something that you can use on your website right away, check out some of the great email forms and scripts on CodeCanyon.

Building an Email Verification and Sign-up Script

What Are We Going to Build?

We are going to build a nice PHP sign-up script where a user can create an account to gain access to the "members only section" of a website.

After the user creates their account, the account will then be locked until the user clicks a verification link that they will receive in their  email inbox.

1. Build a Sign-up Page

We first need a simple page where our visitors can sign up their accounts.

index.php: This is our sign up page with a basic form.

css/style.css: This is the stylesheet for index.php and other pages.

Here's what the HTML and CSS look like when they're rendered in the browser.

Sign Up Form

As you can see, I have added a comment to each line that describes what they do. Also, you might have noticed the following comment in the index.php file:

We are going to write our PHP between these 2 lines!

2. Input Validation

The first thing we are going to build is a piece of code that's going to validate the information. Here is a short list detailing what needs to be validated.

  • the name field is not empty
  • the name is not to short
  • the email field is not empty
  • the email address is valid with the form xxx@xxx.xxx

So our first step is checking if the form is being submitted, and that the fields are not empty.

Time for a breakdown! We start of with an IF statement and we are first validating the name field:

So if you would submit the form now with empty fields, nothing happens. If you fill in both fields then our script will run the code between the brackets.

Now we are going to create a piece of code that will check if an email address is valid. If it's not, we will return a error. Also let's turn our post variables into local variables:

We can now reach our data via our local variables. As you can see, I also added a MySQL escape string to prevent MySQL injection when inserting the data into the MySQL database.

The mysql_real_escape_string() function escapes special characters in a string for use in an SQL statement.

Regular Expressions

Next up is a small snippet that checks if the email address is valid.

Please note that I did not personally write this regular expression, it's a small snippet from php.net. Basically, it verifies if the email is written in the following format:

In the eregi function call, you can see that it checks if the email contains characters from the alphabet, if it has any numbers, or a phantom dash (_), and of course the basic requirements for an email with an @ symbol and a . in the domain. If these characteristics are not found, the expression returns false. 

Okay, so now we need to add some basic error messages.

As you can see we have made a local variable $msg, this allows us to show the error or the success message anywhere on the page.

And we are going to display it between the instruction text and the form.

Finally, we'll add a bit of CSS to style.css, to style our status message a bit.

Sign Up Form

3. Creating the Database & Establishing a Connection

Now we need to establish a database connection and create a table to insert the account data. So let's go to PHPMyAdmin and create a new database with the name registrations and create a user account that has access to that database in order to insert and update data.

Let's create our users table, with 5 fields:

Create DB

Now we must enter details for these fields:

Create Table

For those who don't want to input this data manually, you can instead run the following SQL code.

Our database is created, now we need to establish a connection using PHP. We'll write the following code at the start of our script just below the following line:

We'll use the following code to connect to the database server and select the registrations database with a basic MySQL connection.

Now that we've established a connection to our database, we can move on to the next step and insert the account details.

4. Insert Account

Now it's time to enter the submitted account details to our database and generate an activation hash. Write the following code below this line:

Activation Hash

In our database we made a field called hash, this hash is a 32 character string of text. We also send this code to the user's email address. They then can click the link (which contains the hash) and we will verify if it matches up with the one in the database. Let's create a local variable called $hash and generate a random MD5 hash.

What did we do? Well we are using the PHP function rand to generate a random number between 0 and 1000. Next our MD5 function will turn this number into a 32 character string of text which we will use in our activation email. 

MD5 is a good choice for generating random strings. It also used to be a common choice for hashing passwords, but it has been shown to not be secure for passwords. Instead, use the password_hash function.

Creating a Random Password

The next thing we need to is to create a random password for our member:

Insert the following information into our database using a MySQL query

As you can see, we insert all data with a MySQL escape string around it to prevent any MySQL injection.

You also might notice that the password_hash function changes the random password into a secure hash for protection. Example: if an "evil" person gains access to the database, he can't read the passwords.

For testing, fill in the form and check if the data is being inserted into our database.

5. Send the Verification Email

Right after we have inserted the information into our database, we need to send an email to the user with the verification link. So let's use the PHP mail function to do just that.

In the code above we send a short description to our user which contains the username and password—using the local variables we created when the data was posted. Then we created a dynamic link. 

The result of all this will look as follows:

Email Result

As you can see, it creates a URL which is impossible to guess. This is a very secure way to verify the email address of a user.

6. Account Activation

As you can see, our URL links to verify.php so let's create that file, using the same basic template we used for index.php.

However, remove the form from the template.

The first thing we need to do is check if we have our $_GET variables (for the email and hash).

To make things a bit easier, let's assign our local variables. We'll also add some MySQL injection prevention by, once again, using the MySQL escape string.

Next thing is to check the data from the URL against the data in our database using a MySQL query.

In the code above, we used a MySQL SELECT statement, and checked if the email and hash matched. But beside that, we checked if the status of the account is inactive. Finally, we use mysql_num_rows to determine how many matches have been found. So let's try this out. Just use a simple echo to return the results.

Link Result

We have a match! To change the result, simply change the email and you'll see that the number returned is 0.

So, we can use our $match variable to either activate the account or return a error when no match has been found.

In order to activate the account, we must update the active field to 1 using a MySQL query.

So we use the same search terms for the update as we used in our MySQL select query. We change active to 1 wherever the emailhash and active fields have the right values. We also return a message telling the user that his account has been activated. You can add a message like we did here to the no match part. So the final code should look similar to the following:

Account Activation

If you visit verify.php without any strings, the follow error will be shown:

Invalid Approch

7. Create the Login 

In this final step, I will show you how to create a basic login form and check if the account is activated. First create a new file called login.php with the basic template we used before, but this time I changed the form into a login form.

The form is basic HTML, and is almost the same as the signup form, so no further explanation is needed. 

Now it's time to write the code for the login script. We'll add this just below the MySQL connection code. We start with something we also did in the signup form.

We first check to see if the data is being posted, and we make sure that it's not empty.

Next, we've created the connection to our users table and verified if the entered data is correct. We wrote a MySQL query which would select the password hash from the database associated with the entered username. Finally, we've used the password_verify function to verify the input password. The $result contains TRUE if the user has entered the correct password, otherwise it would be FALSE.

And the active condition is important! This is what makes sure that you can only login if your account has been activated.

In the code above we check if the login was a success or not.

Conclusion

And that's all it takes to create a complete email validation and login system in PHP! I hope you enjoyed the post, and if you did please leave a comment below!

Coding your own PHP is great fun and of course is the foundation for a good app. However, to save time creating more specialized features or for complete applications that you can use and customize, take a look the professional PHP scripts on CodeCanyon.

You can explore thousands of the best and most useful PHP scripts ever created on CodeCanyon.

Here are a few of the best-selling and up-and-coming PHP scripts available on CodeCanyon for 2020.


10 CSS3 Properties you Need to be Familiar With

$
0
0

We've already covered the thirty CSS selectors that we should all memorize; but what about the new CSS3 properties? Though most of them still require a vendor-specific prefix, you can still use them in your projects today. In fact, it's encouraged!

At the conclusion of this article, we'll work on a fun final project.

1. border-radius

Easily the most popular CSS3 property in the bunch, border-radius was sort of the flagship CSS3 property. While many designers were still terrified of the idea that a layout could be presented differently from browser to browser, a baby-step, like rounded corners, was an easy way to lure them in!

The irony is that we're all perfectly fine with the idea of providing an alternate viewing experience for mobile browsers. Strangely, however, some don't feel the same way when it comes to desktop browsing.

Circles

Some readers may not be aware that we can also create circles with this property. All you have to do is set the radius to half the width or height of the element.

And, if we want to have some fun, we can also take advantage of the Flexible Box Model (detailed in #8) to both vertically and horizontally center the text within the circle. It requires a bit of code, but only because of the need to compensate for various vendors.

2. box-shadow

Next, we have the ubiquitous box-shadow, which allows you to immediately apply depth to your elements. Just don't be too obnoxious with the values you set!

box-shadow accepts four parameters:

  • x offset
  • y offset
  • blur
  • color of shadow

Now, what many don't realize is that you can apply multiple box-shadows at a time. This can lead to some really interesting effects. For example, we can use a blue and green shadow to magnify each shadow.

Clever Shadows

By applying shadows to the ::before and ::after pseudo-classes, we can create some really interesting perspectives. Here's one to get you started:

The HTML

The CSS


3text-shadow

Similarly to box-shadow, it must be applied to text, and receives the same four parameters:

  • x-offset
  • y-offest
  • blur
  • color of shadow

Text Outlines

Again, much like its sibling, box-shadow, we can apply multiple shadows, by using a comma as the separator. For example, let's say that we want to create an outline effect for the text. While webkit does offer a stroke effect, we can reach more browsers by using the following method (though not quite as pretty):

4text-stroke

Be careful with this method. It is a non-standard feature. The text-stroke property isn't yet part of the CSS3 spec. However, it is now supported by all major browsers if you use the -webkit- prefix.

Feature Detection

How can we provide one set of styling for, say, Firefox, and another set for Safari or Chrome? One solution is to use feature detection.

With feature detection, we can use JavaScript to test if a certain property is available. If it's not, we prepare a fallback.

Let's refer back to the text-stroke issue. Let's set a fallback color of black for browsers which don't support this property (all but webkit currently).

First, we create a dummy h1 element. Then, we perform a full cavity search to determine if the -webkit-text-stroke property is available to that element, via the style attribute. If it's not, we'll grab the Hello Readers heading, and set its color from white to black.

Please note that we're being generic here. If you need to replace multiple h1 tags on the page, you'll need to use a while statement to filter through each heading, and update the styling or class name, accordingly.

We're also testing only for webkit, when it's possible that other browsers will eventually support the text-stroke property as well. Keep that in mind.

If you want a more comprehensive feature-detection solution, refer to Modernizr.

5. Multiple Backgrounds

The background property has been overhauled to allow for multiple backgrounds in CSS3.

Let's create a silly example, simply as a proof of concept. For lack of any suitable images nearby, I'll use two tutorial images as our backgrounds. Of course, in a real-world application, you might use a texture and, perhaps, a gradient for your backgrounds.

Above, by using a comma as the separator, we're referencing two separate background images. Notice how, in the first case, it's placed in the top left position (0 0), and, in the second, the top right position (100% 0).

Make sure that you provide a fallback for the browsers which don't provide support for multiple backgrounds. They'll skip over the property entirely, leaving your background blank.

Compensating for Older Browsers

To add a single background image for older browsers, like IE7, declare the background property twice: first for old browsers, and the second as an override. Alternatively, you could, again, use Modernizr.

6background-size

Before modern CSS, we were forced to use sneaky techniques to allow for resizable background images.

The code above will direct the background image to take up all available space. As an example, what if we wanted a particular image to take up the entire background of the body element, regardless of the browser window's width?

That's all there is to it. The background-size property will accept two parameters: the x and y widths, respectively.

While the latest versions of Chrome and Safari support background-size natively, we still need to use vendor-prefixes for older browsers.

7text-overflow

Originally developed for Internet Explorer, the text-overflow property can accept two values:

  • clip
  • ellipsis

This property can be used to cut off text that exceeds its container, while still providing a bit of feedback for the user, like an ellipsis.

Did You Know? Internet Explorer has provided support for this property since IE6? They created it!

At this point, you might consider showing the the entirety of the text when a user hovers over the box.

A bit oddly (unless I'm mistaken), there doesn't seem to be a way to reset the text-overflow property, or "turn it off." To mimic this "off" functionality, on :hover, we can set the white-space property back to normal. This works, because text-overflow is dependent upon this to function correctly.

Did You Know? You can also specify your own string, that should be used in place of the ellipsis. Doing so will render the string to represent the clipped text.

8. Flexible Box Model

The Flexible Box Model, will finally allow us to get away from those mangy floats. Though it takes a bit of work to wrap your head around the new properties, once you do, it all should make perfect sense.

Let's construct a quick demo, and create a simple two-column layout.

Now for the CSS: we first need to instruct the container to be treated as a flexible box. I'll also apply a generic width and height, since we don't have any actual content in play.

Next, let's apply, for the demo, unique background colors to the #main div, and the aside.

At this point, there's not much to look at.

Flexible Box Model Example 1

One thing worth noting, though, is that, when set to display: flex mode, the child elements will take up all vertical space; this is the default align-items value: stretch.

Watch what happens when we explicitly state a width on the #main content area.


Flexbox Example 2

Well that's a bit better, but we still have this issue where the aside isn't taking up all of the remaining space. We can fix this by using the new box-flex property.

flex instructs the element to take up all available space.

With this property in place, regardless of the width of the #main content area, the aside will consume every spec of available space. Even better, you don't have to worry about those pesky float issues, like elements dropping below the main content area. 

Flexbox Example 3


We've only scratched the surface here. To learn more about Flexbox, check out our complete guides! This feature is now supported by all major browsers and you can expect it to work properly on over 99% of the devices.

9resize

The resize property—part of the CSS3 UI module—allows you to specify how a textarea is resized. It is now supported by all major browsers except IE and iOS Safari.

Note that, by default, webkit browsers and Firefox 4 allow for textareas to be resized, both vertically and horizontally.

Possible Values

  • both: Resize vertically and horizontally
  • horizontal: Limit resizing to horizontally
  • vertical: Limit resizing to vertically
  • none: Disable resizing

10. Transitions

Perhaps the most exciting addition to CSS3 is the ability to apply animations to elements, without the use of JavaScript.

Let's mimic the common effect, where, once you hover a link in a sidebar, the text will slide to the right ever-so-slightly.

The HTML

The CSS

transition will accept three parameters:

  • The property to transition. (Set this value to all if needed)
  • The duration
  • The easing type

The reason why we don't directly apply the transition to the hover state of the anchor tag is because, if we did, the animation would only take effect during mouseover. On mouseout, the element would immediately return to its initial state.

Because we've only enhanced the effect, we've done absolutely no harm to older browsers.

Final Project

Let's combine the bulk of the techniques we've learned in this article, and create a neat effect for displaying flip cards.

Step 1. The Markup

We'll keep it simple; within our .box container, we'll add two divs: one for the front side, and the other for the back.

Step 2. Horizontally and Vertically Centered

Next, I want our card to be perfectly centered on the screen. To do so, we'll take advantage of the Flexible Box Model. 

As our page will only contain this card, we can effectively use the body element as our wrapper.

Step 3. Styling the Box

We'll now style our "card."

Note that we've also instructed this element to listen for any changes to the state of the element. When they occur, we'll transition the changes (if possible) over the course of one second (transition: all 1s).

Step 4. An Effective Shadow

Next, as we learned earlier this article, we'll apply a cool shadow by using the ::after pseudo class.

Step 5. Styling the Child divs

At the moment, the child divs are still right on top of each other. Let's position them absolutely, and instruct them to take up all available space.

Step 6. Fixing the Front

Refer to the image above; notice how the back-side of our card is displaying by default? This is because, due to the fact that the element occurs lower in the markup, it, as a result, receives a higher z-index. Let's fix that.

Step 7. Rotating the Card

Now for the fun part; when we hover over the card, it should flip around, and display the back side of the card. To achieve this effect, we use transformations and the rotateY function.

Step 8. Mirrored Text

Doesn't that look awesome? But, now, the text appears to be mirrored. This, of course, is because we transformed the container. Let's offset this by rotating the child div 180 degrees as well.

And with that last bit of code, we've achieved our neat effect! 

Conclusion

Thank you so much for reading, and I hoped you learned a lot!


Download and Install WordPress Via the Shell Over SSH and With WP-CLI

$
0
0

Installing WordPress often takes a lot of steps: downloading and uncompressing a zip file, uploading files to the server, and setting up the database and config. That can take a lot of time. Or you can do it by using the Fantastico or SimpleInstall utilities available via your host's control panel. There is nothing wrong with that, but it's not foolproof to say the least. In this post I'll show you a faster and more reliable way—with the shell over SSH.

Nowdays most hosting plans offer an SSH command-line facility so you should definitely consider the SSH method to download and install WordPress on your server. The big advantage  is that you don't need to visit different sites, and don't need to do any uploading or open any control panels. You do everything via a single command-line interface. For this you will need an SSH client. If you are running on Windows go for PuTTY and if you are on Mac you can use Mac's built-in Terminal or iTerm 2. Before we move ahead please make sure your host offers the Bash shell because our commands are configured for that.

At the end of this article, we'll also go through the WP-CLI tool which is an even easier way to download and install WordPress via command line.

1. Connecting to Your Server

Using PuTTY

Open PuTTY and enter your domain name in the box named Host name(or IP address) and enter the port number used to connect to SSH under Port, then click Open. You can even save your site settings by entering a name in the Saved Sessions box and by pressing Save. Next time you can always load the session by selecting your site and clicking Load.

PuTTY will now ask for your username. Enter your username and press Enter. Now you will be asked for your password. Note here that while you are typing your password, you won't see it being typed on the screen. It's hidden for security reasons. Press Enter after you've typed your password and you will be logged on.

Using any other SSH client or Mac Terminal

Enter the following command in your Terminal client to connect to your site's command-line over SSH:

The -p switch tells it to use the port number 22. If your host allows SSH over default port 22, you can omit -p and 22 in the above command, otherwise substitute 22 for your host's SSH port number. After logging in you will see something like this:

That is the shell command prompt where you will be typing all your commands from now on.

2. Downloading WordPress

Now that we have logged in to our SSH server, we need to go to the correct directory where we want to setup our blog. Then we download the files and extract them there. Supposing the directory you want your blog to be installed under is blogdemo residing under the public_html directory, you will use the following command:

Now that we have reached the correct directory we will download WordPress using the wget command.

The above command downloads the latest WordPress install from their server and extracts the file from it into the blogdemo directory. xf, and z are parameters which tell the tar command to extract the contents from the specified file using gzip.

Now after extraction you will find a wordpress directory under the blogdemo directory containing your install. So to shift the files back to where they should be use the following commands:

This command moves the contents of the wordpress directory into the current directory. Anytime you want to check what is in the current directory, type ls.

You can delete both the wordpress directory and the archive file you downloaded if you want using the following commands:

3. Installing WordPress

In this step we will create the database and corresponding user and associate them together. Then we will use the famous 5 minute install of WordPress to finish it off.

Note: Before moving ahead you will need to check whether you have got the privileges to create a database or not. An easy way to check is to go to your phpMyAdmin and check whether you can create a database from there or not. If you can't that means you won't be able to follow this step. You should check with your web host if they allow you to do so or not. Most shared web hosts will let you create a database.

First you need to login to the MySQL command-line using the following command:

After entering this you will be asked for your MySQL password. Type your password and you will be shown a screen like this:

MySQL Login

Now that we have logged in to the MySQL Server, we will first create a database and will grant access to the user to that database. Use the following commands now:

Don't forget the semi-colon at the end of each MySQL command. The first command creates the database. The second command allows the user to connect to the database. The final command grants all privileges to the user for that database. You can test whether your database creation was successful by running this command:

It should say database changed. Now you can exit the MySQL command-line by typing exit.

Now fire up the blog in your browser and run the usual WordPress install and use the database information we used in the third step to setup your wp-config.php and then setup your blog.

Note: New Database User

In our tutorial we are using an already existing database user to connect to the new database. But in case you want separate user for each database you need to create a new user to access that database. Here is how you should do it.

Once you are inside the MySQL shell, use the following commands to create a new user and set its password.

Now go back to Step 3 and run all other commands with this username.

Editing wp-config.php

In our tutorial I have told you that after doing everything on the shell you can directly proceed to the install. But some of you might want to edit wp-config.php to add special settings and code. You can only do that via the shell. While you are in your blog directory at the shell use the following command to fire up the Vim Editor (a command-line shell file editor)

Now you will see something like what's shown below:

Vim Editor

Press the i key to enter insert mode and use arrow keys to move around the file. Once you have made your edits, press the Esc key to exit insert mode. To exit Vim type : and then type wq and press Enter. This will save your changes and quit Vim.

Download and Install WordPress With the WP-CLI Tool

In this section, I'll show you an even better way to download and install WordPress: with the WP-CLI tool. First, we have to install the WP-CLI tool on the sever.

How to Install the WP-CLI Tool

Run the following commands on your server to download, install and configure the WP-CLI tool.

Let's check if the WP-CLI tool is installed successfully by using the following command.

You should see something like this:

Download and Install WordPress

Let's download the latest version of WordPress first place.

IF the download is successful, you'll see something like the following:

So we've downloaded the WordPress code base now.

Next, it's time to create the wp-config.php file. We can do it with the help of the following command. Replace the placeholders with the actual values. I assume that you've already created the database which you would like to use with WordPress.

Finally, let's run the following command which installs WordPress.

And with that, WordPress is installed successfully on your server! 

In fact, the WP-CLI tool is capable of doing a lot more than just installation. It allows you to manage plugins, themes and do necessary version updates as well. All in all, it's a great tool for WordPress developers, and I would encourage you to explore it! You can learn about WP-CLI here at Envato Tuts+.

Learn to Code PHP for WordPress With a Free Online Course

If you want to learn to code PHP WordPress, check out our free online course on learning to code PHP for WordPress!


In this course, you'll learn the fundamentals of PHP programming. To get started, you'll learn why WordPress uses PHP, how to create a PHP file, and how to mix HTML and PHP.  You'll go on to learn how PHP works and how to write simple PHP loops and functions. To wrap things up, you'll build a custom archive page to practice what you learned.

If you want to learn WordPress plugin development, we have a free course for that as well!

Submit A Form Without Page Refresh Using jQuery

$
0
0

A great way to improve the user experience of your website is to validate and submit forms without a page refresh.

In this tutorial I'll show you how easy it is to do just that—validate and submit a contact form that without page refresh using jQuery! Let's get started.

What We're Building

In this example, we have a simple contact form with name, email, and phone number. The form submits all the fields to a PHP script without any page refresh, using native jQuery functions.

1. Build the HTML Form

Let's take a look at our HTML markup. We begin with our basic HTML form:

You might notice that I have included a div with id contact_form that wraps around the entire form.

Be sure to not miss that div in your own form as we will be needing this wrapper div later on. You might also notice that I have left both the action and the method parts of the form tag blank. We actually don't need either of these here, because jQuery takes care of it all later on.

Another important thing is to be sure to include the id values for each input field. The id values are what your jQuery script will be looking for to process the form with.

We are also doing some very basic client-side validation using HTML5 attributes like required and minlength. The minlength attribute will make sure that users supply a name that is at least 3 characters long. Similarly, the required attribute makes sure that users fill out all the form values you need. You can read more about these attribute in our tutorial on validating form inputs using only HTML5 and Regex.

I've added some CSS styles to produce the following form:

Contact Form

2. Begin Adding jQuery

The next step in the process is to add some jQuery code. I'm going to assume that you have downloaded jQuery, uploaded to your server, and are referencing it in your webpage.

Next, open up another new JavaScript file, reference it in your HTML as you would any normal JavaScript file, and add the following:

This function runs  soon as the HTML document is ready. If you have done any work in jQuery previously, this function is the same as jQuery's document.ready function. Inside we will set up our validation code.

3. Write Some Form Validation

We will now write some basic from validation using jQuery. This will improve upon the validation we have so far. Using a validation library will gives us more control over the error messages that are shown to users. It also requires minimal or no change in the markup of the form.

Starting by loading the jQuery Validation library on your webpage. Now, just add the following code:

Make sure you pass the right selector when calling the validate() method. This will validate the form without requiring you to write any error messages in the HTML or the logic to display and hide different error messages in JavaScript. Try submitting the form without filling in any values or by knowingly adding wrong input. The form will display a nice error message like the following image.

Form Validation Error Message

Using the validation library will also allow you to add conditional validation logic to your forms. For example, you will be able to add code that requires a phone number only when the email address has not been provided. I have covered this in more detail in the jQuery form validation tutorial.

4. Process Form Submission With the jQuery AJAX Function

Now we get to the heart of the tutorial—submitting our form without page refresh, which sends the form values to a PHP script in the background. Let's take a look at all the code first, then I will break down into more detail next. Add the following code just below the validation snippet we added previously:

There is a lot going on here! Let's break it all down—it's so simple and so easy to use once you understand the process. We first create a string of values, which are all the form values that we want to pass along to the script that sends the email.

This can be achieved pretty easily using the built-in serialize() method in jQuery. This way you don't have to worry about getting and concatenating the value of different valid user inputs yourself.

I've commented out an alert that I sometimes use to be sure I am grabbing the right values, which you may find helpful in the process. If you uncomment that alert and test your form, assuming everything has gone right so far, you should get a message similar to the following:

Datastirng Alert

Now we get to our main ajax function, the star of today's show. This is where all the action happens, so pay close attention!

Basically what's going on in the code is this: The .ajax() function processes the values from our string called dataString with a PHP script called bin/process.php, using the HTTP POST method type. If our script processed successfully, we can then display a message back to the user, and finally return false so the page does not reload. That's it! The entire process is handled right there in these few lines!

There are more advanced things you can do here, other than giving a success message. For example you could send your values to a database, process them, then display the results back to the user. So if you posted a poll to users, you could process their vote, then return the voting results, all without any page refresh required.

Let's summarize what happened in our example, to be sure we have covered everything. We grabbed our form values with jQuery using the serialize() method, and then placed those into a string like this:

Then we used jQuery's ajax() function to process the values in the dataString. After that process finishes successfully, we display a message back to the user and return false so that our page does not refresh:

The success part of the script has been filled in with some specific content that can be displayed back to the user. But as far as our AJAX functionality goes, that's all there is to it. For more options and settings be sure to check out jQuery's documentation on the ajax function. The example here is one of the simpler implementations, but even so, it is very powerful as you can see.

5. Display a Message Back to the User

Let's briefly look at the part of the code that displays our message back to the user, to finish out the tutorial.

First, we change the entire contents of the #contact_form div (remember I said we would be needing that div) with the following line:

What that has done is replaced all the content inside the contact form, using jQuery's html() function. So instead of a form, we now have a new div with id of message. Next, we fill that div with an actual message: an h2 saying Contact Form Submitted:

We'll add even more content to the message with jQuery's append() function, and top everything off we add a cool effect by hiding the message div with the jQuery hide() function, then fade it in with the fadeIn() function:

So the user ends up seeing the following after they submit the form:

Successful Submission

Conclusion

By now, I think you will have to agree that it is incredibly easy to submit forms without page refresh using jQuery's powerful ajax() function. Just get the values in your JavaScript file, process them with the ajax() function and return false. You can process the values in your PHP script just like you would any other PHP file, the only difference being that the user does not have to wait for a page refresh—it all happens silently in the background.

So if you have a contact form on your website, a login form, or even more advanced forms that process values through a database and retrieve results back, you can do it all easily and efficiently with AJAX.

Learn JavaScript With a Free Course

If you want to master JavaScript, be sure to check out our free course to learn the complete A-Z of modern JavaScript fundamentals.


In this course, you'll learn all of the essential concepts of the JavaScript language. That's right: all of them! Including the most important recent improvements to the language, in JavaScript ES6 (ECMAScript 2015) and JavaScript ES7 (ECMAScript 2016).

You'll start with the very fundamentals of the language: variables and datatypes. Then in each lesson you'll build knowledge, from data structures like arrays and maps to loops, control structures, and functions. Along with the basics of the language, you'll also learn some key built-in APIs for manipulating data, AJAX, and working with the web browser DOM. Finally, you'll get a look at some of the most powerful and widely used web APIs that are supported by all modern browsers.


Parsing a CSV File With JavaScript

$
0
0
Final product image
What You'll Be Creating

The CSV (Comma Separated Values) file format is a popular way of exchanging data between applications.

In this quick tip, we’ll learn how JavaScript can help us visualize the data of a CSV file.

Creating a CSV File

To begin with, let’s create a simple CSV file. To do this, we’ll take advantage of Mockaroo, an online test data generator. Here’s our file:

Initial-CSV-File

Converting a CSV File Into an HTML Table

Now that we’ve generated the file, we’re ready to parse it and build an associated HTML table.

As a first step, we’ll use jQuery’s ajax function to retrieve the data from this file:

Assuming the AJAX request is successful, the successFunction is executed. This function is responsible for parsing the returned data and transforming them into an HTML table:

So, the idea is to convert each of the CSV rows into a table row. With that in mind, let’s briefly explain how the code above works:

  • First, we use a regex to split the AJAX response, and thus separate the CSV rows.
  • Then, we iterate through the CSV rows and split their data fields.
  • Finally, we loop through the data fields and create the corresponding table cells.

Furthermore, to get a better understanding of this code, consider the following visualization:

CSV-Representation

At this point, it’s important to clarify why we used the /\r?\n|\r/ regex to split the CSV rows.

As you probably already know, there are different representations of a newline across operating systems. For example, on Windows platforms the characters representing a newline are \r\n. That said, by using the regex above, we’re able to match all those possible representations.

In addition, most text editors allow us to choose the format for a newline. Take, for instance, Notepad++. In this editor, we can specify the desired format for a document by navigating to this path:

Notepad++-EOL

To illustrate it, consider our file. Depending on the format we choose, it would look like this:

CSV-EOL

Adding Styles to the HTML Table

Before we look at the resulting table, let’s add a few basic styles to it:

Here’s the generated table:

Generated-Table

How to Parse a CSV File With the PapaParse Library

In this section, we’ll see how you can use the PapaParse library to parse a CSV file in the blink of eye! PapaParse is a really powerful CSV parser which provides you a lot of configuration options and you could use it for really big CSV files as well.

The PapaParse library is available on npm, and if you don’t want to use npm, you can download the official PapaParse nmp package from unpkg instead.

How it Works

The following example demonstrates how easy it is to parse a CSV string.

The results variable holds the following contents.

PapaParse results

As you can see, Results.data holds an array of all the rows. If there are any errors during parsing, they will be in Results.errors. Finally, you can use Results.meta to access meta information about the CSV string.

On the other hand, if you want to directly parse a local CSV file you can pass a JavaScript File object:

And you can also pass in the URL to a remote CSV file:

Apart from basic parsing, PapaParse provides a lot of other features like:

  • streaming large files (so you can process them line-by-line)
  • reverse parsing (to emit CSV from a JavaScript object)
  • jQuery integration
  • and more

I encourage you to explore this library since it’s really powerful and easy-to-use!

Conclusion

In this short article, we went through the process of converting a CSV file into an HTML table. Of course, we could have used a web-based tool for this conversion, yet I think that it’s always more challenging to achieve this by writing your own code.

Using Redux in a React Native App

$
0
0

Redux is a library for state management that ensures that the application logic is well-organized and that apps work as expected. Redux makes it easy to understand your application's code regarding when, where, why, and how the state of the application is updated.

Redux is made up of the following key parts:

  • actions
  • reducers
  • store
  • dispatch
  • selector

In this post, we'll look at each part of the Redux architecture in turn.

Actions and Action Creators

An action is a plain JavaScript object that has a type field and an optional payload. It can also be thought of as an event that describes something that has happened.

Action creators are just functions that create and return action objects.

Reducers

reducer is also a function that receives the current state and an action object, updates the state if necessary, and returns the new state. A reducer is not allowed to modify the existing state; instead, it copies the existing state and changes the copied values. In other words, the reducer should be a pure function.

Here is an example. 

Store

A store is an object that stores the current state of a Redux application. You create the initial state of the store by passing a reducer to the configureStore functIon.

To get the current state of a store, use the getState() function as above.

Dispatch and Selectors

dispatch() is a Redux store method and is used to update the state by passing an action object. Here, we create a task/taskAdded action with the addTask() action creator, and then pass it to the dispatch() method.

Selectors are used for reading data from a store.

Tutorial on Using Redux With React Native

In this React Native Redux tutorial, you will develop an app that allows a user to choose from a given set of subjects. The app will contain two screens, and you will also learn how to navigate between them using react-navigation

Create a New React App

Create a new project using the Expo CLI tool.

Currently, you have a single component, App.js displaying a welcome message. 

Create two new components in Home.js and Subjects.js. The home component will be the first screen a user sees, and the subjects component will display all the subjects in our app. Copy the code from App.js and add it to Home.js and Subjects.js.

Modify Home.js and Subjects.js to use Home and Subjects instead of the App class.

Subects.js should look similar.

Navigating Between Screens

Currently, there is no way to navigate between the two screens. The stack navigator allows your app to transition between screens where each new screen is placed on top of a stack.

First, install @react-navigation/native and its dependencies.

For an Expo-managed project, install the following.

Go to App.js and import react-native-gesture-handler at the top. You also need to add NavigationContainer and createStackNavigator to App.js. Then, to add navigation capabilities, wrap the components inside the App class in a NavigationContainer component. 

Now the navigator is aware of your screens, and you can provide links for transitioning between screens.

Redux in a React Native App

As we mentioned earlier, Redux is a state management tool, and you will use it to manage all the states of the application. Our application is a subject selector where the user chooses the subjects from a predefined list.

First, install the Redux packages.

A Redux app follows the following conditions:

  • The state completely describes the condition of the app at any point in time.
  • The UI is rendered based on the state of the app. 

For example, when a user clicks a button, the state is updated, and the UI renders the change based on the state.

Create a Reducer

The reducer will be responsible for keeping the state of the subjects at every point in time.

Create the file SubjectsReducer.js at the root level and add the following code.

In this file, you create an INITIAL_STATE variable with all the curriculum subjects and export the subjects reducer as a property called subjects. So far, the subjects reducer doesn't respond to any actions—the state can't change.

Create an Action

An action has a type and an optional payload. In this case, the type will be SELECT_SUBJECT, and the payload will be the array index of the subjects to be selected.

Create the SubjectsActions.js file at the root level and add the following code.

Now, we'll update the reducer to respond to this action.

Add the Reducer to the App

Now, open App.js and create a new store for the app using the createStore() function. We also make that store available to the components in our app by wrapping them in the <Provider> component. This will ensure that the store's state can be accessed by all of the child components.

Add Redux to the Components

Now let's see how to make state data available to components with the connect() function. To use connect(), we need to create a mapStateToProps function, which will map the state from the store to the props in the two components.

Open Home.js, map the state, and render the values for the current subjects (which will be found in this.props.subjects.current). Also, add a button to navigate to the Subjects component.

Similarly, we'll use connect in the Subjects.js file to map the state to the component properties. 

We'll also add the code to display all the subjects in the Subjects component and a button to navigate to the Home screen. You will also add a button that will add the addSubject action to Subject.js. Here's what the final render() method in Subject.js should look like:

The final app should look like this.

redux app

Conclusion

Redux is a valuable tool, but it's only useful when used in the right way. Some of the situations where Redux might be helpful include code that is being worked on by many people or applications that contain large amounts of application state.

In this tutorial, you learned how to set up a React Native app using Redux.

The Best React Native App Templates on CodeCanyon

CodeCanyon is a digital marketplace that offers the best collection of React Native themes and templates. With a React Native app template, you can get started building your apps in the fastest time possible.

React Native app templates

If you have trouble deciding which React Native template on CodeCanyon is right for you, this article should help: 


How to Turn Your WordPress Website into a Mobile App

$
0
0

Do you want to turn your existing WordPress website into a mobile app without writing a single line of code? 

Webview templates and WordPress app builders are an easy and affordable way to turn your WordPress website into a mobile app. They're perfect for a non-technical person—no mobile app development experience is required! 

Webview templates and WordPress mobile app builders turn your website into a responsive app that can be used on all mobile devices. And any changes or updates you make to your website will be reflected immediately in the mobile app. 

Let's look at webview templates and WordPress app builders on CodeCanyon. 

Universal Android App

WordPress App Builder Plugins 

Grab one of these bestselling mobile app builders and convert your WordPress website into a mobile app. Purchase one of these high-quality mobile app builders to create your app in minutes.  

What is a WordPress App Builder Plugin?

WordPress App Builder plugins help you turn your WordPress site into a mobile app and save you development costs. 

Let's have a look at some top-selling WordPress web app builders on CodeCanyon.

1. Wapppress App Builder 

WappPress App Builder

WappPress is an excellent tool for converting any WordPress website into an Android app instantly. It's very easy to use and simple to navigate. You don't need any coding skills. 

It is packed with highly useful features like Push Notifications, Admob, a custom launcher icon, a custom splash screen, and instant app builds in real time. 

You can even replicate functionality and features of your website in this app. 

2. Lekima React Native App for WordPress & WooCommerce 

Lekima - Store Delivery - React Native App for WordPress  WooCommerce

Lekima is a newcomer on the WordPress app builder scene and in less than six months it has already made an impact! This React Native app allows you to convert your WooCommerce website into a hybrid Android and iOS app. 

It's perfect for the following businesses: food, grocery, pharmacy, and store delivery. 

Once you've converted your WooCommerce store into an app it will have: multiple screens to choose from, multiple payment gateways, push notifications, social login, product display, product cart, and more. 

3. Flink: WordPress App Builder

Flink - WordPress App Builder

The Flink Wordpress App Builder makes it possible to easily create a native Android app from your WordPress website and blog. Your native app is created automatically and an APK file is built and sent by email. The app will work smoothly with many features of WordPress like posts, pages, categories, tags, in-post galleries, audio and video players, and users. 

Because your app is connected to your website via the WordPress API, any content updated by you on your website is also updated in your app instantaneously. No need for extra actions.

You can send out push notifications via Firebase. Also, your users can use the app in different languages by switching to their preferred language in the settings page. 

4. Android App Builder 

Android App Builder

Convert your WordPress site into a native Android app from the convenience of your desktop! You can do all this using Android App Builder. This software creates native apps for Android without you having to write a single line of code. It's perfect for both seasoned Android developers and people without programming skills. 

Android App Builder writes the new classes, activities, scales the icons, creates key stores, etc. You won't even need to open Android Studio!

In addition, you can do all of the following operations with Android App Builder:

  • Generate your ready to run project.
  • Test your new application on emulator or a real device.
  • Generate a signed APK or App Bundle to publish to the Play Store.

You only have to install it once. Your project is created and compiled on your computer. You don’t have to enter your secret codes, ids or passwords on anyone’s web site. Everything starts and ends on your computer.

Free WordPress Mobile App Builders

If you are on a tight budget, the following free mobile app builders are worth exploring:

AppMySite 

AppMySite

AppMySite is a allows you to convert your WordPress and WooCommerce sites to Android and iOS mobile apps. You can create native apps that offer your customers a premium experience that keeps them coming back for more. In addition, you can publish them on the App Store or Google Play Store. 

Note that you can get started with AppMySite for free, but if you want white label branding, you'll have to pay a monthly fee ($9 per month at the time of writing).

SuperPWA: Super Progressive Web Apps 

SuperPWA - Super Progressive Web Apps

Super Progressive Web Apps is open source software that converts your WordPress website into a progressive web app. Progressive Web Apps require that your WordPress website is served securely—ie. your website should be HTTPS.

Users can come back to your website by launching the app from their home screen and can interact with your website through an app-like interface. Your return visitors will experience almost-instant loading times and enjoy the great performance benefits of your PWA!

Progressive WordPress 

Progressive WordPress

Progressive WordPress is another PWA plugin that helps encourage users to add your website to their homescreen. But that’s not all. It also allows you to control the display behaviour of your website so it will be shown without any browser elements. Just like a native app.

No connection? No problem. Progressive WordPress pre-caches all critical assets of your website, as well as all visited resources. So if there’s no internet connection it will serve the resources from the local storage.

Turn Any Website Into a Mobile App 

The options are ideal for WordPress websites, but you can also easily turn any other kind of website into a mobile app. For a one-time payment you can grab one of these bestselling webview app templates and convert your website into a mobile app. 

Top-Selling WebView App Templates on CodeCanyon in 2020

If you have an existing website that you want to optimize for mobile users, consider turning it into a WebView app. 

Web apps or responsive web apps are essentially webpages that can be read on mobile devices. They can be accessed through mobile web browsers without needing to install anything. 

To give a web app the look and feel of mobile apps, including the ability to add the app to the Google Play Store or App Store so it can be installed a mobile device for easy access, you will need a WebView template

Best Webview App Templates on Code Canyon

The following best-selling WebView templates for Android and iOS available on CodeCanyon will be your best bet for turning your website into a web app.

1. Best-Seller: Universal Android App 

Universal Android App

The Universal Android App template allows developers to create an app for almost any purpose using the template’s dedicated layouts, with different layouts designed for different kinds of content. The template’s "configurator" tool can be used to define the content without you needing to write a single line of code, and the template has tons of built-in features to give you a head start. In addition to step-by-step documentation, it comes with in-app purchase options, AdMob advertising, push notifications by OneSignal, and more. 

2. Best-Seller: Universal Android WebView App 

Universal Android WebView App

Universal WebView App is a native Android application which uses a web view component for displaying content. With this template, you can turn your responsive website into a universal mobile app. It is quick, easy, and affordable, and it does not require programming skills. The code is easily configurable and customizable. And there is just one config file to set up everything! 

It has lots of nice extra features such as Material Design styling, geolocation, and pull-to-refresh gesture support. Universal WebView App is also compatible with WordPress or any other web framework. It supports HTML5, CSS3, JavaScript, jQuery, Bootstrap, and other web technologies.

Create your own app in less than 15 minutes without any special knowledge! It’s easier than you think.

3. Web2App for Android and Web2App for iOS 

Web2App

If you're looking to convert awebsite into an Android or iOS app, then Web2App is for you! The template is packed with features and has powerful customization, such as seven different layout options where you can choose your own theme and customize the app to fit your particular brand identity. Not only that, but its comprehensive documentation, along with video tutorials and step-by-step instructions, make your job much easier than you might have thought possible.

4. RocketWeb for Android

RocketWeb

RocketWeb is yet another WebView-based app for Android. It comes with a lot of configuration options, and you don't need to learn any programming language to make changes to the app. What sets it apart from the competition is the wide selection of available themes. There are over 50 color schemes for you to choose from, based on the theme of your own website

It comes with support for RTL view, a dynamic sliding menu, and push notifications. There is also integration for AdMob to serve ads.

5. SuperView WebView App for Android and SuperView for iOS 

SuperView WebView App for Android

The SuperView WebView App for Android and SuperView for iOS are great for people who already have a website and want to quickly create a mobile app that pulls up the content from the website.

They comes integrated with AdMob, social logins, and in-app billing. Other features of the app templates include Firebase push notifications, geolocation, a splash screen, and a loading indicator.

6. WebViewGold for Android and WebViewGold for iOS

WebViewGold for Android

WebViewGold wraps your web-baesd or local HTML content into a real, native Android app! No more coding, no more plugins needed. This app template supports all kinds of web apps and websites, including HTML, PHP, WordPress, progressive web apps, and HTML5 games. It also supports AdMob banners and full-screen interstitial ads.

Turn Your Website Into a Mobile App Today!

You have a chance to reach millions of mobile users by simply converting your WordPress website into a mobile app. Webview templates and mobile app builders on CodeCanyon will get you started right away! 

In addition to all the webview templates and WordPress app builders available, there are also thousands of other high-quality WordPress plugins on CodeCanyon that can help you improve your website for you and your users. This incredible collection of plugins contains all types of plugins including video, SEO, eCommerce, and email plugins.


Viewing all 5160 articles
Browse latest View live