Do you want to provide real time, instant solution to your customers most pressing problems?
Live chat lets you have real-time conversations with customers and resolve their problems instantly. It allows you to provide faster service to your customers. Live chats also allow users in an online community to chat with each other in real time.
Best-Selling PHP Live Chat Scripts on CodeCanyon
If you want to add live chat to your website, you can use a PHP chat script. There are currently almost 100 live chat PHP scripts available on CodeCanyon. For a one-time fee you can take your customer support to the next level by purchasing an online support script that suits your needs.
Benefits of a Using Live Chat PHP Script
Some of the many benefits to using live chat in your business include:
provide fast solutions to customer problems
good support means return business
understand what customers are looking for and sell them the right products
instant customer feedback lets you to see where you need to make improvements fast
analytics give you data that is relevant to your decision making
PHP Flat Visual Live Chat is a live chat with a twist. It not only allows you to communicate with your clients and customers directly, but also enables you to guide them through the pages of the site to show them various visual elements and to clarify any questions they may have.
In addition to a beautiful responsive design, it also comes with chat log management. Also, an operator can transfer discussion to another operator online, a contact form that appears if there’s no one available for chat, and sound notifications are played on receiving new messages.
Live Chat 3 is a simple and beautiful PHP live support chat script that will help you to efficiently communicate in real-time with your customers and resolve their problems fast. It comes with all features you need like chat, file sharing, redirect or transfer client, speech to text and more.
It includes a complete group chat solution so you can invite up to 50 of your website visitors or clients into a group chat. That way you can listen to what your customers want, share and receive live feedback, or even teach them about different products.
It has native mobile apps for iOS and Android so can download Live Chat 3 on your mobile device to use it when you're not at your desk. You get push notification when you receive a new message or have a new client. It is integrated with WhatsApp.
Support Board is a PHP live support chat script that helps you automate your customers’ communication with artificial-intelligence-driven bots and a chat system integrated with the most-used platforms. This way you can save time and communicate directly with your customers using software you already know and love for example Slack. And by connecting Dialogflow use can use one of the worlds most advanced forms of artificial intelligence to answer customer questions automatically. Support Board has modern admin area where you can organize and find users, manage conversations, or access saved replies.
Best Support System is self-hosted support ticket application with live web chat. It handles support tickets, manages emails, and collects any payment by PayPal. It also has a dynamic search system that makes it easy for customers to search the knowledge base for answers.
The system is easy to install, no programming skills are required. You can customize this system as you like and even include Facebook chat. You can collect users feedback through an email sent out when the ticket is closed.
If you use Perfex CRM then integrating Perfex CRM Chat is the next logical step to bringing real-time, live customer service to your customers and enabling communication between your staff as well.
This addon uses the Pusher API for communication and collaboration between staff, colleagues, and clients. The module also uses WebSockets—not HTTP requests that slow down the server.
It offers options to create chat groups, connect with clients, export conversations, delete conversations and even create tickets from clients conversations.
Innue is the perfect chatbot for customer service or information acquisition. This intelligent interactive agent chatbot helps automate communication with the customer and create personalized customer experiences at scale.
It can understand what a user wants and is prepared to meet users’ requests. The fact that is responsive means it can display all conversations, information, and menus on all devices, including desktops, tablets, and smartphones.
Grupo Chat Pro offers complete, beautiful and easy to use chat script for your website that can be integrated into any online publishing platforms. This multi-user chat room script comes with multi-level chat room management for administrators and moderators. Other features include unlimited chat rooms, private chat, avatars, language manager, user profiles, a radio player, ad slots and much more.
Connect is a web application offering real-time communication between users via video and audio conferencing. It also allows file sharing, screen sharing, live person to person and group chat messaging.
It's built using secure and scalable WebRTC, which is an open source framework to enable real-time communication in audio, video and text in web and native apps.
HelpDesk 3 also offers clients support via live chats and tickets, but has taken things a step further by allowing clients to email their queries and include attachments in chats. Not only is it easy to install, but you can set up automated answers for the chat feature, set up standard responses for the chat and tickets, and your client history is saved and can be viewed at any time. HelpDesk 3 also allows you to create an FAQ article database to cut down on unnecessary inquiries.
InfyChat can be used for applications like social network, social community, and internal chatting apps. It’s a self-hosted app, so you have complete control of your data and privacy. Some features it comes with include a simple messaging UI, read receipts, online-offline status, typing status, and the ability to upload documents, images and videos.
ChatNet is a fully-fledged PHP group chat room and private chat script for your website, mobile app or web application. Its mobile-first, modern and user-friendly design will make your website or app a feature-rich community and social platform.
The script works on all modern browsers. It is easy to install and you can customize its colors without editing a single line of code. And if you are familiar with PHP and MySQL you can customize the code as well. It is self-explanatory and well commented.
The well-written documentation will guide you through the process.
If you run a listing directory website you can make it easy for customers to communicate directly in real time with different business listed in your directory. Woopy PHP Listings and Chat App Web Template allows you to do just that. It is a two-in-one template. One part is directory website builder. The other is a chat application that you incorporate into the directory. It is multilingual and RTL capable.
Consider Pinky Chat if you're looking for a smarter way to quickly handle your live support customer service. This live chat application and help desk software for your websites allows you to chat with your customer in real-time over web and mobile too. You can track analytics of your website, visitor’s path and geo location details.
Other features include multiple department support, two-way file sharing, operator-to-operator chat, canned response shortcuts, and a responsive chat window for mobile devices.
It's live chat widget works with any website including static HTML, WordPress, OpenCart, Joomla, Drupal and more.
Live Chat Best Practices:
Follow these guidelines to communicate effectively with your customers online.
1. Create a Customer Support Playbook
In order to achieve consistently high quality service by live chat to your customers you need to create internal playbook with rules. Having a playbook allows you to anticipate frequently occurring scenarios faced by customers and provide the right words and phrases to resolve their problems.
Not only does having a playbook allow for consistent performance, it also ensures consistency in terms of brand voice.
2. Be Transparent About Using Translators
If you're using a language translator to chat with a customer be upfront and let them know. This way they will be more understanding if you use words that are inappropriate or may be misinterpreted in their cultural context.
3. Use a Supportive Tone
Positive reinforcing phrases build the customers confidence in your customer service and leave them happy and buoyed by their experience. Negative phrases like "no", create negative reactions that leaves them unhappy and dissatisfied by their experience.
Always show customers that you're listening, just like in real life conversation, use familiar words like "I see" or "I understand".
4. Personalize the Chat
Use pre-chat forms to collect relevant customer information like name, email in order to provide personalized service. Also, use real pictures of agents to allow customers to know they are interacting with a real person and not a chatbot.
5. Keep it Short and Concise
Live chats are tools for of having instant conversation with customers. They are informal, chatty, relaxed and fast moving. This make them the perfect tool for delivering instantaneous replies to customer's questions.
So avoid answering with long messages. Shorter sentences are more conversation like and they allow customers to digest your answers and to tell you if they understand your answer or need clarification.
6. Multitask by Serving Multiple Customers at Once
Live chat experience is different from phone or email. You can multitask by chatting with more than one customer at once but learn the ropes first so you're not keeping people waiting.
Use canned messages so you don't leave the customers hanging. Let them know customer service agents are attending to other customers and they'll be attended to
7. Ask for Feedback
Get instant feedback through survey forms with ratings. Make it immediate after the live chat while customers have a fresh memory of the interaction.
How to Position Live Chat on Your Website
Customers want an instant response. Make it simple for them to reach out to you with their inquiries. For this reason, it is important to make live chat visible and easily accessible for your customer.
Placing live chat in the right places on pages of your website delivers better live chat experiences for customers. The standard position for a live chat support is the bottom-right of the window screen. This is where customers expect it to be.
Place it on specific pages where customers are likely to reach out with their inquiries. Think the home page, contact page, pricing, sales page, and shopping cart.
Understand that placing live chats everywhere can be come off as intrusive and aggressive so exercise judgement when it comes to placement.
Get A PHP Live Chat Script Now!
On CodeCanyon you will find many more PHP live chat scripts and of course many other kinds of PHP scripts to choose from. With these scripts, you can easily set up a live chat support for your website without coding knowledge.
Here are some articles to help you understand more about live chat applications and how you can incorporate them in your business
In this article, we’ll discuss how you can make a live chat script in PHP. Although, there are different ways you could achieve this, we’ll use a socked-based implementation.
If you’re building a community site which involves user engagement, it’s useful to provide a way for users to discuss ideas real-time. When it comes to real-time interaction between users, it’s best to provide a kind of chat-room feature where they can get together and discuss their ideas.
Today, we’re going to discuss how you can implement live chat in your PHP website. As it’s a popular feature, there are a lot of ready-made chat scripts available in the market. You'll find a mix of both free and premium PHP chat scripts to choose from.
In the next section, we’ll see how to download and configure the Chat Using WebSocket and PHP Socket module.
How to Download and Configure the Chat Using WebSocket and PHP Socket Module
The Chat Using WebSocket and PHP Socket module is available on GitHub, and thus, you can either clone the repository or download the .zip package file.
If you want to clone the Chat Using WebSocket and PHP Socket repository, you can use the following command on your command prompt.
On the other hand, if you want to download the .zip file, you could download it from the official repo.
The Chat-Using-WebSocket-and-PHP-Socket directory contains the package files. You need to place this directory under the document root of your web server so that you can access it via the browser.
Next, the package contains two PHP files, server.php and index.php, and we need to configure the host value in both files. Open both files in your favorite text editor and replace the localhost value with the hostname of your server. Of course, if you’re working on the local machine for testing purposes, you don’t need to change it.
With these changes, we’re done with the configuration of our module. Before we go ahead and see how to run it, we’ll go through the server.php and index.php files to understand how exactly it works in the next section.
How the Chat Using WebSocket and PHP Socket Module Works
The Chat Using WebSocket and PHP Socket module is based on WebSockets. Let’s quickly see what exactly the WebSockets API is:
The WebSocket API is an advanced technology that makes it possible to open a two-way interactive communication session between the user's browser and a server. With this API, you can send messages to a server and receive event-driven responses without having to poll the server for a reply. — MDN
Once a browser opens a web socket connection with the web server, it can perform two way communication with the web server. And thus, it can send data to the web server with the help of the send method, and it can receive data from the web server with the help of the onmessage event handler. So that’s the client side implementation of WebSockets.
On the server side, we need to use PHP socket functions to open and bind sockets, listen to incoming socket connections, read and send data to all the available sockets.
Let’s go through the important snippets in both files.
The index.php File
The index.php file is responsible for displaying the chat UI and handling a socket connection with the web server.
Let’s go through the following snippet which is the most important part in the index.php file.
<script language="javascript" type="text/javascript">
    //create a new WebSocket object.
    var msgBox = $('#message-box');
    var wsUri = "ws://localhost:9000/demo/server.php";
    websocket = new WebSocket(wsUri);
    websocket.onopen = function(ev) { // connection is open
        msgBox.append('<div class="system_msg" style="color:#bbbbbb">Welcome to my "Demo WebSocket Chat box"!</div>'); //notify user
    }
    // Message received from server
    websocket.onmessage = function(ev) {
        var response         = JSON.parse(ev.data); //PHP sends Json data
        var res_type         = response.type; //message type
        var user_message     = response.message; //message text
        var user_name         = response.name; //user name
        var user_color         = response.color; //color

        switch(res_type){
            case 'usermsg':
                msgBox.append('<div><span class="user_name" style="color:' + user_color + '">' + user_name + '</span> : <span class="user_message">' + user_message + '</span></div>');
                break;
            case 'system':
                msgBox.append('<div style="color:#bbbbbb">' + user_message + '</div>');
                break;
        }
        msgBox[0].scrollTop = msgBox[0].scrollHeight; //scroll message

    };

    websocket.onerror    = function(ev){ msgBox.append('<div class="system_error">Error Occurred - ' + ev.data + '</div>'); };
    websocket.onclose     = function(ev){ msgBox.append('<div class="system_msg">Connection Closed</div>'); };

    //Message send button
    $('#send-message').click(function(){
        send_message();
    });

    //User hits enter key
    $( "#message" ).on( "keydown", function( event ) {
      if(event.which==13){
          send_message();
      }
    });

    //Send message
    function send_message(){
        var message_input = $('#message'); //user message text
        var name_input = $('#name'); //user name

        if(message_input.val() == ""){ //empty name?
            alert("Enter your Name please!");
            return;
        }
        if(message_input.val() == ""){ //emtpy message?
            alert("Enter Some message Please!");
            return;
        }

        //prepare json data
        var msg = {
            message: message_input.val(),
            name: name_input.val(),
            color : '<?php echo $colors[$color_pick]; ?>'
        };
        //convert and send data to server
        websocket.send(JSON.stringify(msg));
        message_input.val(''); //reset message input
    }</script>
Firstly, the new WebSocket(wsUri) call opens a socket connection with the web server. Once a socket connection is open, we’ve defined different event handlers to catch different types of events.
Event Handlers
Mainly, the WebSocket object supports four events: onopen, onmessage, onerror and onclose. Our script has defined event handlers for all these events.
The onopen event handler is used to display a welcome message to users.
websocket.onopen = function(ev) { // connection is open
    msgBox.append('<div class="system_msg" style="color:#bbbbbb">Welcome to my "Demo WebSocket Chat box"!</div>'); //notify user
}
Next, the onmessage event handler is used to display messages that are received from the web server. Basically, it parses the JSON data received from the server, prepares the HTML code, and appends it to the chat box.
websocket.onmessage = function(ev) {
    var response         = JSON.parse(ev.data); //PHP sends Json data
    var res_type         = response.type; //message type
    var user_message     = response.message; //message text
    var user_name         = response.name; //user name
    var user_color         = response.color; //color

    switch(res_type){
        case 'usermsg':
            msgBox.append('<div><span class="user_name" style="color:' + user_color + '">' + user_name + '</span> : <span class="user_message">' + user_message + '</span></div>');
            break;
        case 'system':
            msgBox.append('<div style="color:#bbbbbb">' + user_message + '</div>');
            break;
    }
    msgBox[0].scrollTop = msgBox[0].scrollHeight; //scroll message

};
You can use the onerror event handler to handle errors and display appropriate error messages to users.
If event handlers are used to listen and act to server side events, the send method allows you to send data from a browser to the web server.
In the index.php file, we’ve defined the send_message function which is called when users click on the Send button or press the enter button. The send_message function handles the logic of sending data to the web server.
function send_message(){
    var message_input = $('#message'); //user message text
    var name_input = $('#name'); //user name
    if(message_input.val() == ""){ //empty name?
        alert("Enter your Name please!");
        return;
    }
    if(message_input.val() == ""){ //emtpy message?
        alert("Enter Some message Please!");
        return;
    }

    //prepare json data
    var msg = {
        message: message_input.val(),
        name: name_input.val(),
        color : '<?php echo $colors[$color_pick]; ?>'
    };
    //convert and send data to server
    websocket.send(JSON.stringify(msg));
    message_input.val(''); //reset message input
}
As you can see, we’ve called the websocket.send method to send data to the web server.
The Server.php File
The server.php file is responsible for listening to incoming socket connections, reading data and sending it to all the clients. In this section, we’ll discuss important snippets in the server.php file.
The first thing is to create a socket connection by using the socket_create function.
Also, we’ve initialized the $clients variable which holds different socket connections from different users.
$clients = array($socket);
Finally, there’s the while loop which is endless, and it does two important things as explained below.
Firstly, it checks for any new socket connection. If there’s a new socket connection, it’s added to the global $clients variable. It also notifies other clients about this new connection. Basically, other users are notified when a new user joins the chat room.
//check for new socket
if (in_array($socket, $changed)) {
    $socket_new = socket_accept($socket); //accept new socket
    $clients[] = $socket_new; //add socket to client array
    $header = socket_read($socket_new, 1024); //read data sent by the socket
    perform_handshaking($header, $socket_new, $host, $port); //perform websocket handshake
    socket_getpeername($socket_new, $ip); //get ip address of connected socket
    $response = mask(json_encode(array('type'=>'system', 'message'=>$ip.' connected'))); //prepare json data
    send_message($response); //notify all users about new connection
    //make room for new socket
    $found_socket = array_search($socket, $changed);
    unset($changed[$found_socket]);
}
Next, it loops through the all connected sockets, and checks for any incoming data. If there’s any data received on any socket, it reads that data by using the socket_recv function. The received data is in the JSON format, and thus we need to decode it in the first place. Finally, the send_message function is called which sends this data to all the connected sockets.
//loop through all connected sockets
foreach ($changed as $changed_socket) {
	//check for any incomming data
	while(socket_recv($changed_socket, $buf, 1024, 0) >= 1)
	{
		$received_text = unmask($buf); //unmask data
		$tst_msg = json_decode($received_text, true); //json decode
		$user_name = $tst_msg['name']; //sender name
		$user_message = $tst_msg['message']; //message text
		$user_color = $tst_msg['color']; //color
		//prepare data to be sent to client
		$response_text = mask(json_encode(array('type'=>'usermsg', 'name'=>$user_name, 'message'=>$user_message, 'color'=>$user_color)));
		send_message($response_text); //send data
		break 2; //exist this loop
	}
    ...
    ...
}
The send_message function looks like this:
function send_message($msg)
{
    global $clients;
    foreach($clients as $changed_socket)
    {
        @socket_write($changed_socket,$msg,strlen($msg));
    }
    return true;
}
If any user is disconnected, the following code is responsible for removing the socket client associated with that user from the $clients variable. Also, all connected users are notified about this event as well.
$buf = @socket_read($changed_socket, 1024, PHP_NORMAL_READ);
if ($buf === false) { // check disconnected client
    // remove client for $clients array
    $found_socket = array_search($changed_socket, $clients);
    socket_getpeername($changed_socket, $ip);
    unset($clients[$found_socket]);
    //notify all users about disconnected connection
    $response = mask(json_encode(array('type'=>'system', 'message'=>$ip.' disconnected')));
    send_message($response);
}
As the while loop is endless, it continuously checks for any new connections and messages, and thus, all users are instantly notified about it.
So that’s the server-side implementation of sockets. In the next section, we’ll see how to run this module.
How to Run the Chat Using WebSocket and PHP Socket Module
Firstly, we've got to start the socket server so that it can start listening to incoming connections.
Go ahead and run the server.php file on the command line as shown in the following snippet. It should start the socket server.
$php -q server.php
Now, you need to visit the index.php file in your browser. As you’ve placed the Chat-Using-WebSocket-and-PHP-Socket-master directory under the document root, you should be able to access it via https://localhost/Chat-Using-WebSocket-and-PHP-Socket-master/index.php.
You should see the following UI.
You can open the http://localhost/Chat-Using-WebSocket-and-PHP-Socket-master/index.php URL from another browser to simulate multi-user experience. You'll be notified about the new user connection.
Start messaging in both screens, and you'll be notified instantly.
As you can see, it’s fairly easy to implement a socket-based PHP chat module on your website. There are other ways as well like an AJAX-based chat module which continuously polls a server to get new messages from it, but the socket-based implementation is more efficient and doesn't generate as much traffic to your server, so it is preferred.
Conclusion
Today, we discussed how you can implement live chat in PHP with the help of the Chat Using WebSocket and PHP Socket Module. It’s a socket-based implementation and we’ve discussed important parts of this module throughout the article.
In the past few years, browsers have come a long way when it comes to supporting newer CSS properties that allow developers to create nice effects and animations using just pure CSS.
There is a lot of browser support for using different transitions and keyframe animations in your projects now. You no longer have to rely on JavaScript libraries to add basic animations. You can animate your web pages with CSS alone!
Animating different elements on a webpage is now easier than ever. However, it can still be very confusing or daunting for absolute beginners. In this post, we will cover some of the best CSS animation libraries on CodeCanyon that you can use to add fancy CSS animation and stunning CSS effects to your webpages today.
New libraries are added periodically to the collection, and you can select one from the best-sellers or apply your own filters to fine-tune the results.
There are libraries to animate all kinds of elements or apply different kinds of effects to elements like buttons.
Best CSS Animations Libraries (On CodeCanyon for 2021)
The first one on our list is CSS3 Image Hover Effects. You can use it to add around 17 different kinds of image hover animations.
This includes basic CSS effects like fading and sliding overlays as well as more advanced animations like splitting overlays and joining overlays. Other interesting effects include corner ribbons and image stacks.
Visit the description page to find out more about the library. The video on the description page shows all the animations in action.
This CSS3 Mega Tooltip Animation Pack offers a great solution for people who want to integrate nice animations with different tooltips on their website.
This great css animations pack comes with ten different tooltip animations. There are eight predefined color options. However, you can change the CSS files to add your own unique colors.
There is support for all major browsers. You can even support browsers as old as IE8 with a fix included in the download files after purchase.
The download files also contain detailed documentation and HTML samples that illustrate how to use the animation pack effectively.
The tFigure—Image Captions library offers five different hover animations to display image captions.
You can use them to show nicely animated captions for different images. The overlays for each animation are available in four different colors.
The animations themselves are pretty simple. However, the way in which the captions are laid out on the overlays makes them very attractive.
These animations are framework independent, so you can install them on any website you want. They are also easily customizable, so you can make sure that the color scheme of the overlay matches the theme of your website.
Check out the animation's live preview page to see the awesome image caption animation in action.
There are a lot of times where users might have to wait a while for a process to complete. This might be a very large image that has to load or some other computation process that needs to complete.
If the process takes a couple of seconds, it is a good practice to let users know that you are working on it. A good way to do that is with simple animated loaders.
The Animated Loaders Kit is perfect for this situation. It comes with ten CSS-only animated loaders.
There are many advantages of using these pure CSS-based animated loaders. They are easy to customize. It will take only a couple of minutes to change the color, font, and size of the loaders. You can also change the animation speed. They have a very small file size compared to using GIF files.
The best way to appreciate how nice they are is to see the live preview on the description page.
This Image Hover Effects Collection kit was added fairly recently to CodeCanyon and comes with 20 different awesome CSS animation styles.
They follow a responsive design philosophy and support all major browsers. So you can rest assured that any effects you use on your website will look good on all devices and all screen sizes.
The animations are also fully customizable, and you can easily change the overlay and text colors for all animations to better align them with the overall theme of your own website.
The code is well documented, so it will be easier to make changes whenever necessary. You should definitely check out the live preview to see how good these hover animations are.
Free CSS Animation Libraries for 2021
Generally, you can expect these paid CSS animation libraries to have a lot of variety in the animations compared to free alternatives. They also come with free support for six months and lifetime updates.
Many times, these premium libraries also support old browsers. However, this might not be the case with free animation libraries.
It might be easier for anyone who is just starting out to simply use these paid libraries. However, if you don't have the budget to purchase these paid plugins, we have also listed some free alternatives below.
Here are four free CSS animation libraries that you can use in your projects:
This is also a free image hover animation library. However, it only comes with basic sliding animations.
The unique feature of this library is that the hover animations are aware of the cursor direction. So the overlay will appear to move in from the left side if the user hovers over the image from the left side.
This animation library is not aimed at a specific use case like image hover animations or tooltips.
It is simply a general-purpose library that you can use to animate different elements on a webpage. There are a bunch of classes that you can add to different elements to control the speed and delay of the animation.
This library consists of pure CSS-based loading animations. You can use them in your project if you are looking for some nice preloader animations.
Additional Resources
It can be hard to figure out where to start for an absolute beginner. We are listing some tutorials here which will make it easier for you to understand how CSS animations work and how you can start using them in your own projects.
Using different pre-built CSS animation libraries is not hard at all. However, having a basic understanding of the concepts will go a long way when it comes to making changes to these animations or trying to create something of your own in future.
You should also consider reading these two tutorials that teach you how to create your own CSS-based animations for scratch. The first tutorial is for basic hover effects, while the second one is a quick tip for page loading animations.
Using a bit of animation for different elements on your website can make the content more interesting and engaging.
Coming up with our own unique animations from scratch can take some time. So we listed some of the best free and premium CSS-based animation libraries that will help you get started in no time.
New animations and effects are added all the time to CodeCanyon—you can choose one of the best-sellers or try something fresh and new!
This post has been updated with contributions from Franc Lucas. Franc is a writer for Envato Tuts+ who enjoys exploring the world of SaaS.
Are you interested in building a news app for you or your clients?
News apps have become a must-have application type because there is so much happening all around us, and keeping abreast with news is something that people do regularly on their mobiles.
News app templates get you up and running quickly because all the programming has been done for you, so all you need to do is follow the documentation instructions to get set up.
One of the many Android news app templates available on CodeCanyon
The best Android news app templates organize news into a few broad categories, allow users to save news stories they want to read later in a favorites list, and have a powerful search feature that helps them find relevant news stories quickly and easily.
Top-Selling Android News App Templates for 2020 on CodeCanyon
Whether you’re interested in building a news app from posts on your own website, creating an Android news app for a localised news source, looking for Android news app design inspiration, or pulling together all major news sources into one handy app, you’re sure to find a template that’s right for you from among the ten best Android news app templates available at CodeCanyon.
Developed using Android Studio and Google Material Design, Android News App provides developers with an easy-to-configure Android news app template.
Content can be managed from the PHP MySQL admin panel, where you can change the admin username, password, and profile information, as well as organising news categories, news items, and more.
News App for WordPress Site is ideal for those who already have a news-rich WordPress blog that they want to turn into a news app. The template is quite different from the other app templates featured here because instead of drawing news from various sources, it allows users to turn their WordPress website into a news feed just by inserting their website URL into the template. News stories can be organised by category, just like with other news app templates, and the app is AdMob ready.
The All-In-One News app template offers developers a beautifully designed app that allows users to get all their news, including live TV, videos, photo, weather, and top stories, all in one place. As with the other apps featured here, users can log in with their social media accounts, filter news based on the categories they prefer, and then share and comment on news items.
The News Application template makes it super easy for you to create your own news app. The template features a beautiful news app UI design created with Material Design. It supports both landscape and portrait mode, and it gives users the ability to add unlimited categories. It also offers push notifications, powerful search, and the ability to share news stories via social media.
This beautifully designed app supports full HD. In addition, it comes with an easily editable template, two different text positions, seven unique tile animation effects, and 16 scroll animation effects.
The back-end is very fast and easy to use. The administrator can use it to create any kind of content on the CMS. You can also integrate Google Maps, Facebook, Twitter, YouTube, and Vimeo.
Breaking news headlines, modifiable categories, deep link sharing, powerful search, Facebook comments, AdMob ads, push notifications, and video and image support are just a few of the great features to be found in the Ultimate News App template.
The template also comes with two separate android news reader app video tutorials and online documentation to help you set up the admin page and customise the app.
My News is a multipurpose Android app template that can be used as a news resource, a personal blog, or a portfolio. My News offers Facebook signup and login, categories for organising news stories, push notifications, AdMob banners, and a full-featured admin panel which allows the app’s admin to manage user accounts.
Short News Android App provides the latest news with an infinite scroll of news feed with headlines and brief descriptions of all the latest and breaking news. Like the other news app templates here, Short News organises the news stories in categories, as well as recent news categories.
This Android news app also offers AdMob banner support, Facebook Audience Network Ad banners, and a powerful news comment function which allows end users to comment on stories quickly and easily, as well as the usual push notifications and the ability to share news stories on social media.
Created with Android studio, it comes with news app source code, PHP script source code for the back-end, and extensive documentation with screenshots.
New News Android App is a simple and easy-to-use app template that helps developers create a news reader app quickly. The admin panel contains a category manager, news manager, user manager, notification manager, and various other settings. The app features a dynamic drawer menu system for organising news categories, dynamic search, multi-language support, and more.
The YouNews app template is ideal for those looking to make their own news app android to keep followers, clients and customers updated with news about their business. Administrators of the app can easily add and edit news items via the dashboard, and their additions and changes will be displayed right away in the app.
The 5 Best Free Android News Apps
The premium app templates available on CodeCanyon are a great way to learn the ins and outs of what it takes to develop a news app. With these, you can easily create your own app with the most comprehensive set of features.
However, if you're not ready to buy an app template, you can just try out some of the existing news apps in the Google Play Store and try and figure out how to reproduce their functionality.
Below is my list of the five best free Android news apps.
News Republic is an AI-powered mobile Android news app that brings you breaking news, local and international news, viral headlines, and trending videos from over 3,000 sources. You can customize your news by selecting from a million topics. It learns what you read and brings you what you like. You have access to lightning-fast in-app video newsfeeds. You can share your favorite content on social media.
SmartNews brings you trending stories in under a minute by searching lots of news categories. It has a clean, uncluttered news app UI design that creates an engaging browsing experience. It has a built-in readability mode that tunes out distractions. You can also read news offline.
TheScore is the go-to Android news app for sports enthusiasts. It brings you news from all the major leagues like the NFL, NBA, and so on. If you want real-time scores and stats about your favorite teams and players, the app has got you covered too.
Inoreader is an Android news app and RSS reader that brings you news from all over the world. You can save news that interests you to read later. You can build your own newsfeed by choosing news categories and topics you care about, search content that you have read in the past, share articles on social media, and save articles to Dropbox, Evernote, and Pocket. Inoreader has a free ad-supported version and a paid version. It also has day and night reading modes. With this app you get android news app source code free download.
News360 is an mobile Android news app that learns what you like and searches for articles and blog posts that give you what you like. What makes the News360 app robust is its ability to integrate into many platforms, such as Evernote. You can integrate it into your Facebook and Twitter media to share stories. You can also save stories to read them later.
Things to Look for When Choosing a News App
Lightweight Apps with Quick Loading Speeds
News content includes not only written text, but also images and videos. This means that fast loading speeds are important.
Social Sharing
Making it easy for users to share news that you provide on your app increases engagement and traffic.
Security and Frequent Updates
Users want to be sure their data is safe: regular updates address bugs that could make their information vulnerable.
Location-Based News with Integrated Maps
To automatically identify users' locations and serve them personalized news relevant to their localities.
Monetizing
Look for templates that come integrated with gateways for making money from your news app.
Why News Apps?
News apps make sense because many people get their news online. They want regular updates on what is going on in the world—whether it's politics both local and global, business, entertainment, fashion, and so on.
News apps also make it easy to curate news in very particular niches. News for particular industries will attract a lot of traffic from people who are in that industry. This offers lots of opportunities to monetize your news app because people will pay for niche information that is picked particularly for them.
Launch Your Android News App With a Great Template
This article lists just a few of the popular Android news app templates available on CodeCanyon.
If you are looking for inspiration or you're building an application and need help with a particular feature, then you may find your answer in some of these templates.
CodeCanyon is an online marketplace that has hundreds of mobile app templates—for Android, iOS, React Native, and Ionic. You can save days, even months, of effort by using one of them.
If you have trouble deciding which template on CodeCanyon is right for you, these articles should help:
In this two-part series, you will learn about the ins and outs of working with tabular data in React using the React Bootstrap Table2 component. You'll be able to create sophisticated and professional-looking tables with little effort and yet be able to customize every aspect. In this part, we'll continue the journey by expanding rows, pagination, cell editing, and advanced customization.
Overview
This is part two of a two-part series about React Bootstrap Table2. In part one, we created a simple React application using react-create-app and created the table shown below.
We also populated a table with data, worked with columns, styled the table, and selected rows.
In this part, we'll continue the journey by creating expanding rows, allowing cell editing, and doing some advanced customization.
Expanding Rows
Expanding rows is one of the coolest features of React Bootstrap Table2. When displaying tabular data, you may want to see additional data on one or two rows, but you might clutter the display to show all the data for all the rows.
One option is to show tooltips, but tooltips require that you hover with the mouse over the target area, and you can only see one tooltip at a time. Expanding rows let you display additional data for each row in a kind of drawer that stays expanded as long as you want, and you can collapse it back when you're done. You can expand as many rows as you want at the same time. Here is how it's done with React Bootstrap Table2.
We'll use the prop expandRow to specify how rows will expand on click.
const expandRow = {
  renderer: (row, rowIndex) => (<div><p>{ `This Expand row is belong to rowKey ${row.id}` }</p><p>You can render anything here, also you can add additional data on every row object</p><p>expandRow.renderer callback will pass the origin row object to you</p></div>
  )
};
This is how the table will look when you click on a row.
Pagination
So far, we displayed just four rows of data. Tables are designed to display a lot of data that doesn't necessarily all fit on the screen simultaneously. That's where pagination comes in. React Bootstrap Table2 supports many pagination options.
Let's populate our table with additional data by adding a few entries, as shown below.
We then apply the property to the table as shown below.
<BootstrapTable
        // striped
        hover
        keyField='id'
         keyField='id'
          data={ person }
           columns={ columns }
          expandRow={ expandRow }
          //apply the pagination function here
          pagination={ paginationFactory(options) }


            />
The table will be displayed starting from the first page and will show five entries per page.
Cell Editing
Another form of data manipulation is in-place editing (a.k.a. cell editing). Cell editing can be triggered by a click or double-click. To enable this property, first install the react-bootstrap-table2-editor.
npm install react-bootstrap-table2-editor --save
Then import it the top of App.js.
//App.js
import cellEditFactory from 'react-bootstrap-table2-editor';
Sometimes, viewing your data in a web UI is not enough, and you need to take your data and feed it to other tools. Import the exportCSV attribute (and optionally a filename), and an export button is added to the table. When you click the button, it allows you to save your data to a CSV file.
Install react-bootstrap-table2-toolkit.
npm install react-bootstrap-table2-toolkit --save
The export feature is available via exportCSV prop on ToolkitProvider wrapper. To display and enable CSV export, wrap the BootstrapTable in a ToolkitProvider.
import ToolkitProvider, { CSVExport } from 'react-bootstrap-table2-toolkit';

const { ExportCSVButton } = CSVExport;

//  the rest of the code here

<ToolkitProvider
  keyField="id"
  data={ product }
  columns={ columns }
  exportCSV>
  {
    props => (<div><ExportCSVButton { ...props.csvProps }>Export CSV!!</ExportCSVButton><hr /><BootstrapTable { ...props.baseProps } /></div>
    )
  }</ToolkitProvider
Table Search
This property works the same way as the Export feature. First, import the Search property, enable it on ToolKitProvider and wrap the SearchBar as a child of ToolkitProvider.
We covered a lot of material in this tutorial, but ReactReact Bootstrap Table2 has a lot more in store. Practically every aspect of the table can be customized. Read the full documentation on how to customize a table.
Here are all the features offered by React Bootstrap Table2:
row customization
column customization
table sort
table search
row selection
column filter
cell edit
pagination
expandable row
overlay
remote tables
Conclusion
React Bootstrap Table2 packs a powerful punch. It provides a pleasant user interface for displaying, searching, and manipulating tabular data out of the box. The API is very consistent—major features can be enabled by specifying a simple attribute and optionally customized with additional attributes that often can be dynamic functions. While the default behavior and the basic configuration should satisfy most users, if you need more advanced features and customization, the official documentation has lots of examples of to go about it.
In this article, I’m going show you how to add Google reCAPTCHA v3 to a form on your PHP website. The latest reCAPTCHA is different than the previous versions—it doesn’t require user interaction at all. In this post, we'll see how it works, and we’ll build a real-world example for demonstration purposes.
As a website owner, you’re always looking for a strong anti-spam solution which can prevent spamming on your website and only allows legitimate content to come through. Gone are the days when you could integrate a simple text-based CAPTCHA solution and it was enough to stop the naughty bots.
On the other hand, if you have used third-party anti-spam solutions for your website, it’s likely that you're aware of the reCAPTCHA solution provided by Google. With each version of reCAPTCHA, Google has strengthened its capabilities to detect and filter out spam. Specifically, reCAPTCHA v2 is one of the best among the different third-party anti-spam solutions.
You can integrate reCAPTCHA v2 on your website in two different ways. The first is the famous "I’m not a robot" checkbox. And the other one is the invisible method in that the user interaction is required only in suspicious cases. In this post, we’ll discuss reCAPTCHA v3, which is invisible and doesn’t require user interaction at all!
In the next section, I’ll explain how reCAPTCHA v3 works, and later on we’ll build a real-world example to demonstrate it.
How Google reCAPTCHA v3 Works
It’s said that a picture is worth a thousand words! So let’s have a look at the following screenshot to understand what exactly is going on underneath when you integrate reCAPTCHA v3 on your website.
Let’s try to understand the overall flow in detail:
The end user requests a web page.
The web app or server returns the requested page, which includes reCAPTCHA v3 code.
Next, the user fills in the form and clicks on the submit button.
Before submitting the form data to the server, the reCAPTCHA v3 code on the client makes an AJAX call to the Google server and obtains a token. The important thing here is that we have to pass the action attribute with an appropriate value during the AJAX call. You should pass the value which identifies your form. This is the value which you'll use for verification on the server side, along with other parameters.
The token obtained in the previous step is submitted along with the other form data. In most cases, we append two hidden variables to the form, token and action, before the form is submitted.
Once the form is submitted, we have to perform the verification step to decide if the form is submitted by a human. As a first step, we’ll make a POST request to verify the response token. The POST request passes the token along with the Google secret to the Google server.
The response is a JSON object, and we’ll use it to decide if the form is submitted by a human. The format of the JSON object is shown in the following snippet.
{
  "success": true|false,      // whether this request was a valid reCAPTCHA token for your site
  "score": number             // the score for this request (0.0 - 1.0)
  "action": string            // the action name for this request (important to verify)
  "challenge_ts": timestamp,  // timestamp of the challenge load (ISO format yyyy-MM-dd'T'HH:mm:ssZZ)
  "hostname": string,         // the hostname of the site where the reCAPTCHA was solved
  "error-codes": [...]        // optional
}
There are three checks that we must do to make sure that it’s safe to go ahead with processing the form. The response score should be greater than 0.5, and the success property should be TRUE. Along with that, you must compare the response action value with the value of the action hidden variable which is submitted along with the form.
The reCAPTCHA v3 API returns a certain score for each request without user friction. The response score which you get is based on the user's interactions with your site—their key presses and mouse movements. The reCAPTCHA v3 learns by the real traffic on your website. So it may be that the scores are different in different environments. As a starting point, you can use a threshold of 0.5, and you could adjust it later on as per your requirements.
So that's an overview of the process. In the next section, we'll see how to register your site with Google to get a site key and site secret.
Register reCAPTCHA v3 Key and Secret
The Google reCAPTCHA library requires you to register keys for your domain before you can actually use it. In this section, we’ll see how you can register it.
First, go to the reCAPTCHA admin panel to create a link which presents you with a form asking you for a few details, as shown in the following screenshot.
In the reCAPTCHA Type field, select the reCAPTCHA v3 option. Fill in the Domains and Owners information as needed. Next, read and accept the reCAPTCHA Terms of Service. Finally, click on the Submit button to save the settings.
Upon form submission, Google generates a site key and site secret for your domain, as shown in the following screenshot.
Please copy and note these down as we’ll need them later on when we build our real-world example.
Build a Real-World Example
In the previous section, we created the necessary credentials which we could use while setting up the reCAPTCHA v3. In this section, we’ll create an example to demonstrate how to integrate it in your PHP web page.
We’ll create two PHP files: subscribe_newsletter_form.php and subscribe_newsletter_submit.php.
The subscribe_newsletter_form.php file is used to display the newsletter subscribe form, which allows the user to enter the email address and subscribe for newsletters.
The subscribe_newsletter_submit.php file handles the form submission and does the necessary validation.
Create the Newsletter Subscribe Form
Go ahead and create the subscribe_newsletter_form.php file with the following contents.
Let’s go through the important snippets in this file.
First, we loaded the reCAPTCHA JavaScript library in the <head> section. It’s important to note that you have to pass your site key as a render=YOUR_SITE_KEY query string parameter. Also, we’ve loaded the jQuery library as well so that we can use form-related utility methods. It’s not necessary to use jQuery—you can use any other library of your choice, or even vanilla JavaScript.
Next, we created a basic form which includes the email textbox and submit button—nothing fancy here.
Finally, there’s the JavaScript snippet at the end of the file, which is the key part for implementing reCAPTCHA. We’ve created the jQuery submit handler for the form so that when the user submits the form, we catch that event and do the necessary processing before the actual form submission. We use the event.preventDefault() function to stop the form submission from taking place when it normally would.
Next, the grecaptcha object calls the execute method, which obtains the token from the Google server by performing an AJAX call. It’s important to note that you have to pass the site key and action name while calling the execute method. The action name allows you to have a detailed break-down of data in the Google admin console. It’s also used to verify the reCAPTCHA response on the server side, which we’ll see a bit later.
When the execute method receives the token response, it passes the token to the anonymous function supplied in the then method. Next, we append two new hidden variables to the form, token and action, along with their values. Finally, we submit the form by calling the submit method of jQuery.
Handle Form Submission and Validation
Go ahead and create the subscribe_newsletter_submit.php file with the following code to handle form submission.
<?php
define("RECAPTCHA_V3_SECRET_KEY", 'YOUR_SECRET_HERE');
if (isset($_POST['email']) && $_POST['email']) {
    $email = filter_var($_POST['email'], FILTER_SANITIZE_STRING);
} else {
    // set error message and redirect back to form...
    header('location: subscribe_newsletter_form.php');
    exit;
}
$token = $_POST['token'];
$action = $_POST['action'];
// call curl to POST request
$ch = curl_init();
curl_setopt($ch, CURLOPT_URL,"https://www.google.com/recaptcha/api/siteverify");
curl_setopt($ch, CURLOPT_POST, 1);
curl_setopt($ch, CURLOPT_POSTFIELDS, http_build_query(array('secret' => RECAPTCHA_V3_SECRET_KEY, 'response' => $token)));
curl_setopt($ch, CURLOPT_RETURNTRANSFER, true);
$response = curl_exec($ch);
curl_close($ch);
$arrResponse = json_decode($response, true);
// verify the response
if($arrResponse["success"] == '1' && $arrResponse["action"] == $action && $arrResponse["score"] >= 0.5) {
    // valid submission
    // go ahead and do necessary stuff
} else {
    // spam submission
    // show error message
}
The most important part after form submission is to verify the token which is submitted along with the other form values. For that, you need to make a POST request to the https://www.google.com/recaptcha/api/siteverify URL. Also, you need to pass the secret key and token as the POST data. In the above example, we’ve used PHP cURL functions to make the POST request.
As a response, you’ll get a JSON object which contains the necessary information that you can use to verify. As discussed earlier, you should at least check three things to make sure the form is submitted by a human: success, action, and score.
How to Use the reCAPTCHA PHP Client Library
In the previous section, we discussed how you can handle form submission and validation in the subscribe_newsletter_submit.php file. In this file, we've used the core PHP code to call the Google API and verify the response from the Google server. Although it's useful to understand the underlying flow, usually you'll want to just use a ready-made library so you don't have to rewrite this commonly-used code.
In this section, I'll show you how to use the reCAPTCHA PHP client library to handle form submission and validation.
Go ahead and run the following command from your project directory to install the reCAPTCHA PHP client library.
$composer require google/recaptcha "^1.2"
Once it's installed, you just need to include the autoload.php file as shown in the following snippet.
In our example, let's revisit the subscribe_newsletter_submit.php file to make necessary changes.
<?php
require_once '/path/to/recaptcha/src/autoload.php';

define("RECAPTCHA_V3_SECRET_KEY", 'YOUR_SECRET_HERE');

if (isset($_POST['email']) && $_POST['email']) {
    $email = filter_var($_POST['email'], FILTER_SANITIZE_STRING);
} else {
    // set error message and redirect back to form...
    header('location: subscribe_newsletter_form.php');
    exit;
}

$token = $_POST['token'];
$action = $_POST['action'];

// use the reCAPTCHA PHP client library for validation
$recaptcha = new \ReCaptcha\ReCaptcha(RECAPTCHA_V3_SECRET_KEY);
$resp = $recaptcha->setExpectedAction($action)
                  ->setScoreThreshold(0.5)
                  ->verify($token, $_SERVER['REMOTE_ADDR']);

 // verify the response
if ($resp->isSuccess()) {
    // valid submission
    // go ahead and do necessary stuff
} else {
    // collect errors and display it
    $errors = $resp->getErrorCodes();
}
As you can see, we've instantiated the \ReCaptcha\ReCaptcha class which is provided by the reCAPTCHA client library.
Next, we've called a couple of methods like setExpectedAction and setScoreThreshold to set the incoming action and expected score values. Finally, we've to call the verify method to check if the $token variable holds a valid value.
The verify method returns an object which we can use to check if the verification went through successfully, As you can see, we've used the isSuccess method to check it. If the verification was not successful, you can use the getErrorCodes method to retrieve errors and act accordingly.
As you can see, it's fairly straightforward to use the reCAPTCHA client library to validate the Google reCAPTCHA v3.
This makes it easy to use Google reCAPTCHA v3 in your PHP web pages to detect and prevent spamming.
Conclusion
Today, we discussed how you can use one of the most popular anti-spam solutions on the web: Google reCAPTCHA v3. We created a real-world example to demonstrate how you can integrate it in a PHP website.
Check out some of the other free PHP tutorials we have on offer!
A lot of times when I am working with strings in PHP, it becomes important to check if a string contains another substring. PHP has a lot of functions to help you manipulate strings any way you like. We will be using some of these functions today to learn how to check if a string contains a specific substring.
Three new function have been added in PHP 8 to help us figure out if a string contains another substring. Please keep in mind that all these functions are case sensitive and checking for existence of an empty substring with them will always return true.
str_contains() which checks if a string contains a specific substring.
str_end_width() which checks if a string end with a specific substring.
str_starts_with() which checks if a string starts with a specific substring.
<?php

$sentence = "Dolphins and Elephants are intelligent animals.";

if(str_contains($sentence, "Elephants")) {
    echo 'Elephants are intelligent.';
}
// Elephants are intelligent.

if(str_starts_with($sentence, "Dolphins")) {
    echo 'Dolphins are intelligent.';
}
// Dolphins are intelligent.

if(str_ends_with($sentence, ".")) {
    echo 'There is a full stop at the end of the sentence.';
}
// There is a full stop at the end of the sentence.

?>
As I mentioned earlier, these functions perform a case sensitive match. You can also perform a case-insensitive match with them by first converting both the string and substring to same case using strtolower() or strtoupper().
These functions are ideal if you don't want to get any extra information about the substrings like their position. People who need extra information about the match should consider using the functions below.
Using strpos() and stripos()
You can use the PHP strpos() function to get the position of first occurrence of a subtring in a string. The function will return false if it cannot find the substring.
When you use strpos() to check for a substring make sure that you use the strict inequality operator. This is because the position returned by strpos() starts with 0 and 0 can also equate to false. Using a regular equality check will give you false negatives if the substring is right at the beginning of the main string.
Here are some examples of strpos():
<?php

$sentence = "Amy, Angela, Adam and Andrew are going to a party.";

if(strpos($sentence, "Angela") != false) {
    echo 'Angela is going to a party!';
}
// Angela is going to a party!


if(strpos($sentence, "Amy") != false) {
    echo 'Amy is going to a party! (1)';
} else {
    echo 'Amy is not going to a party! (1)';
}
// Amy is not going to a party! (1)

if(strpos($sentence, "Amy") !== false) {
    echo 'Amy is going to a party! (2)';
} else {
    echo 'Amy is not going to a party! (2)';
}
// Amy is going to a party! (2)

?>
As you can see in the above example, Angela is not at the beginning of our sentence so it would have a non-zero position which evaluates to true.
On the other hand, Amy is right at the beginning and its position 0 evaluates to false even though it exists in the string. Therefore, always make sure that you evaluate the value of strpos() with !== because there is no way to know where a substring might occur when dealing with strings in real life.
Sometimes, you might need to make this check of substring in a string case-insensitive. In that case, you can simply use the stripos() function in PHP. It works exactly like strpos() but makes the search case-insensitive.
<?php

$sentence = "Detect if this sentence mentions MaNGoEs.";

if(strpos($sentence, "mangoes") !== false) {
    echo 'There was no case-sensitive mango match!';
}

if(stripos($sentence, "mangoes") !== false) {
    echo 'There is a case-insensitive mango match!';
}
// There is a case-insensitive mango match!

?>
Using strstr() and stristr()
By default, the strstr() function returns a portion of the main string starting from the substring until the end of main string. It will return false if the the substring does not exist inside the main string.
We can use this information to check the existence of a substring inside a string. All we have to do is evaluate the value returned by strstr() and check if it is false or not. Just like last time we will be using the strict inequality operator !== to do the check.
Here are some examples:
<?php

$sentence_a = "Is 984523850 your number?";
$sentence_b = "No, my number is 984523850";

if(strstr($sentence_a, "0") != false) {
    echo 'The first sentence has a 0 in it.';
}
// The first sentence has a 0 in it.

if(strstr($sentence_b, "0") != false) {
    echo 'The second sentence has a 0 in it. (1)';
} else {
    echo 'There is no zero in the second sentence. (1)';
}
// There is no zero in the second sentence. (1)

if(strstr($sentence_b, "0") !== false) {
    echo 'The second sentence has a 0 in it. (2)';
} else {
    echo 'There is no zero in the second sentence. (2)';
}
// The second sentence has a 0 in it. (2)

?>
You can use stristr() in place of strstr() to make the search case-insensitive. All other behavior of stristr() stays exactly the same.
Final Thoughts
In this quick tip, we went over three different ways of checking if a string contains a substring in PHP. You can use any of these functions depending on what information you need from the string. Using the new PHP 8 functions will allow you to skip any type of strict checking but you will need to use the older functions if you want to know the position of the substring or get a part of the main string as return value.
You'll often want to work with dates and times when developing websites. For example, you might need to show the last modified date on a post or mention how long ago a reader wrote some comment. You might also have to show a countdown of the days until a special event.
Luckily, PHP comes with some built-in date and time functions which will help us do all that and much more quite easily.
This tutorial will teach you how to format the current date and time in PHP. You will also learn how to get the timestamp from a date string and how to add and subtract different dates.
Getting the Date and Time in String Format
date($format, $timestamp) is one of the most commonly used date and time functions available in PHP. It takes the desired output format for the date as the first parameter and an integer as a timestamp value which needs to be converted to the given date format. The second parameter is optional, and omitting it will output the current date and time in string format based on the value of $format.
The $format parameter accepts a series of characters as valid values. Some of these characters have straightforward meanings: Y gives you the full numeric representation of the year with 4 digits (2018), and y only gives you the last two digits of the current year (18). Similarly, H will give you the hour in 24-hour format with leading zeros, but h will give you the hour in 12-hour format with leading zeros.
Here are some of the most common date format characters and their values.
Character
Meaning
Example
d
day of the month with leading zeros
03 or 17
j
day of the month without leading zeros
3 or 17
D
day of the week as a three-letter abbreviation
Mon
l
full day of the week
Monday
m
month as a number with leading zeros
09 or 12
n
month as a number without leading zeros
9 or 12
M
month as a three-letter abbreviation
Sep
F
full month
September
y
two-digit year
18
Y
full year
2018
There are many other special characters to specify the output for the date() function. It is best to consult the format characters table in the date() function documentation for more information about special cases.
Let's see some practical examples of the date() function now. We can use it to get the current year, current month, current hour, etc., or we can use it to get a complete date string.
You can also use the date() function to output the time. Here are some of the most commonly used time format characters:
Character
Meaning
Example
g
hours in 12-hour format without leading zeros
1 or 12
h
hours in 12-hour format with leading zeros
01 or 12
G
hours in 24-hour format without leading zeros
1 or 13
H
hours in 24-hour format with leading zeros
01 or 13
a
am/pm in lowercase
am
A
am/pm in uppercase
AM
i
minutes with leading zeros
09 or 15
s
seconds with leading zeros
05 or 30
And here are some examples of outputting formatted time strings.
// Output — 11:03:37 AM
echo date('h:i:s A');

// Output — Thursday, 11:04:09 AM
echo date('l, h:i:s A');

// Output — 13 September 2018, 11:05:00 AM
echo date('d F Y, h:i:s A');

?>
It is also important that you escape these special characters if you want to use them inside your date string.
<?php

// Output — CEST201813am18 1115 Thursday.
echo date('Today is l.');

// Output — Today is Thursday.
echo date('\T\o\d\a\y \i\s l.');

// Output — Today is Thursday.
echo 'Today is '.date('l.');

?>
Get the Unix Timestamp
Sometimes, you will need to get the value of the current Unix timestamp in PHP. This is very easy with the help of the time() function. It returns an integer value which describes the number of milliseconds that have passed since 1 January 1970 at midnight (00:00:00) GMT.
You can also use this function to go back and forth in time. To do so, all you have to do is subtract the right number of seconds from the current value of time() and then change the resulting value into the desired date string. Here are two examples:
<?php

$ten_days_later = time() + 10*60*60*24;
// Output — It will be Sunday 10 days later.
echo 'It will be '.date('l', $ten_days_later).' 10 days later.';

$ten_days_ago = time() - 10*60*60*24;
// Output — It was Monday 10 days ago.
echo 'It was '.date('l', $ten_days_ago).' 10 days ago.';

?>
One important thing you should remember is that the timestamp value returned by time() is time-zone agnostic and gets the number of seconds since 1 January 1970 at 00:00:00 UTC. This means that at a particular point in time, this function will return the same value in the US, Europe, India, or Japan.
Another way to get the timestamp for a particular date would be to use the mktime($hour, $minute, $second, $month, $day, $year) function. When all the parameters are omitted, this function just uses the current local date and time to calculate the timestamp value. This function can also be used with date() to generate useful date and time strings.
<?php

$some_time = mktime(1, 1, 1, 12, 3, 1994);
// Output — It was Saturday on 03 December, 1994.
echo 'It was '.date('l', $some_time).' on '.date('d F, Y', $some_time).'.';

?>
Basically, time() can be used to go back and forth to a period of time, while mktime() is useful when you want to go to a particular point in time.
Convert a Datetime String to a Timestamp
The strtotime($time, [$now = time()]) function will be incredibly helpful when you want to convert different date and time values in string format to a timestamp. The function can parse almost all kinds of datetime strings into timestamps.
With relative datetime formats, this function can easily convert commonly used strings into valid timestamp values. The following examples should make it clear:
<?php

$some_time = strtotime("10 months 15 days 10 hours ago");
// Output — It was Sunday on 29 October, 2017 03:16:46.
echo 'It was '.date('l', $some_time).' on '.date('d F, Y h:i:s', $some_time).'.';

$some_time = strtotime("next month");
// Output — It is Saturday on 13 October, 2018 01:18:05.
echo 'It is '.date('l', $some_time).' on '.date('d F, Y h:i:s', $some_time).'.';

$some_time = strtotime("third monday");
// Output — Date on the third monday from now will be 01 October, 2018.
echo 'Date on the third monday from now will be '.date('d F, Y', $some_time).'.';

$some_time = strtotime("last day of November 2021");
// Output — Last day of November 2021 will be Tuesday.
echo 'Last day of November 2021 will be '.date('l', $some_time).'.';

?>
Adding, Subtracting, and Comparing Dates
It's possible to add and subtract specific periods of time to and from a date. This can be done with the help of the date_add() and date_sub() functions. You can also use the date_diff() function to subtract two dates and output the difference between them in terms of years, months, and days, or something else.
Generally, it's easier to do any such date and time related arithmetic in object-oriented style with the DateTime class instead of doing it procedurally. We'll try both these styles here, and you can choose whichever you like the most.
<?php

$present = date_create('now');
$future = date_create('last day of January 2024');
$interval = date_diff($present, $future);
// Output — 05 years, 04 months and 17 days
echo $interval->format('%Y years, %M months and %d days');

$present = new DateTime('now');
$future = new DateTime('last day of January 2024');
$interval = $present->diff($future);
// Output — 05 years, 04 months and 17 days
echo $interval->format('%Y years, %M months and %d days');

?>
When using DateTime::diff(), the DateTime object on which the diff() method is called is subtracted from the DateTime object which is passed to the diff() method. When you are writing procedural style code, the first date parameter is subtracted from the second date parameter.
Both the function and the method return a DateInterval() object representing the difference between two dates. This interval can be formatted to give a specific output using all the characters listed in the format() method documentation.
The difference between object-oriented style and procedural style becomes more obvious when subtracting or adding a time interval.
You can instantiate a new DateTime object using the DateTime() constructor. Similarly, you can instantiate a DateInterval object using the DateInterval() constructor. It accepts a string as its parameter. The interval string starts with P, which signifies period. After that, you can specify each period using an integer value and the character assigned to a particular period. You should check the DateInterval documentation for more details.
Here is an example that illustrates how easy it is to add or subtract dates and times in PHP.
<?php

$now = new DateTime('now');
$the_interval = new DateInterval('P20Y5M20D');
$now->add($the_interval);

// Output — It will be Saturday, 05 March, 2039 after 20 years, 05 months and 20 days from today.
echo 'It will be '.$now->format('l, d F, Y').' after '.$the_interval->format("%Y years, %M months and %d days").' from today.';

$now = date_create('now');
$the_interval = date_interval_create_from_date_string('20 years 05 months 20 days');
date_add($now, $the_interval);

// Output — It will be Saturday, 05 March, 2039 after 20 years, 05 months and 20 days from today.
echo 'It will be '.$now->format('l, d F, Y').' after '.$the_interval->format("%Y years, %M months and %d days").' from today.';

?>
You can also compare dates in PHP using comparison operators. This can come in handy every now and then. Let's create a Christmas day counter using the comparison operators and other DateTime methods.
<?php

$now = new DateTime('today');
$christmas = new DateTime('25 December 2018');

while($now > $christmas) {
    $christmas->add(new DateInterval('P1Y'));
}

if($now < $christmas) {
    $interval = $now->diff($christmas);
    echo $interval->format('%a days').' until Christmas!';
}

if($now == $christmas) {
    echo 'Merry Christmas :)';
}

// Output — 103 days until Christmas!

?>
We began by creating two DateTime objects to store the present time and the date of this year's Christmas. After that, we run a while loop to keep adding 1 year to the Christmas date of 2018 until the present date is less than the Christmas date. This will be helpful when the code runs on 18 January 2024. The while loop will increment the Christmas date as long as it is less than the present date at the time of running this script.
Our Christmas day counter will now work for decades to come without any problems.
Frequently Asked Questions About date() in PHP
There are some common questions about getting different kinds of information from the date() function in PHP that pop up every now and then. We will try to answer all of them here.
How Do I Get the Current Year in PHP?
You can get the current year in PHP by using date('y') or date('Y'). Using a capital Y will give you all the digits of the current year, like 2021. Using the small y will only give you the last two digits, like 21.
What Is the Right Way to Get the Current Month in PHP?
There are four different characters for getting the current month in PHP, depending on the format you want. You can use the capital letter F to get the full name of the month, like February, or get the month in a shorter three-letter format by using M.
You can also get the current month in numerical terms by using m and n, which will give you the month with and without leading zeroes respectively.
<?php

echo date('F');
// February

echo date('M');
// Feb

echo date('m');
// 02

echo date('n');
//  2

?>
How Can I Get the Day of the Week in PHP?
You can also get the day of the week in PHP by using four different characters. The capital D will give you a three-letter representation of the day of the week, like Mon or Tue. Using an l (lowercase L) will give you the full name of the day of the week.
You can get a numerical value between 0 (for Sunday) and 6 (for Saturday) for the days of a week by using w.
How Do I Get the Current Time in 12-Hour Format in PHP?
You can get the current time of the day in a 12-hour format by using g or h. With g, you will get the time without any leading zeroes, while h will add some leading zeroes. The AM or PM can be added by using a (for small letters) or A (for capital letters).
<?php

echo date('g:i:s a');
// 5:05:19 am

echo date('h:i:s A');
// 05:05:19 AM

?>
Can I Get the Current Time in 24-Hour Format in PHP?
Using the characters G and H will give you the current hour of the day in 24-hour format. You won't get any leading zeroes with G, but H will add leading zeroes.
<?php

echo date('G:i:s');
// 15:06:48

?>
What Is the Best Way to Escape Characters in a Date Format?
The date() function accepts a string as its parameter, but many characters have a well-defined meaning, like Y for year and F for a month. This means that using these characters directly as part of a string may not always have the desired results.
If you want the date() function to output these characters, then you have to escape them first. Here is an example:
<?php

echo 'Today is '.date("l the jS of F Y");
// Today is Friday 2804Europe/Berlin 19th 2021f February 2021

echo 'Today is '.date("l \\t\h\\e jS \of F Y");
// Today is Friday the 19th of February 2021

?>
Some of the characters, like t, need two backslashes because \t is meant for tabs. If possible, it is advisable to just put the regular string that you want to echo outside date(). Otherwise, you will be escaping a lot of characters.
Final Thoughts
In this tutorial, we learned how to output the current date and time in a desired format using the date() function. We also saw that date() can also be used to get only the current year, month, and so on. After that, we learned how to get the current timestamp or convert a valid DateTime string into a timestamp. Finally, we learned how to add or subtract a period of time from different dates.
I've tried to cover the key DateTime functions and methods here. You should definitely take a look at the documentation to read about the functions not covered in the tutorial. If you have any questions, feel free to let me know in the comments.
Do you want to use tables to visually present information in a user-friendly manner?
Table plugins save the time and headache that comes with creating tables from scratch. You don't need coding knowledge. The plugins are also responsive and mobile-friendly so the tables you create can be viewed on mobile devices.
On CodeCanyon you will find hundreds of premium WordPress and WooCommerce table plugins. In this post, I'll show you some of the best, and then I'll share some free alternatives.
An example of Table Management plugins for WordPress and WooCommerce available on CodeCanyon
Best-Selling Table Plugins for WordPress and WooCommerce on CodeCanyon
Grab one of these table plugins for WooCommerce and WordPress and add great-looking tables to your site today.
If you want to manage your tables and charts easily and flexibly, go for wpDataTables; the powerful responsive tables, spreadsheets and charts and data manager in a form of a WordPress table plugin.
wpDataTables comes with an Excel-like interface complete with editing tools. You can import Excel, CSV, or Google spreadsheets to editable tables. And since it's built to work with MySQL so you can show results of your queries even when datasets have millions of rows.
It fits natively into any device so you can choose which columns can be collapsed on mobile or tablet. What's even cooler is that you can configure advanced filtering for each column on your tables.
For chart rendering you can use one of three supported libraries: Google charts, Highcharts or Chart.js, alltogether providing 35 types of charts. Charts can be linked to a table so when you search and filter, the chart adjust dynamically. wpDataTables is compatible with WPBakery (formerly Visual Composer).
Table Rate Shipping for WooCommerce gives the ability to create clean, uncluttered shipping rate tables with multiple shipping option based on a variety of conditions including weight, length, width, height, surface area, and volume quantity. Pricing models come with numerous cost options that determine what price the customer pays at checkout. You can put the customer in control of the shipping price they want to pay by offering choices like ground shipping, next day delivery and so on.
This plugin is compatible with other great plugins like Polylang, Order Delivery Date Pro, and Currency Switcher. It's translation ready and comes with WPML multilingual support. It also works with any theme.
Unclear shipping information leads to many abandoned carts. Here is where WooCommerce Advanced Shipping come to the rescue! It will help you displaying shipping information in easy to understand tables that avoid confusion and allow your customers to click buy and complete their purchases without any hesitation. You can create your own shipping rates tables of different sizes and varying complexity. You can use conditional logic and also set conditions that are user-based, cart-based, and product-based. You have unlimited customization options to choose from that include shipping methods, shipping zones, advanced pricing conditions and so on.
What's a website without pricing table? Go Pricing allows you to create WordPress pricing or compare tables for your website. It comes with 250 premade tables to choose from so you don't have to create one from scratch. You can edit and customize your pricing tables from the admin interface by choosing from hundreds of customization options like colors, icons and more. There's a live preview window to see how your pricing tables will look in real-time.
To add some sass to your pricing tables you can include column animations to each and every column by choosing from 39 transition options. To make them even more engaging you can add images, audios, videos, and maps. Don't forget to take advantage of Google Fonts and match the pricing tables text to your website font.
League Table is a versatile database table WordPress plugin that allows you to create beautiful sortable and responsive tables inside your posts, pages, custom post types or widget area.
It's powerful list of customizable features include: 135 options per table, 17 options per cell, 13 general options, a spreadsheet editor to edit the table data and an advanced multi-columns sorting system.
Tablenator makes it a breeze to create tables for WordPress with shortcodes or the WPBakery Page Builder. This easy WordPress table creator plugin is equipped with an advanced table editor in a spreadsheet format that allows you to create tables in no time. Using advanced scripts you can make your tables interactive with sorting, search, and pagination features.
You can also make your tables responsive to fit in different mobile screen formats. It also comes with built-in shortcode generator so you can embed your table anywhere on your site.
Woo Product Table Pro is built with this idea in mind: product tables when done right make it easy for users to view products and place orders. This fully responsive and mobile-friendly WooCommerce table plugin is perfect for wholesale stores, product catalogs, order forms, restaurant orders, and more.
In fact, this plugin also comes with customizable, ready-made product display tables for particular online store businesses like: music store, book store, fashion store, jewelry store, accessories store. There is also a product table for restaurants for users to easily order food.
There is also a quotation table and wish list table. You can insert your tables anywhere with shortcodes.
Mighty Table is not a table creator plugin. Instead, it allows you to add sorting, search, filters, and highlighting functionality to your existing tables. You don't need to remake your tables, it works with the tables and content you already have.
The plugin auto-inserts a search box at the top of your tables. It auto-detects the type of data in each column to know whether it should sort it alphabetically or numerically. You can change the behavior of the filters so that instead of hiding the rows that don’t match the filters, the plugin will highlight the rows that do match them.
A product in your store can come in different color variations. By creating a variations table using WooCommerce Variations Table, you can display this product in all its different colors on your website.
On your product variation tables you can activate features that make it easy for customers to search, sort, and filter. You can show data like images, SKUs, size, price, color and quantity available.
You can also add paging and scrolling if you don't want to the product page to get too long.
Look no further than Coinpress if you want to instantly integrate real-time cryptocurrency data on your website. This plugin provides you with advanced cryptocurrency tables and over 2200 automatically generated coin pages. The tables contain data like real-time price, market capitalization, volume, supply, charts, historical data, markets, calculators, social feed, comments, and more.
There are premade coin description, website, explorer, and social links built into the coin editor. You can customize every aspect of Coinpress and tailor it to fit in with look of your website. You can also do SEO optimization on dedicated coin pages to rank higher in search engines.
Free Table Plugins for WordPress
If these premium table plugins for WordPress are outside your budget, there are some free table plugins you can try. These plugins come with a lot of features that will help you create tables for your website. However, if you need advanced features you will need to pay for the premium versions.
WP Table Builder is a drag and drop table builder plugin for WordPress. It’s very easy to create responsive tables with WP Table Builder. It's perfect for creating comparison tables, pricing tables, list tables, and more.
WP Responsive Table makes HTML tables horizontally scrollable on a small screen. The table is horizontally scrollable in its own container, which fits the screen. The plugin works out of the box, so there's no need for additional settings. It works with regular HTML tables in the Classic Editor or in Gutenberg.
Data Tables Generator is a highly-rated, free, responsive table plugin for your data. From the admin panel you can generate interactive graphs, and interactive charts with sorting and filtering. You can also print or export to PDF, CSV, and Excel spreadsheets.
Woo Product Table allow you to show all your products in a table with a simple shortcode. This fully-responsive plugin is easily customizable by changing settings like the color, background, title, padding, or margin.
Quackit is a free HTML table generator that helps you generate tables on the fly for WordPress or HTML.
Tips for Creating Readable Tables
So how do you design tables that are effective at conveying information?
1. What Is Your Table For?
Think about the purpose of your table.
Is it a pricing table?
Is it a product variations table?
Is it shipping price table?
Ultimately, if you're running a business, the purpose of all this information is help visitors make a decision that leads them to purchase. You want them to be able to understand your information fast so they can make their decisions.
2. Not Everything Should Be a Table
Not all information in your dataset should be presented in a table. The most important question to ask is:
What is the key information you want to present to your website visitors?
How do you present it with clarity?
3. Keep it Simple
It's easy to get lost on table designs and forget what tables are meant for. Tables are tools for visually displaying information in a way that visitors to your website can easily understand.
Readability is key. Make it your priority.
Remove visual clutter to avoid distracting the eye.
The focus should be on the information and not on the table itself.
Start Building Tables on Your Website Now!
In addition to table plugins you will find thousands of other high-quality WordPress plugins on CodeCanyon that can help enhance your business's website. Have a look through this large collection of plugins, and you'll find helpful plugins in all different types of categories, from marketing to eCommerce to social media.
Find the perfect WordPress plugin to help your business succeed and motivate your customers. You can find even more plugin ideas and inspiration in our new free course on finding the best WordPress plugins for your site.
If you're a WordPress developer, you know how important it is to have a wide selection of digital assets in your toolbox.
With thousands of items all in one place, Envato Elements is just the resource you need, and you can download as many assets as you want, as often as you like, for a single affordable monthly fee.
What's more, all downloaded items are covered by a single license that gives you broad commercial rights when using the items you download.
Get 1 Month Free!
Exciting news for WordPress developers: for a limited time, Envato Elements is offering free access to all the WordPress resources you need, for a whole month. Download as many premium WordPress themes and plugins as you want, along with photos, fonts, graphics, and much more.
To secure this special deal, just sign up using this special link. Or enter this code when you register:
coupon_code=elements_cont_tuts-freemonth1-4kumwn
If you have any doubts that Envato Elements is for you, here are the reasons every WordPress developer needs to sign up for this service today.
unlimited premium themes to download
unlimited advanced plugins
unlimited fonts for a stylish site
unlimited icons and graphics for website design
royalty-free stock photos and videos
logos
the Elements plugin for WordPress
Unlimited Premium Themes to Download
With over 1,000 WordPress themes to choose from in our library, I'm sure you'll find what you need. From blog and eCommerce templates to minimalist and multipurpose WordPress templates, we've got them all. Here are some of our favorites:
Blogosphere is one of our most popular WordPress themes. This premium WordPress theme was designed to make blogging easier and prettier.
The theme includes several blog layout styles, is Gutenberg ready, and is fully integrated with WooCommerce. This blogging WordPress theme can be adapted to any niche. Or you can activate its ready-to-use demos:
The wonderful thing about using a ready-made theme is that it can help you cut out a lot of the grunt work that goes into building a site from scratch and focus your energy instead on making modifications that will make your site unique.
Envato Elements has hundreds of wonderful themes that will help you do just that, like Bonfire, a multipurpose WordPress theme that features 14 beautiful pre-defined homepages and is perfect for a wide range of creative businesses.
Bonfire is based on the Redux framework and works with loads of popular plugins like Visual Composer, Slider Revolution, Ultimate Addons for Composer, WPML, and Mega Menu.
One Theme is a stunning business and event theme that has countless customisation options. The theme comes with eight home pages, 30+ inner pages, and 25 additional elements.
Eunice is a stylish, attractive, and bright photography theme that will help you showcase your artwork. The theme features photo layouts such as full-width sliders, grids, masonry, ribbons, and albums.
This theme was designed so you can easily promote your apps, launch products, promote events, and much more! App Landing comes with three professionally created home pages that are sure to impress.
The clean and minimal Zuka theme has ten unique demos and more than ten header layouts, as well as testimonial displays, team pages, and many other useful features. The theme comes with a simple drag-and-drop editor that easily allows you to customise your entire website.
Unlimited Advanced WordPress Plugins
Browse through a library of more than 600 plugins for WordPress websites. Do you need a slider? A Pinterest plugin? WooCommerce plugins? Download as many as you need with your subscription.
This WordPress plugin is one of the most popular plugins for a reason. If you run a WordPress blog, you know how important it is to integrate Pinterest. This plugin allows you to display your own profile pins and boards from Pinterest on your website.
The purpose of this WordPress plugin is to showcase your ideas and inspire your visitors and clients. Try it today!
Another reason to use Envato Elements is to access its awesome collection of plugins like the Next Post Fly Box for WordPress featured here. Next Post Fly Box is a lightweight WordPress plugin that creates floating boxes with the next and previous blog posts. The box content settings allow you to display a featured image, post title, excerpt, and a close button. This handy plugin also supports custom post types and post categories.
The ZoomSounds HTML audio player features nine skins and multiple layouts. All that is required to add this powerful audio player to your website is a simple shortcode.
The default WordPress eCommerce plugin, WooCommerce, can be quite slow at times, which makes for a sub-optimal customer experience. WooCommerce Quick Order Plugin helps fix this issue by allowing your users to purchase your products faster!
Quickly and easily create complex FAQs for your customers with this WordPress plugin. Unlike the classic FAQs, you can have your users generate new questions based on their input, which will help you build a more thorough database of FAQs.
Super Forms allows you to create a custom form that redirects to the PayPal checkout page. This is ideal if you have a website that deals with subscriptions and need to use a popular payment processor.
Unlimited Fonts for a Stylish Site
As a WordPress developer, you know the importance of fonts and typography. Download as many as you need here. Whether you need serif, sans-serif, script, or decorative, there are thousands of premium fonts waiting for you.
If you need a beautiful, strong cursive font that makes a statement, Saekana Script fits the bill. A great font for logotypes, titles, and website headers, this big, bold script will certainly command attention in places where you need it. Saekana comes in two styles—rough and clean—and contains a full set of lower and uppercase letters and a large range of punctuation and numerals.
Alternatively, if you're looking for a simple and beautiful sans serif font for your logo design, website title, or headers, QARVIC is a terrific choice. It has two types of letters—plain type and type grunge—and also comes with outline icon characters. The font contains a full set of lower and uppercase letters, multilingual characters with accents, punctuation, and numerals.
This beautiful and fancy handwriting typeface can work for all types of businesses. Clarion is a single-weight font with the standard OTF, TTF, and web fonts.
Original is a minimal and vintage typeface that is perfect for logos, artwork, headers, and business cards. The font also features numerals and symbols.
Every WordPress developer needs a set of icons in different styles they can access for different purposes. Happily, with your Envato Elements subscription, you have access to an endless pool of icons in every style imaginable. All, like the Graphic Design Line Icons set featured here, are provided in transparent PNG files and are easy to customise using any vector software like Adobe Illustrator.
Don't wait until you need terrific graphics to scramble to find them. With Envato Elements, you have access to any number of graphics that are super simple to incorporate into your website. This Happy Children Swimming in the Sea graphic is just one of many vector illustrations available that will save you the hassle of searching for an illustrator or spending hours hopping from one site to the other to find illustrations that are just right for your purpose.
This set of modern education icons is a must-have if you are running any sort of educational or tutorial website or app. These graphics are sure to make your website look more visually appealing.
This fully editable and customisable icon set will work perfectly for mapping interfaces, navigation apps, and website designs. It includes all sorts of icons, including pins, pointers, highway signs, markers, and much more.
This high-quality icon pack contains 15 bank and finance icons. You'll find pound, euro, calculator, piggy bank, pie chart, bar chart, and money bag icons in this set.
This simple set of black and white icons is very versatile and will make any app or website that you put it on more attractive to your users. Included is an SVG file for each icon.
Logo Templates With Unlimited Downloads
Browse through a library of more than 10,000 logos you can edit in any design software. Here are some of the best logo templates.
If you've got a veterinary WordPress website, you'll love this minimalist logo. It's vector-based, which means it's fully editable and scalable without losing resolution. Edit this awesome and simple logo in Adobe Illustrator.
This logo is perfect if you have a WordPress website for a wedding, or if you're a wedding planner. This logo is vector-based, and you can easily edit the text and colour.
Finding the right logo can be one of the biggest challenges when creating a new project. Happily, Elements has hundreds of ready-made logos to make your task easier. Apricity Logo Template, an organic style logo template suitable for any business or product, is just one of many available with an Elements subscription. The template is easy to customise. You can change the size and colour and alter the text as you like.
This gorgeously delicate logo is another reason Envato Elements is useful for WordPress developers. With this kit, you get 18 logo designs, 17 icons, and 13 watercolour elements, and what's more, you can remove any elements you don't need and modify everything to make it work with the brand image you're creating. All files are well organised and fully editable.
This fully customisable logo comes in Adobe Illustrator format. Whether you need to change the shapes, text, colours, fonts, or positions, you will have full control over this modern and sleek-looking logo.
Royalty-Free Stock Photos
Did you know there are over one million photos in the Envato Elements library? As a WordPress developer, you've got to have the best royalty-free stock photos available. Here are just some of our top categories.
A WordPress cooking blog or recipe website needs the best food stock photos. This is just an example of the kind of royalty-free stock photos you'll find in the Food collection.
The beautiful landscapes section contains stunning photographs of some of the most amazing landscapes across the globe. If you need to display a landscape on your website or app, then you must check out these photos.
Need to display spectacular images of big cities? The Big City Vibes section of Envato Elements has plenty of images to help you create an eye-catching experience for your users.
A well-chosen photograph can make a huge difference to the success of your project. With your Elements subscription, you can now take advantage of the hundreds of thousands of new royalty-free stock photos available at Envato Elements and take your project to a whole new level.
Unlimited Royalty-Free Stock Videos
The same goes for video, which is often far more expensive to source than still images. Give yourself the best chance of finding the right video footage for your website, when you access the hundreds of royalty-free stock videos at Envato Elements.
With over 300,000 videos, the People category is a popular one in the stock videos. If you need couples, friends, families, or any kind of video stock featuring people, don't hesitate to go there.
Take advantage of our wide collection of holidays video stock footage for your WordPress website. This is great for a travel blog, travel agencies, and more.
If you need to create a corporate and business video, Envato Elements has you covered. You will find over 60,000 premium videos to download in this stock video section.
Adding cartoon footage to your videos is a great way to engage your audience. The library of cartoon videos available on Elements is sure to have a cartoon that will fit in your next video.
Slow-motion videos can add quite a bit of interest to your videos or can make great website background videos. You can choose from over 5,000 captivating videos for your next project from the Envato Elements library of slow-motion videos.
Bonus: The Elements Plugin for WordPress Makes It Easy
To make Elements even more accessible to WordPress users, Envato has developed an elegant new plugin. The Elements WordPress plugin currently offers scores of template kits, which together contain over 1,000 well-designed templates you can use while creating a WordPress site.
Because it's designed to work seamlessly with popular WordPress page builders such as Elementor and Beaver Builder, you won't have to write a single line of code while using it.
Creating professional-looking static pages for a WordPress site is hard, even for an experienced web developer. It involves tasks such as designing responsive layouts, finding appropriate creative assets, and acquiring the right licenses to use them. If you've ever tried doing all these tasks on your own, I'm sure you understand how time-consuming and expensive they can get.
With the Envato Elements WordPress Plugin, you'll be able to perform all these tasks with just a few clicks. This unique plugin gives you immediate access to hundreds of free template kits and over 700,000 premium royalty-free photos right inside your WordPress admin panel. By using it alongside a page builder plugin such as Beaver Builder or Elementor, you can create stunning pages for your site in minutes.
Choose as Many WordPress Assets as You Like Today
Now you know some of the reasons that make Envato Elements an indispensable asset for WordPress developers. There are countless tools and resources that you can download, all with an Envato Elements subscription. If none of the items I’ve shared with you here catch your fancy, there are thousands more to choose from at Envato Elements, and you can download as many as you like for one low monthly price.
This post has been updated with contributions from Maria Villanueva, a journalist and writer with many years of experience working in digital media.
With almost a third of all online stores running WooCommerce, it's become a powerful tool for online business. Once you begin to use it, you'll quickly see why it's the most popular eCommerce platform on the web.
Using WooCommerce in its standard form is great. It hasn't climbed to these kinds of heights without being a powerful tool or a solution that isn't complete.
But because it has such a large user base and it is flexible, the number of plugins that augment WooCommerce is breathtaking. Building a more custom, robust, useful, and profitable business using WooCommerce is easier now than ever.
One great way to level up an eCommerce build is to add new ways to handle pricing and shipping, such as with a WooCommerce dynamic shipping calculator or, perhaps, WooCommerce price-based shipping. There's a number of products being sold online, so it makes sense that the ways in which they are priced and shipped are diverse as well.
On Envato Market, you'll find all of the best available WooCommerce pricing and WooCommerce.
To help build a better experience for both shopkeepers and customers, here's 37 of the best shipping and pricing WooCommerce plugins. Whether you need WooCommerce price based shipping, a shipping calculator WooCommerce plugin or a WooCommerce delivery charges plugin, explore the options set out below.
Adding WooCommerce pricing plugins to a WordPress WooCommerce-powered website is a great idea. Sure, running the standard WooCommerce is just fine, but dig into these different pricing plugins and see how much more powerful they are. Not only for more sales, but to run an efficient business.
Here are several different pricing WooCommerce plugins that are well worth considering:
The beauty of e-commerce is that you can sell to customers around the world. Whilst currencies such as Sterling, Euros or Dollars are understood by many, for successful WooCommerce pricing it's even better to price products in the currency of the customer. Francs, Kroner, Yen and more.
WooCommerce Currency Switcher is a multi-currency plugin that allows multiple currencies to be set in real-time.
Another great WooCommerce pricing plugin, this multi-currency switcher helps customers to see store pricing in their local currency.
The exchange rate may be set automatically or manually. Further, by using geo-location, this multi-currency plugin defaults to the correct currency for the customer's locale.
Control which currencies are shown, how currency symbols are displayed and whether exchange fees should be applied along with a whole host of other tweaks and customizations.
WooCommerce Dynamic Pricing and Discounts is an excellent all-in-one solution.
Benefit from a number of options to replace multiple tools. This plugin handles sales, special offers, bulk pricing, bundles, wholesale, loyalty programs, and so much more. There are thousands of different combinations ready for you to try!
The WooCommerce Pricing and Discounts plugin is an incredibly flexible pricing and discount plugin that sets prices and discounts dynamically.
Whether you want to set prices and discounts for what is currently in the cart, a specific time period, or for a specific amount that was spent, this WooCommerce plugin does it all.
Here are some of the plugin's main features:
dynamic price display
advanced quantity or amount spent strategies
hide products' prices and make them unpurchasable
set time periods and user roles
If you're looking for a flexible, all-in-one pricing solution for your business, then WooCommerce Pricing & Discounts is a must-have plugin.
WooCommerce Deposits: Partial Payments Plugin is designed for partial payment integration in WooCommerce.
Customers log in to pay the remaining amount, and the initial payment is set up as a fixed price or percentage. It's also a great plugin to combine with WooCommerce Bookings.
Editing product data is a very time-consuming process. With WOOBE, you have a robust and flexible way to edit products in bulk, making the product editing process quick and easy.
The WooCommerce Pay Your Price plugin has multiple uses. It can be used to accept donations, create a unique sales experience, or test the marketability of your products.
The concept is simple: users pay their own price.
Of course, there are several features that give you the flexibility to tweak it to fit your specific needs:
use it for simple products, subscriptions, and variable products
Setting up the pricing for various discounted items quickly becomes complicated.
Adding discounts to certain products, creating discounts for buying in bulk, and having buy-one-get-one-free discounts are all easily accomplished with the help of the WooCommerce dynamic pricing plugin, NextGen.
NextGen's main features:
product pricing and discounts
cart discounts
checkout fees
customizable discount slider
discount shortcodes
This handy plugin allows you to set up as many types of discounts as you'd like with an easy-to-use interface.
The Improved Sale Badges for WooCommerce plugin transforms the default WooCommerce sale badges into attractive badges that will grab customers’ attention instantly.
Modify the badge styles based on the items you have for sale, or the season or holiday, using the great presets included in the plugin. The plugin seamlessly integrates itself into the WooCommerce interface.
User SuperCoolTotes says:
“Quality plugin. Works as expected with lots of customisation options. Regular updates with new features. Using with Flatsome theme, works with no problems.”
WooCommerce Volume Discount Coupons provides automatic discounts and coupons based on the quantity of products in the customer’s cart. Volume discounts are only effective if customers know they exist, and this extension ensures they’re aware by displaying discounts directly on relevant products.
WooCommerce Coupons Countdown is a WooCommerce coupon code plugin that provides attractive coupon codes and lets you show real-time countdown counters on an e-commerce site.
It's an effective marketing technique. A sense of urgency in shoppers by making them aware that a bargain is about to expire.
User bertlio says:
"I was searching for a coupon plugin that offers these specific features and I'm so glad it works so well! Easy, effective and opens a world of possibilities!”
WooCommerce Social Reward and Coupon provides you with a way to reward customers when they share or like your products on social media with discounts and coupon codes.
User communiquemedia says:
“What can I say your solution is neat and it works both technically and as a sales tool. Without the social reward plugin, sales and social interactions dropped.”
You can also allow your customer to choose between gifts, allow coupons to be automatically added to the user’s cart, and allow a cart discount to be applied based on quantity or subtotal of matching products.
User yanikphoto says:
“Adding free products automatically to cart has increased our sales by 20%! Love this plugin!”
Custom WooCommerce Discounts provides a flexible method for offering discounts to customers in your online store. It also allows you to set various conditions for applying discounts to different products.
Everyone wants sales, but nobody wants to talk about shipping. In actuality, shipping is where more money can be saved and customers feel more empowered.
And if customers are paying less for shipping, that gives them more money to spend on your products, instead of sending money to the shipping company.
Here are several different shipping plugins that approach shipping in many different ways. You're sure to find something that fits your need at Envato Elements.
WooCommerce Multi Locations Inventory Management is a plugin option to manage product stock from multiple locations for a WooCommerce Store.
Customers check a product’s availability based upon the location of a product. The plugin detects the nearest product location and availability based on the shipping address.
This allows you to manage stock across multiple stores, warehouses or other locations.
This is an amazing WooCommerce shipping plugin to complement any online store.
WooCommerce Sales Map displays the locations to which you've sold products. This can be defined per country or as precise as per city, all via an easy to add shortcode in the WordPress editor.
Locations are determined automatically from the shipping address entered by the customer. And configure whether you prefer to use standard Google map pins or a custom marker.
Having a comprehensive and up-to-date order management system is vital for any online store's success.
Currently, there is no way to record which items in an order have been shipped. Ultimately, this affects the relationship between a business and the customers in a negative way.
With WooCommerce Partial Orders, you'll be able to record which items in an order have been shipped, improving the relationship with customers.
Here are some of the important features of the plugin:
This is a great feature to add for your customers and build customer loyalty. The Shipping Details Plugin for WooCommerce allows customers to enter a shipment tracking number and track their order—as well as email when the order is marked complete.
Dropshipping isn't something every WooCommerce website needs...
But if you do, you'll want WooCommerce Dropshippers.
"For every sale made, the dropshipper will receive a mail notification with the customer’s address where to ship the goods. After the shipment is complete, the dropshipper will be able to notify the store admin of the completed operation."
Set up your own list of conditions and costs used to determine shipping options for your customers using the Table Rate Shipping for WooCommerce.
"This table rate method for WooCommerce has the ability to add multiple rates for a given customer based on a variety of conditions set by admin. These can include shipping destination, cart subtotal, item shipping class, price, weight, and so much more."
Not only is it one of the best table rate shipping plugins for WooCommerce, it's one of the best shipping WooCommerce plugins.
Features include:
create multiple instances and options per method and add shipping titles and descriptions
add conditions like price, quantity, weight, dimensions, shipping class, categories, specific products, and dates
numerous cost types, including flat, percentage, and different multipliers
This feature-rich WooCommercce shipping plugin provides a hassle-free experience when managing the shipping for an online store.
The plugin uses simple rules to help you manage the shipping of products, which fits the needs of any specific business.
"This is a very robust plugin that is well supported. If you are looking for a tool to calculate delivery rates based on distance, this plugin will do it. The author was very helpful and prompt in fixing the issues I had on my site."
Check out some of the important features of this WooCommerce WordPress plugin.
Allowing customers to have more than one address associated with their profile is very handy.
If you only allow one address, it's a bother for users who may want to send a gift to a friend or loved one, as they have to "update" their address details to send the shipment to any other place than their personal address.
WooCommerce Multiple Customer Addresses shatters that bothersome mechanic and allows customers to associate multiple addresses to their profile!
Features include:
apply different addresses for different products in the same cart
switch billing and shipping addresses in the checkout
The WooCommerce Weight-Based Shipping is an especially important WooCommerce shipping plugin for businesses dealing with heavy products.
"Weight Based Shipping is a simple yet flexible shipping method for WooCommerce focused mainly on cart weight (but not limited to) to calculate shipping cost. Plugin allows you to add multiple rules based on various conditions."
While the WooCommerce Cart-Based Shipping plugin does include some elements of weight-based shipping, its focus is a little different in its options. The shipping calculation hinges on three methods:
subtotal price
number of items in the cart
total weight
"For example, the higher the subtotal or weight of the cart, or the more items a customer is purchasing, the higher the shipping rate may be."
Features include:
multiple instances based on WooCommerce shipping zones
This has got to be one of the more remarkable shipping WooCommerce plugins.
You can charge shipping based on distance with the WooCommerce Distance Rate Shipping plugin. This is the perfect plugin for WooCommerce-based businesses that deliver their own goods.
Adding free shipping to products in your store is a powerful way to entice customers to make a purchase.
WooCommerce has very limited functionality when it comes to setting up free shipping for your products.
With Conditional Free Shipping, you'll have the freedom to set up free shipping based on a wide range of settings of your choice. This includes setting up free shipping by the number of items in a cart, by specific country, or by product categories. Conditional Free Shipping will allow you to set up the free shipping that fits your particular business model.
This WooCommerce plugin even allows the display an encouraging message above the shopping cart to motivate customers to purchase.
WooCommerce Advanced Shipping allows you to create your own shipping rates based on specified conditions like weight, quantity of items, country, etc. This gives you flexibility in what you charge and when.
User eyelabgr says:
Very nice plugin that gives you a lot of flexibility when it comes to shipping choices and charges. I've been using it for about a year without any problems.
It provides customers with live shipping rates in their shopping cart and at checkout, allows you to create Canada Post PDF Shipment Labels, and offers up-to-date package information from Canada Post’s Parcel Tracking service.
It can be used to ship within Canada as well as worldwide.
User Afsaneh says:
“The support is very efficient and the plugin simple and very well developed. This is the best solution (price and features) for using Canada Post.”
WooCommerce Cart Based Shipping works alongside a WooCommerce store by adding a new shipping method directly to the WooCommerce settings that allows you to set different shipping rates based on the items a customer has in the cart.
The three calculation methods are: by the number of items in the cart, by the subtotal price, and by weight. For example, the higher the subtotal or weight of the cart, or the more items a customer is purchasing, the higher the shipping rate may be.
User designpoint says:
“This is a simple, inexpensive plugin that does exactly what it says.”
WooCommerce Product Filter is an all-in-one filter for WordPress ecommerce plugins that offers unlimited options for customers to filter by any criteria to find exactly what they’re looking for.
The WooCommerce plugin is quick and easy to set up, and the admin user interface makes it a breeze to fully customise how the filter looks and works.
User 119creative says:
“This plugin has been a life-saver for me! I had a request from a client and this was exactly what I needed! It took me a while to get up to speed with it as I hadn't really needed to create anything like this before, but the customer support was awesome ...very quick and very detailed! It helped me get things working exactly how I needed them to in no time at all!”
This WordPress eCommerce plugin allows you to perform tasks like easily creating discounts for a large number of items, creating product variations, changing stock, editing attributes, or changing product images. Products and variations are displayed in a spreadsheet-like table and can be edited in bulk or individual cells.
User onsens says:
“This should be in WooCommerce by default. It boosted my productivity by nearly 100% as it is way easier to add and edit products with this plugin. Customizability is pretty high as well.”
WOOF extends the capacity of the WooCommerce plugin by enabling site visitors to search products by categories, custom product attributes, tags, custom taxonomies, and price.
User stay_rad says:
“Excellent support and the plugin works exactly as I needed it to. Thanks so much!”
WooCommerce Extra Product Options allows you to extend the functions available in the WooCommerce plugin by adding additional product pricing options and add-ons, applying conditional logic to your forms, adding extra styles, image swatches, buttons and other features, as well as being able to control the placement of your new fields within the Form Builder.
User steventaitinger says:
“This WordPress plugin is incredible. It is well designed, simple to use and effective at doing what it says. The author responded quick to detailed pre-purchase requests and after purchase with tips for using its custom CSS option on my site. The price is amazing for what you get! I tried 6 or 8 other options alongside this and this one had not only the best value but also the best options I was looking for.”
Conclusion
As you can see, there are many different shipping and pricing WooCommerce plugins, not to mention the many other types of WooCommerce plugins found on CodeCanyon.
If you're selling a product online that needs to be shipped, you will more than likely find what you're looking for in this list.
This list helps you build a better eCommerce platform, or at the very least, start you thinking about what exactly you can do to level up an online business.
If you want to learn more about how to use WooCommerce, take our free course with Rachel McCollin. You'll learn everything you need to know to set up a successful online store.
Directories are a popular and profitable kind of website. Directory websites list products and services for users to browse. They are databases that deliver information based on location and category. They can contain a large amount of data in the form of listings under different categories.
Directory websites come in all sizes and shapes: complex, simple, local, national, global, or niche. Some well-known examples of directory websites include Yelp, Angie’s List, Craigslist, TripAdvisor, Amazon, and many more.
If you want to start a directory website, the best place to begin is identifying a niche in your local area. You can make money by charging listings for normal or featured listings. You can also earn money by displaying advertisements or offering membership packages.
However, keep in mind that creating a custom directory website can be a massive undertaking that costs a ton of money. Directory plugins are the best and cheapest option. Their authors have thought of just about anything a directory website will need.
In this post, I’ll show you some premium directory plugins available on Envato Market.
Simple Directory Pro is a multi-purpose WordPress directory plugin powered by Google Maps.
One of the best directory plugins for WordPress, you may create both a single page and a multi-page business directory where the listings include maps and distance search.
Employ this plugin as a map only, as a store locator, a staff directory, employee director, store finder, restaurant finder, local business directory or any other geographical directory requirement that you have.
It also supports paid listings and claim listing functionality through PayPal and Stripe payment functions.
If you're looking to deploy the best directory plugin for WordPress, then ensure you take a look at Everest Business Directory. It's one fo the best directory plugins for WordPress to create. and manage business directories.
It's a complete management system for frontend directory submission, directory listing, editing and more.
Everest Business Directory is an advanced plugin with powerful features, ample options and a number of elegantly designed layouts. Everything that you need to create an outstanding business directory.
DT—Directory WordPress plugin is suitable for a number of different directory applications, whether you're looking for a WordPress store directory plugin or something else.
DT—Directory WordPress plugin can produce a map output, a data output and a combined map and data output with visitors being able to search both map and data to find the information they need.
This directory allows visitors to claim and verify their listings with monetization possible. Further, integrate ads and reviews and ratings if appropriate for the directory you're creating.
Web 2.0 Directory Plugin is a multi-purpose WordPress directory plugin. Use it to build classified ad websites, events directories, listings for cars, bikes, boats and other vehicles, restaurants directories, real estate listings, wedding directories, yellow pages, local directories, and more.
That’s not all: Web 2.0 Directory Plugin converts any existing website into a full-featured directory.
Some features of this multi-purpose directory plugin include:
fully compatible with WPBakery (Visual Composer) and SiteOrigin page builders
customizable search by content field and location-based search
CSV import/export/update with the ability to import image files
ability to include YouTube and Vimeo video attachments for listings
Google Maps and MapBox (OpenStreetMap) integrated
SEO friendly—fully compatible with Yoast WordPress SEO plugin
integration with WooCommerce, PayPal, Stripe, MailChimp, WPBakery (Visual Composer), and Yoast SEO
13 language files in the language directory inside the plugin: Russian, German, Japanese, Spanish, French, Chinese, Portuguese, Italian, Turkish, Dutch, Persian, Arabic, and Swedish
Using Directory Pro, earn money by charging for any of the following:
If you want to build any number of directories with a single install or easily clone and migrate directories by exporting and importing directory settings, then Directories Pro has got you covered.
Types of directories you can build with this versatile, feature-rich WordPress plugin include website directories, property directories, and community-driven local business directories like Yelp.com or Yahoo! Local.
Features:
Allow users to submit and manage their content from the front-end without going to the back-end dashboard.
Display listings on custom styled maps with advanced features such as custom area search, geolocation, and full-screen map.
Let businesses or users claim their own listings. A verified listing will allow them to edit their data and keep it fresh and relevant.
Use popular contact form plugins to add a contact form to listings. Supports Contact Form 7, WPForms, and Gravity Forms.
I tried other directory plugins in the past and this one is top of the line. Totally customizable, tons of features and support is remarkable. All at a great price.
Integration with WooCommerce, PayPal, Stripe, MailChimp, WPBakery, and Yoast SEO.
New listings will display with a new badge icon. The website administrator can set the number of days the badge icon will appear.
Create unlimited subscriptions and memberships, including a free account tier.
Offer coupons for signup or coupon packages and set coupon limits and expiry dates.
Users can interact with each other: for example, users can see who is interested in their listings and contact them directly.
Translatable with 13 language files in the language directory inside the plugin: Russian, German, Japanese, Spanish, French, Chinese, Portuguese, Italian, Turkish, Dutch, Persian, Arabic, and Swedish.
Unlike the other items on this list, Business Directory Ionic is not a WordPress plugin. Instead it's a mobile app with a powerful content back-end included. Together, these make a complete store and business listing solution.
Users can easily browse through businesses and stores using filters like category, name, or distance. Store and business owners can display and promote their products, services, news, contact information, and more.
Here is why you should use Business Directory Ionic for your directory website:
no code knowledge or tech development required
clean and user-friendly interface
highly customizable structure, with modular architecture
comes with carefully curated color themes
easy installation, detailed quick start guide
easily maintainable data, via the Firebase or Backendless GUI
free updates, with new features being added constantly
Once you install this plugin, it will automatically create all the necessary pages, email templates, and settings. You can also customize your own listing detail page with WPBakery (Visual Composer).
integration with WooCommerce, PayPal, Stripe, MailChimp, Visual Composer, and Yoast SEO
robust front-end submission system
create unlimited subscription and membership types including free accounts, one-time payment, recurring payment, free trial, paid trial, and variable payment packages
offer coupons with limits and expiry dates
users can see who is interested in their listings and contact each other directly
translatable with 13 language files in the language directory inside the plugin: Russian, German, Japanese, Spanish, French, Chinese, Portuguese, Italian, Turkish, Dutch, Persian, Arabic, and Swedish
Check out a live preview and see if this plugin is what you’re looking for.
The Hotel Listing plugin is a perfect choice if you’re looking to set up a directory website for listing hotels, motels, hostels, bars, and restaurants.
Once you install it, the plugin will create all the necessary pages, email templates, and settings. You can also customize your own listing detail page using WPBakery (Visual Composer).
Some features of this plugin include:
integration with WooCommerce, PayPal, Stripe, MailChimp, Visual Composer, and Yoast SEO
easy-to-use front-end submissions
unlimited membership types and plans
many options for creating and offering coupons
translatable with 13 included languages
Check out the live preview of this awesome plugin and see why user Ringdal says:
Lovely plugin which can be added to form a seamless feature on your website. Beautiful design and fantastic support. Thank you for designing something I had been looking for—for a very very long time.
The Everest Business Directory plugin is the easiest way to create and manage business directories. This advanced plugin is loaded with lots of powerful features that you need to create an outstanding business directory.
Some features of this plugin include:
Front-end directory submission: users can easily submit their business or product to your directory right from the front-end, using the simple submission form.
You can manage all your directory submissions right from the directory submission dashboard. You can label featured directories with a single click.
Highly configurable submission form: you can ask your users to add any details that you need, such as contact information or links to social accounts.
Elegantly designed form templates and advanced search, with options to search by keyword, location, category, and tag.
Advanced Google Maps integration for directory listing and the ability to pull addresses from Google Maps directly.
By far one of the best directory plugins. Easy to use, light weight, and comes with great customer service.
Understanding Directories
Suppose you’re on vacation in a city you’ve never been to before. You went to a popular website and read about the attractions the city offers. You read reviews of several hotels before booking one.
Now you want to go out for dinner. You check that popular app on your mobile to see what restaurants are in the area. A few interesting places catch your eye. You read reviews by customers who’ve eaten there. You decide on one that has the best ratings based on the reviews you’ve read. There is even a map to show you how to get to the restaurant from your hotel!
Or another scenario: imagine pipes in your house are leaking, and you have to find a plumber fast. You go to a website that lists plumbers in your area, see how they have been rated by other users, read some reviews, and find the right one.
Maybe you want to buy a car. You search through the massive online listings for cars available in your town.
When you rent an apartment or buy a house, you look on websites with local real estate listings.
If you want to buy a blender, you go to Amazon and search for blenders that fit your budget.
If you're looking for a job, you search through job postings on job websites.
Examples of directories are endless. They are the most popular kind of website.
Directory Websites Explained
Directory websites contain a massive amount of data in the form of listings under different categories. They list products and services and even personal information for users to browse. Essentially, they are databases that deliver information based on location and category.
You can list just about anything. Think WordPress Yellow Pages plugin, but it can be so more than just that.
Directories are curated listings. Directories are community driven. Directories produce user-generated content. Directories generate a lot of traffic!
Directories provide tools like robust search bars, searching by filters, pictures, location information with maps, product information, contact details, and more.
Some directories are public: to help customers find store or business locations, list the names of doctors and their specialties, etc. On the other hand, some directories are private for the internal use of a business or organization.
Types of Directory Websites
There are so many kinds of directory websites. If you’re looking to start your own, these niche examples should give you some ideas:
A plugin is a piece of software that allows you to add a specific function to your WordPress website. It saves you the time and headache of creating that functionality from scratch.
A directory plugin is a piece of software you add to your WordPress website to help you create your own directory website.
Why You Should Use a Directory Plugin
Building a directory website from scratch is a massive undertaking that will cost you a lot of time and money. Fortunately, directory plugins have all the groundwork covered, and they are very affordable.
Once you buy and install a directory plugin, you get many out-of-the-box features to get you started. Your main focus will be running your directory website.
Ways to Make Money Through a Local Business Directory
displaying advertisements
charging listing fees—normal listings and featured listings
membership subscriptions
booking and reservation—users trust directories and prefer to do the booking and reservation through them
What to Look for in a Directory Plugin
Front-end submission: An efficient and manageable front-end submission system is a must. This will make it easy for you to maintain the listings and will let you crowdsource listings.
Location-based searches with integrated maps: any directory that deals with physical locations, stores, or services will need location-based search and maps.
Tools for customers to rate and review businesses.
Ease of use: it needs to be easy to add listings and make changes to them.
Easy to customize: so it canintegrate seamlessly with the design of your website.
Compatibility across all browsers and devices—especially mobile devices, including touch responsiveness.
Integration with payment gateways.
Integration with email marketing platforms like MailChimp.
Ability to integrate with booking and reservation pluginsso visitors can book and reserve without leaving the directory.
Search engine optimization (SEO).
Shortcodes to make it easy to add a directory anywhere on your website.
Back-end tools—for analytics, generating reports, etc.
Finally, keep in mind that directories generate a lot of activity. High activity has the potential to slow down your website, which can turn off your visitors. Your hosting provider should have the capacity to handle it.
Build Your Directory Website with Envato
Directory websites are some of the most popular sites on the web. And they can be very profitable. If you’re looking to start one of your own, the plugins I have covered—and more—are available on CodeCanyon at Envato Market.
This one’s an important one: in this tutorial, you’ll learn how to backup your WordPress site.
If you’ve ever fallen foul of a server being hacked, or a hardware failure, or you’ve lost data during an update of some kind, you’ll know how frustrating (and potentially expensive) it can be. It’s vital that your WordPress website is regularly backed up!
How to Backup Your WordPress Site
Backing Up WordPress
Most hosting providers nowadays offer backups as standard, and if not as standard then at least as a purchasable addition to your hosting package. If you make use of this, then you might feel you don’t have to make your own backups—but it’s always worth being on the safe side, and I recommend you do!
WordPress Scheduled Backups by Your Hosting Provider
Before we go any further, let me just show you how my hosting provider backs up my WordPress installations. I use SiteGround (and you can get up to 70% off their managed WordPress hosting through Themeforest) and I always recommend it, though most managed WordPress options will offer something similar.
On the Security > Backups page on my SiteGround dashboard you can see every backup which has automatically taken place–in my case they’re scheduled to happen every afternoon. At the top of the page I can also trigger a manual backup if I need one right now.
For each of these backups, I have the option to restore:
all files and databases
files
databases
email
Automated backups like this are definitely a feature which you should look for when choosing a WordPress web host.
Backup Your WordPress Website With a Plugin
There are a bunch of plugins available to manage backups of your website, but arguably the most popular (with literally millions of installs) is Updraft Plus. Install and activate it by going to Plugins > Add New and then searching the WordPress repository for it.
Once installed (it’s free) you can follow the simple instructions to create your backups (check out the massive blue button):
Each time you make a backup, a copy of your website’s files and database will be made and saved in the location of your choosing (on the web server itself, your Dropbox, another web server via FTP, and so on). You can also set a schedule, so you needn’t give it a second thought.
How to Backup Your WordPress Website Manually
To backup your website manually, you need to do two things:
Backup the database
Backup the files
To backup the files, you need access to the server, either through your host’s dashboard (such as cPanel), or via FTP through an FTP Client of your choice (such as FileZilla). Here’s the File Manager in SiteGround, which enables me to explore the whole system and manipulate the files however I want.
To be sure your backup is going to be of use to you in the future, make sure you download the WordPress core files, plus the plugins and theme files too. Download the files to your computer, and then store them somewhere secure.
To backup the database, you’ll need access to the PHPMyAdmin where your WordPress database can be found. In the case of my SiteGround dashboard above, I go to Site > MySQL.
With your database selected, go to Export and then choose the kind of settings you want. A Quick Export Method is fine for us here.
Make sure the Format is set to SQL, and then hit Go. This will export an SQL file with all the contents of the database to your download location.
Conclusion
And that’s how you backup your WordPress website, in a couple of different ways! One thing to note: within WordPress itself, there’s a Tools > Export option. Whilst this can be useful, it’s far from complete as a backup solution. It only exports the content of the website, not the underlying website.
If you're putting a group of videos on your WordPress site, the standard features of WordPress handles image galleries well and does a good job of displaying single videos. Yet having a fully fledged video gallery is out of reach for default WordPress installations.
Fortunately, there's a number of useful plugins out there to get the video gallery you’re looking for while controlling the look and feel.
Consider what you require from a WordPress video gallery plugin.
What to Look for in a WordPress Video Gallery
There's quite a few video gallery plugins for WordPress, but finding the one that suits your specific needs can take a bit of research. It’s important to know what you’re looking for.
Here are some points to consider:
What kind of layout do you need? Will a standard grid do the trick or are you looking for a masonry-style display?
What video sources do you need to support? Are all of your videos hosted on YouTube? Or will you need to combine sources together, such as Vimeo, Wistia, or self-hosted videos?
Do you want to be able to mix media together in the gallery? Will you want to show video, images, or other file types side by side?
Are you looking for an out-of-the-box solution, or is customization important to you?
Without answering these questions first, you’re likely to fall into the trap of installing and uninstalling a number of plugins before finding the one that fits your needs.
Answering these questions helps in picking best solution from the outset.
Best WordPress Video Gallery Plugins
Let’s take a look at some of the best WordPress video gallery plugins on the market.
WooCommerce is an incredibly popular and powerful element of WordPress sites that is essential for anyone wanting to sell products and services.
And it's well known that photos and videos sell products online.
With this plugin, you may add as many videos as you wish from either YouTube or Vimeo. The video gallery has image zoom, arrow-key navigation and thumbnails.
The YouTube Video Gallery plugin builds upon WPBakery Page Builder to give you the ultimate in layout choices, choose from more than sixty!
It's fully HTML5 and CSS3 compatible and is WooCommerce ready so that you can customize with unlimited fonts and colours to integrate this video gallery plugin for WordPress into any site that you create or maintain.
Get started with grid, list or carousel designs and go from there with this responsive and retina-ready video gallery CMS.
This is a powerful and interesting way to add video to a WordPress site. It's a true 360º video player that gives you powerful ways to control and deploy WordPress video.
Stream video from YouTube and Vimeo, customize everything, include a video gallery, deploy on mobile devices and install in minutes. It includes support for integrating your own ads if required.
A truly engaging and immersive image and video gallery WordPress plugin!
Video Player 360 WordPress —Video Gallery DZS Add On
This hybrid grid-gallery solution has been around for a few years, receiving regular updates, including a recent optimization for WordPress Gutenberg.
Essential Grid Gallery Compatibility
One of the prime aspects of this plugin is how thorough testing is done by its development team when it comes to compatibility. Out of the box it works with all modern web browsers, and even supports back to Internet Explorer 9.
Essential Grid’s compatibility doesn’t stop with browsers, either. It’s also been optimized to work with a variety of website builders, including Elementor, WPBakery (previously Visual Composer), and Beaver Builder.
Easily Adjust Look and Feel
With this plugin, quickly create a great-looking gallery by choosing from one of the pre-built skins. Create your own custom skins as well, and they can be used by your galleries and grids throughout your site. Alter the existing ones with the built-in visual editor.
Wide Range of Media Support
Essential Grid Gallery doesn’t just support video (though it does that spectacularly!). With its content source selectors, you can create galleries that support videos from YouTube, Vimeo, and even self-hosted.
Its extendability allows for other media to be added as well, including images, media from popular social media platforms, WordPress posts, and more.
Next up, we have the Justified Image Grid: Premium WordPress Gallery. Like many of the plugins on this list, the Justified Image Grid is built to handle several grid and media layouts, but still excels when it comes to video.
This plugin is $27, is regularly updated, and boasts a 5-star rating with over 1,600 reviews. Let’s check out some of its features.
Visuals and Layouts
True to its name, this grid and video gallery plugin allows for a number of different visual styles, including a justified alignment that keeps everything lined up perfectly. There are also a handful of skins that come ready to use, with the ability to modify them thoroughly (including a module that integrates with WPBakery!)
Justified Image Grid rolls in a few interesting visual features, as well. For example, it provides automatic support for serving up thumbnails scaled for retina devices, and you can apply a variety of graphic effects to your media on the fly.
Media Sources and Additional Features
Being primarily a grid plugin, Justified Image Grid offers a lot of support for media sources right away. There are a variety of methods to pull in media for your grid from WordPress, NextGEN Gallery, Facebook, Flickr, and RSS feeds. On the video side, there’s support for videos hosted on YouTube, Vimeo, and self-hosted.
Besides just the number of sources available, this plugin brings a number of useful features to the table. WPML support, support for animated GIFs, and a number of performance optimizations make it a great solution.
Example of overlays and effects in Justified Image Grid
This grid-gallery combo gives you a variety of layouts to choose from, including the ever-popular masonry look. It also comes with a number of styles automatically, and a built-in visual editor to customize your design further.
This grid plugin contains everything you need to get a video gallery up and running—including support for YouTube, Vimeo, and self-hosted videos. Unlike the others on the list, however, this plugin also throws Dailymotion into the mix. Beyond that, it also supports a variety of WordPress data sources, images, and even audio sources.
The aptly named Video Gallery WordPress Plugin is a bit more focused than others that we’ve looked at so far. It focuses specifically on video gallery functionality. This regularly updated plugin runs $20 and includes some unique features.
Included with the plugin are some nice skins to get you started, as well as the ability to add YouTube, Vimeo, Dailymotion and self-hosted videos to your gallery. In addition to manually adding videos to your gallery, this plugin gives you the option of inserting videos from “streams” such as a playlist, a specific user’s channel, or a keyword search.
Another regularly updated and well-loved plugin, The Grid: Responsive WordPress Grid Plugin lets you create a beautiful video gallery and costs $27. Supporting grids, masonry, and justified layouts, this plugin makes it easy to get the look you’re after.
Combined with a built-in visual editor and support for Visual Composer/WPBakery, you’ll also have plenty of control over your video gallery’s design.
If you’re looking to add a variety of social feeds into your gallery, The Grid is your best bet. This gallery plugin supports YouTube, Vimeo, and self-hosted videos (including streams from each), but in addition lets you mix in content from Facebook, Twitter, Flickr, and more.
The last video gallery plugin on the list, Smart Grid Gallery: Responsive WordPress Gallery Plugin, is a simpler plugin. Smart Grid comes with a handful of styles and the ability to swap colors using an available color picker. It also comes with several media hover and layout options, but if you want to really dig deep into customization, you’ll need to know a bit of CSS.
When it comes to support, Smart Grid keeps it minimal, with capabilities to use images, YouTube videos, or Vimeo videos. If you’re looking for a straightforward solution, Smart Grid is likely a good choice for you.
Which Video Gallery Will You Use?
If you came to this article looking to find the best WordPress video gallery plugin to use in your site, I hope you found it! Did you end up using any of the plugins on this list? Have your own favorite video gallery extension that you like to use? Tell us about them in the comments!
There are lots of ways that you can turn your site into an additional revenue stream, but many of these options revolve around one-off payments. You could build an online store, sell advertising space, or fill your website with affiliate links—or you could sell membership subscriptions that'll guarantee you a steady income for the next few weeks, months, or potentially even years.
In this article, we’ll be sharing 22 of our favourite free and premium plugins that you can use to transform your WordPress website into a thriving online community.
Top 15 WordPress Membership Plugins (From CodeCanyon for 2021)
There are many different ways that you can add membership functionality to your WordPress website. You could restrict access to selected pages and then sell subscriptions to this premium content or you could turn your entire website into an exclusive, members-only portal. Or perhaps you already have an offline community and want a way to manage it online.
Whatever your motivation, the quickest and easiest way to build an online community is to use a professionally developed WordPress membership plugin.
To help you get your membership site up and running, here are ten of the best WordPress membership plugins that are currently trending on CodeCanyon.
With a five star rating, this is one of the best membership plugins for WordPress. This plugin allows your users to login or register to your site using their favorite social website accounts or their email.
This WordPress membership plugin comes with many great features:
social integration with Facebook, Twitter, Google Plus, LinkedIn
works with any WordPress theme
supports WooCommerce and BuddyPress
all your site can be locked for anonymous users
User izzycart says:
This is the best popup login plugin I have used so far, easy to use and easy to customize to taste. Kudos to the team.
This WordPress membership plugin can be very useful. You can require selected user to change their passwords after a selected time. You can also allow or ban users to from using the same passwords. It's compatible with WooCommerce and more!
The Final User WordPress membership plugin is very user friendly. It's a tool that you can use for WordPress membership management with its front-end dashboard and Mailchimp integration.
This WordPress subscription plugin comes with a high-quality payment gateway. It's compatible with Paypal, Stripe, and of course WooCommerce. Members can set up free accounts and trials, as well as one-time and recurring payments. If you're looking for the best membership plugin for WordPress, give Final User a try.
As of January 2020, 93 percent of websites were using WooCommerce instead of an alternate WordPress plugin. If your website is one of these millions, then you can transform your existing WooCommerce installation into a WordPress membership website using this dedicated WordPress gym membership plugin.
Using this member list plugin for WordPress, you can:
create multiple fitness plans
set up pricing tables
accept PayPal and Stripe payments
translate into 15 languages
If you already have WooCommerce set up or you plan to use it in the future, then you can save yourself a ton of time and effort by choosing Fitness Trainer as your WordPress gym membership plugin.
UPME takes your profiles to the next level, by allowing you to create unlimited custom profile fields.
The User Profiles Made Easy (UPME) plugin does exactly what it says on the tin: it makes user profiles easy!
This WordPress subscription plugin has all the features you’d expect from a profile, login and restriction WordPress membership management plugin, plus a few interesting extras:
A seamless front-experience with profile, registration and login pages that can be customized to match the rest of your website.
The ability to generate invitation codes and send them to specific users via email, allowing you to create an exclusive, invitation-only registration process.
Advanced content restriction, including preventing non-registered visitors from accessing selected posts, pages, URLs, categories, content blocks, or even your entire website.
One-click social login and registration thanks to seamless Facebook, Twitter and LinkedIn integration. You can also use UPME to sync content from these popular social networks to your website.
The UMP plugin supports all the major payment gateways.
Ultimate Membership Pro (UMP) is a plugin that lets you sell membership subscriptions to your WordPress content. Once you’ve created one or more subscription levels, you can restrict access to your website’s content based on the visitor’s specific subscription level (or lack of subscription!).
This robust WordPress membership plugin integrates with all of the most popular payment and checkout systems, including PayPal, Stripe, and 2Checkout.
If you’re a fan of the WooCommerce eCommerce platform, then you can also use UMP to restrict access to any WooCommerce product.
UMP is a robust plugin for a WordPress membership site that doesn’t hold anything back—when you purchase this plugin, you’ll get 35 add-on packs included!
ARMember has everything subscribers need to build a rich, multimedia profile.
ARMember is a one-stop solution that has everything you need to create a WordPress membership website. If you want the best membership plugin for WordPress, you'll like ARMember's impressive features.
Some of the ARMember WordPress membership plugin’s stand-out features include:
Automatically generated shortcode. Add plan selection, registration, payment and coupon creation functionality to your website with a single piece of shortcode.
Multiple memberships. A single user can hold multiple membership plans and add-on options simultaneously.
Invite-only membership. Want to create an exclusive, invite-only website? Or perhaps you simply want more control over who uses your website? With ARMember, you can restrict sign-up so that users must receive an invite before they can register.
Grace period. If someone misses a payment or their membership expires, then you can allow them to continue accessing your content for a set period of time.
Flexible payment options. ARMember lets users choose between making a manual payment every time their membership runs out or setting up an auto-debit payment.
Country-specific tax. You can define different tax percentages for different countries, and these settings will then be applied automatically based on the country the user selects when purchasing their membership.
Built-in Security. ARMember helps protect your website with a range of security features, including brute force protection, IP and URL-based restriction, and the option to ban specific usernames and email addresses at sign-up.
Lots of integrations. ARMember supports eight different email tools, including Mailchimp, Mailster, and ActiveCampaign. It also integrates with BuddyPress, bbPress, myCred, WooCommerce, Visual Composer, AfiiliateWP, and WPBakery Page Builder.
Allow users and visitors to share activities, profiles, and groups, with support for over 25 social networks.
Of all the WordPress membership plugins on this list, Youzer places a particular focus on community and user profiles. When you add Youzer to your WordPress website, you can be confident that your users will be able to customize their profile and community pages in a way that’s akin to Facebook’s user profiles.
Continuing the Facebook theme, Youzer has full support for many social networking features, including likes, mentions, comments, and moods, and can provide social login and registration by integrating with Facebook, Twitter, Google, Instagram, and LinkedIn.
“If you want to create a community focused website with Wordpress, then a plugin like Youzer is essential," says Kyla Gloer.
Youzer has a responsive design and full support for ads, so you can potentially generate some additional income by advertising on your users’ profiles. It also integrates with MyCRED, BBpress, WooCommerce, Giphy, Mailchimp, and Mailster Newsletter.
UserPro makes it easy to add front-end profiles, login and registration to your WordPress website.
UserPro provides everything you need to create a flourishing online community, including user profiles, login, registration, and content restriction.
User Imtovi says:
“The most useful and powerful user profile Wordpress solution I have seen!”
The WordPress subscription plugin integrates with all the major social networks, including Facebook, Twitter, Instagram, and LinkedIn, so visitors can register with your website using their existing social media credentials.
When a new user logs in to their account, UserPro can sync their existing social media profiles with their new UserPro profile, helping them create an interesting and engaging profile with minimum effort.
“I've been using this plugin for years. Works great and looks professional on the front end," says ACleverCat.
UserPro also supports a range of social features, so users can connect with other members of the community and view one another’s recent activities, including new posts, comments, and follows.
SUMO Memberships is a complete WooCommerce Membership System.
Do you already have a WooCommerce store? SUMO Memberships is a comprehensive WooCommerce membership system that lets you sell memberships through your existing WooCommerce store.
Using the SUMO WordPress membership plugin, you can restrict access to pages, posts, content blocks, URLs, and custom post types, and grant access to specific WooCommerce products based on a user’s membership level. You can also provide alternate content for webpages that a user doesn’t have permission to view, such as an alternate page or post.
By providing alternate content for people who aren’t subscribed, you can provide a better user experience for everyone who visits your website. It's why many customers think that SUMO is the best membership plugin for WordPress for their WordPress membership sites.
“Excellent support and willingness to adopt feature requests. The plugin lacked an upgrade/downgrade function when I first bought it. I asked for it and bingo! It was there on the next major update. You can't ask for more than that," says SUMO Membership user now4dw.
PrivateContent records every pageview, login, logout, registration, and more, via its Google Analytics integration.
You can use PrivateContent to quickly and easily transform your WordPress website into a multi-level membership platform by restricting access to every aspect of your site.
Some of this WordPress subscription plugin’s standout features include:
advanced user tracking
restrict any element
integration with Elementor, Visual Composer, and Cornerstone
The Ultimate Learning Pro LMS helps you create a premium elearning platform for your students and instructors.
Do you have a portfolio of e-learning materials that you want to monetize? Or perhaps you have some specialist knowledge that you want to share with the world by creating your own online training course?
Ultimate Learning Pro is a membership plugin that’s targeted squarely at students and instructors. This plugin has everything you need to create, publish, distribute, and manage your own online courses.
Once students enroll with your website, they can use Ultimate Learning Pro’s extensive feature set to purchase, complete and review all of your e-learning materials.
After completing each course, you can use this plugin to issue students with certificates, badges, and reward points, and gather feedback about their experiences with your e-learning materials.
Don't already have a portfolio of e-learning materials? Ultimate Learning Pro also features an intuitive course builder that makes it easy to start building your own online courses.
You can use WPGYM to create a complete, WordPress-powered gym management system.
Unlike all the plugins we’ve covered so far, WordPress Gym Management System (WPGYM) is designed to help you manage an offline community, online. Specifically, it’s a complete WordPress gym membership plugin.
For gym owners and instructors, WPGYM provides all the tools you need to share nutrition plans, workout schedules, and class timetables, while gym members can use WPGYM to perform useful tasks such as tracking their physical stats over time or reserving their spot at an upcoming exercise class.
“What a great team to work with, they always strive to make sure I'm happy and go the extra mile," says WPGYM user brokenbox.
As far as setting up your WordPress membership site is concerned, it doesn't get easier than with WP Membership. Just install this member list plugin for WordPress, and you're done. No extra configuration, no extended setup. It just works.
On top of the responsive design of this WordPress membership management plugin, WP offers features like:
Mailchimp integration for new members
PayPal, Stripe, and WooCommerce payment gateway
seven pricing tables
coupon functionality
11 language files included
10 Best Free Membership Plugins For WordPress To Download in 2021
Maybe you only require access to a limited feature set, or you simply want to experiment with membership functionality before deciding whether this is the right direction for your website.
If you’re not ready to invest in a premium WordPress membership plugin just yet, then there are plenty of WordPress membership plugins free to download.
Here, we’ve collected ten of our favorite WordPress membership plugins free from across the web:
This lightweight WordPress free trial plugin lets you quickly and easily build registration and login forms using drag and drop.
If you need additional functionality, then there are several premium addons available, including add-ons that enable social login, so users can register and log in to your website with their existing Facebook, Twitter, or LinkedIn credentials. You can also purchase add-ons that integrate the User Registration plugin with popular services such as WooCommerce, PayPal, and Mailchimp.
The Ultimate Member plugin lets you create online communities and WordPress membership sites in seconds by automatically generating all the pages required to offer complete membership functionality, including user profiles, login, registration, and a password reset page.
You can quickly and easily generate all the pages required to deliver a complete membership website, using the free Ultimate Member plugin.
It's one of the best free membership plugin for WordPress. If you need to modify any of Ultimate Member’s forms, then it also includes a drag-and-drop form editor that supports custom fields. By experimenting with custom fields, you can create an endless variety of unique login, registration, and profile editing forms.
You can use this WordPress membership plugin free to restrict access to your website’s content based on various membership levels, including one-time payments, recurring subscriptions, and custom trial periods.
The Paid Membership Pro plugin can add an additional revenue source to your website.
Whenever an unregistered user attempts to access restricted content, they’ll be automatically re-routed into a funnel that’s designed to drive them towards making a purchase.
This WordPress free trial plugin supports PayPal, Stripe, Authorize.net, Braintree, and 2Checkout, and is used by over 80,000 organizations worldwide.
This free WordPress plugin lets you protect your posts and pages so only registered members can view your content. Simple Membership also gives you the option to add Google reCAPTCHA to your registration, login, and password reset forms, and to require new users to accept your terms and conditions before they can register with your website.
If you need to customize the WordPress free trial plugin, then it also provides lots of action and filter hooks, plus an API that you can use to query, create, and update member accounts.
When you restrict content using the WP-Members Membership plugin, it automatically generates post excerpt teaser content, to encourage non-registered users to purchase a subscription.
If you’re a developer, then the WordPress membership plugin free is also highly customizable. It provides over 120 action and filter hooks, plus a library of API functions.
This free WordPress membership management plugin can generate all the forms users need to register, log in, and manage their membership. If the default forms don’t fulfill all of your requirements, then you can add your own fields using the plugin’s Fields Customizer tool.
Users Ultra Membership offers lots of functionality that free plugins often reserve for their premium add-ons. Out of the box, Users Ultra Membership supports social login, integrates with Mailchimp, PayPal, and bbPress, and auto-syncs with WooCommerce.
While ProfileGrid is fundamentally a membership plugin and profile builder, it also supports groups, so the people who visit your website can connect with other people who share their interests. These groups can be free or paid, public or private, and you can display different content depending on whether a user is signed up to a particular group.
This WordPress free trial plugin is also notable in that it offers a built-in private messaging system that works in real time, and it allows users to submit and share blogs via your membership website.
ProfileGrid supports user-submitted content, including guest blogs.
This WordPress free trial plugin features an easy-to-use drag-and-drop form builder. Once you’ve created your perfect form, you can place it anywhere on your website using the shortcode that WP User Frontend generates automatically.
WP User Frontend also allows registered users to post content on your website, so you could potentially create your own network of guest bloggers. Once a guest writer’s content is live on your site, they can go back and edit their work, and reply to comments, making this a great plugin for sparking discussion.
WP User Manager has everything you need to create a membership website, but some standout features include:
A handy shortcode editor that’s embedded within the WordPress page editor, so you no longer have to try to remember complicated shortcodes.
A templating system that lets you customize all of this plugin’s templates.
The ability to ban visitors from using certain usernames—perfect for ensuring no-one ever registers with your website using an offensive username!
This best free membership plugin for WordPress also offers a free extension where users can request an export and erasure of their personal data, which can help ensure your website remains GDPR compliant.
Create a Complete Membership Website in 2 Easy Steps
If you want to create an online community, then WordPress plugins are the easiest way to add membership functionality to your website. Don’t believe me? In this section, I’ll show you how to generate all the pages required to create and support a flourishing online community on your WordPress membership site, in just two steps.
For this quick and easy tutorial, I’ll be demonstrating the UserPro plugin—if you opt for a different membership plugin then the steps may differ, but as long as you choose a professional, high-quality membership plugin, the process should be just as easy.
1. Install the UserPro Plugin
Assuming you’ve already purchased and downloaded UserPro, the first step is to upload this plugin to your WordPress website:
In WordPress’s left-hand menu, select Plugins > Add New > Upload plugin.
Scroll to the If you have a plugin in a .zip format section and select Choose file.
Select the userpro.zip file you downloaded as part of the purchasing process, and then click Install now.
When prompted, select Activate plugin.
2. Enter Your Purchase Code
When you purchased UserPro, you should have received an email with the subject line [CodeCanyon] Purchase Confirmation. This email contains a purchase code that you’ll need to share with WordPress:
Open your purchase confirmation email and copy your unique Purchase code.
In WordPress’s left-hand menu, select UserPro.
Select the Licensing tab.
Scroll to the Activate UserPro section and paste your purchase code into the accompanying text field.
Select Save Changes.
Your Community Website Is Ready to Go!
And that’s it! UserPro has automatically created all the pages your new community website needs, including registration and login pages, fully editable user profiles, and a searchable directory of everyone who’s registered with your website. To check out this content for yourself, select Pages > All Pages and spend some time exploring all the membership pages that UserPro has kindly created for you.
After just a few minutes’ work, you have everything you need to start your own online community, but UserPro has much more to offer, including giving visitors the option to register using their existing Twitter or Facebook credentials, and displaying the user's location via Google Maps integration.
If you want to learn more about this plugin, then check out our two-part UserPro series where I show you how to implement social login, add Google Maps integration, and much more.
With UserPro, you can give everyone who visits your website the option to create a profile, connect with other users, display their location using Google...
Find out how to add “Login with Facebook” and “Login with Twitter” to your WordPress website, and how to display each user’s location, by integrating with...
4 Tips for Creating a Successful Membership Website
Choosing a professional, feature-packed membership plugin is the first step to creating a successful membership website, but there’s still lots you can do to help grow your audience.
In this final section, I’ll share four ways that you can encourage people to sign up, engage with your community features, and ultimately renew their membership, so you generate the maximum revenue from your WordPress community website.
1. Offer a Free Trial
Free trials are one of the most effective ways to market anything—and membership websites are no exception.
Customers like to know exactly what they’re getting before they make a purchase. Giving potential new subscribers a way to experience all of your website’s great membership features, first-hand and for free, can encourage them to make a purchase.
ARMember is a WordPress membership management plugin that let's visitors choose a free trial.
2. Create Multiple Subscription Levels
To get the maximum number of registrations, your membership plans need to appeal to a wide audience.
Unless you have a specific reason not to, it’s always a good idea to create multiple membership levels—for example, you might offer Bronze, Silver, and Gold subscriptions, or Monthly and Annual plans. For the best results, each membership should offer unique perks, and there should be a considerable difference in pricing.
If you’re trying to monetize your website, then multiple membership levels can also be a way to increase the average spend per member. If a new customer expresses an interest in a Silver subscription, then you have the opportunity to upsell them a Gold subscription.
Even after a user has purchased their subscription, there may still be upsell opportunities in the future. In these scenarios, it can often help to present the upsell as an exclusive bonus—for example, if a subscriber's Silver membership is about to expire, then you could offer them a Gold membership at a discounted rate, as a special thank you for being such a loyal customer.
3. Keep in Constant Communication With Your Community
Today’s typical Internet user has a short attention span, so even after someone purchases a subscription, you’ll need to work hard to keep them engaged with your website.
Most premium WordPress plugins have features that are designed to help you hold your audience’s attention—for example, both ARMember and Youzer integrate with popular email marketing solutions Mailchimp and Mailster. You can encourage members to visit your website by sending them regular newsletters and email updates about all the new and exciting content they’re missing out on.
Other plugins, such as WooCommerce Membership and Ultimate Learning Pro, allow you to “drip” content to your users. By carefully scheduling content in advance, you can ensure that something is always happening on your website, which will encourage members to get into the habit of regularly checking your site, in the hopes of discovering new content.
4. Create a Sense of Community
A successful online community needs to feel like a community, so you should try to give subscribers multiple ways to connect with one another.
As a minimum, visitors should be able to comment on your content and reply to comments left by other members, but you could also allow users to post their own content; view other people’s profiles; create and join groups, and exchange instant messages with other members of the community.
Many premium WordPress plugins also include features that are inspired by social media—for example, UserPro allows members to “follow” each other and view logs of every member’s recent activity, including any new content or comments that this person has posted.
UserPro lets members of your site connect with each other in meaningful ways.
By fostering a sense of community, you can encourage members to build an emotional connection to this community, and by extension your website.
More WordPress Plugins For Great Websites From Envato Tuts+
You now know that plugins can help you create a WordPress membership site. But there are thousands of plugins that can help you take your website to the next level. If you want to keep improving your website's design and performance, check out some of these selections we've gathered on Envato Tuts+.
Start Building Your WordPress Membership Website Today!
Are you ready to transform your website into a thriving and revenue-generating online community? Using one of our premium WordPress membership plugins, you can add advanced membership features to your website within minutes.
Whether you want to generate additional income from your existing WordPress website, launch your own social platform, manage your existing offline community online, or sell e-learning materials, a WordPress membership plugin can help you achieve your goals.
Are you planning to build a business app for Android, but you want to cut down some of the tedious parts of coding and focus on the more interesting work of making your app unique?
With premium Android business app templates, you can make unique apps that can be customized or configured for the needs of particular clients. They come with plenty of functionality, including the ability to monetize them through adverts and in-app purchases.
Top-Selling Business Android App Templates for 2021 on CodeCanyon
Grab one of these business Android app templates. They come with ready-to-use designs and functionality. All the time-consuming programming has already been done for you, so you can focus on designing an app that kicks ass.
15 Best Business App Templates For Android on CodeCanyon
On CodeCanyon, you can find loads of awesome and stylish business app templates that relate to all aspects of business, from increasing productivity to keeping on top of expenses and increasing a company’s visibility in an ever more crowded field.
Active eCommerce is a business app template that transforms your eCommerce CMS into a mobile app. This is a great option if you need to create an app for your business. See some great features:
smart cart system
easy checkout
product wishlist
multiple shipping address
advanced search
social media login
customer reviews
Note: Active eCommerce CMS must be installed on your server for this app to work.
Do you need to create an app for your business in the food industry? Then this is a fantastic mobile business app template.
Chef is a full solution for your food business. You'll get 5 services in one purchase: website, admin panel, customer React App, store web panel and an iOS and Android app.
This business app template has a five-stars rating. User keiornexo said:
It's honestly great code, it works well, and it's very neat between views and controllers, something that I really appreciate a lot. Thanks for this great product, I look forward to new products from the developer.
GoGreen is a great mobile business app. If you've got a delivery business or a store with delivery services, this is the app you need. See what's included in this business phone app for Android:
customer Android app source code
vendor or store Android app source code
delivery boy Android app source code
admin panel PHP script source code
database file and installation documentation
This business app template also has a five star rating. user sumerbhai1 said:
The app itself is a wonderful product and above everything else, the customer support from this developer is super awesome and they are ready to help you out with great patience. Absolutely recommended.
Are you looking for Android apps for small business owners? Maybe you need to create an app for your business in the beauty industry.
The Salon and Spa Appointment Booking App is a great option for you. This business app template is a simple, flexible and powerful booking software for your spa salon business.
See what customer shopzonedo said about this five star mobile business app:
Customer support is top-notch and this app so far is the best booking app I've come across on CodeCanyon.
Looking for business chat apps for your business? Chatbots have a proven track record of helping businesses deliver great customer service.
Their ease, speed, and convenience improve productivity. The Chat Bot template allows developers to build chatbots for their clients. This business texting app is a native virtual assistant app that can be integrated into another Android app using Firebase. It comes with developer-friendly commented code, AdMob integration, and push notifications.
Keeping on top of small details boosts customer satisfaction. Weboox Convert Perfex CRM allows developers to build Android CRM apps that help clients do just that. This business phone app for Android is easy to customize the colors and add your own icons to reflect your brand.
You can add custom CSS to optimize the device’s screen page and create a unified look. The app also detects automatically when there is no connection and prompts the user to continue when the Internet is restored.
Immediacy makes video the ultimate user engagement tool that reaches wider audiences and brings traffic to your business. What better app to accomplish this than Videon!
This Android video app is built with native Java in Android Studio. It has an admin panel in which you can publish videos by uploading them on YouTube or Vimeo.
Unreliable payment gateways lead to abandoned shopping carts, loss of profit, and loss of potential customers. You need Android apps for small business owners like this one.
Payment App allows developers to build reliable and trustworthy payment-related apps for businesses. It comes with a beautiful UI and screen designs that are easy to understand. The screens have login and registration, payment management, and transaction history.
Keeping on top of the news—particularly as it pertains to business—is critical to every business, so a great news app is a crucial asset.
NewsExtra allows developers to create their own news app with headlines, breaking news labels, various categories, deep link sharing, video and image support, and much more. What’s great is that the app can be customised to pull news from pre-determined sources so that users only get news that is relevant to their needs.
Fitness gives you the stamina you need to run your business. Thankfully, Daily Workouts reminds you to take a break and get some exercise. You don't need equipment to be in shape. It comes loaded with ten exercises you can follow, including GIF animations showing you how to do each exercise. You can pause the workout, skip to the next exercise, or go back to the previous one. It also has a smart calendar to track your activity.
One thing a good business has to do is communicate, and with the Events App Template, developers can create an app that allows business users to store and share information about upcoming events with clients and colleagues alike.
Users just need to press a button to add events they’re interested in to their native calendar app or to open an event’s address in Google Maps to get directions. They can also share news about the event on Facebook, Twitter, email, Messenger, or other social apps they use.
Keeping track of our expenses helps us have better control over our money, but it can be a real pain. Daily Expense Tracker is an app template for designers who want to create an efficient financial tracker. It is designed to organize income and expenses and record the movement of money by date.
Users can review reports on their finances over a day, a week, a month, or a year. The app can remind users to pay bills and can also help them to manage receipts so that getting reimbursements for business expenses is easy.
Imagine managing all the functions of your business from an app. SPREE is a point-of-sale mobile app that has efficiency built into it. You easily manage employees, customers, sales, payments, purchases, returns, store expenses, store documents, suppliers, and inventory.
You can send emails, texts, and make calls from the app to your customers, staff, and suppliers. You can also earn from this app through a SaaS-enabled system and ads. It is perfect for stores, hotels, restaurants, clubs, market stalls, and more.
Everyone loves a good deal. And when you've got a mobile business app to help you, it's even better. The Offers and Deals app has a smart search and find function that locates the business you need (restaurants, hotels, grocery stores, supermarkets) and deals in a specific area.
See what's included in the business phone app for Android:
Clickkart is a great business app template. This mobile business app is a scalable, multi-vendor app built on Android Native, so it's a great solution if you need to create an app for your business.
The intuitive interface of the shopping app is fully customizable, and it provides easy navigation. See some other cool features:
easy registration
user profile
shop by store or category
product listing
user-friendly cart
powerful admin panel
Things to Consider when Choosing a Business App
1. Needs Analysis
The question to ask yourself is: can you make do with the tools you are already using? And if you have to get that new app, what specific solutions should the app offer? So before you spend money on the new app with bells and whistles you think you can't live without, it is important to do a thorough audit of your workflow and processes. This allows you to have an extensive knowledge of the pain points and needs of your business.
2. Growth
As your business grows and expands, will the apps you're considering accommodate your growth and expansion? Will you need to replace them every time your business makes great leaps forward? And if so, consider how much disruption this will cause and how it will affect your customers and your bottom line.
3. Do Your Research
Know about the features and how they specifically help your workflow and productivity. Read reviews and ratings to see what are people are saying about the app. This can be a good indicator of the quality of the app template and also the trustworthiness of the provider.
4. Ease of Customization
Being able to adapt the app to your needs is important. Find out how you can customize it to do what you want it to do for you. It may cost more, but if need be, ask the developer to do it for you.
4 Tips for Marketing Your App
Building your app and launching it is just the beginning! Customers have to know that your app exists. There is very stiff competition. Promoting your app is something you will need to do on a daily basis. Here are some tips to help market your app.
1. Landing Pages Create Anticipation
Landing pages with a video teaser create anticipation. This is a great engagement strategy. Studies have shown high rates of mobile downloads.
2. Promotion on Social Media Platforms
Social media platforms provide a built-in audience eager to hear about your app.
3. Put Your Email List To Use
Sending out regular and interesting newsletter emails to your audience creates engagement. Find creative ways to have visitors on your website sign up for your newsletter. Subscribe to an email marketing platform like Mailchimp.
4. Invest in Great Content
Post regular, interesting, useful content that customers can apply to their own lives to show that you have more to offer them than getting them to buy your stuff. Think of how the knowledge you have gained in your niche can be useful to your customers.
Explore More Android App Template Resources on Envato Tuts+
And if you want to improve your skills building Android apps and templates, then check out some of the ever-so-useful Android tutorials we have on offer.
These best business app templates for Android are just a small selection of the hundreds of Android app templates we have available at CodeCanyon, so if none of them quite fits your needs, there are plenty of other great options to choose from.
This post has been updated with contributions from Maria Villanueva, a journalist and writer with many years of experience working in digital media.
Creating an attractive user interface for Android apps is almost always a time-consuming task. It takes days, sometimes weeks, to conceptualize and design pixel-perfect layouts that look good on all screen sizes and pixel densities. Furthermore, with most users today expecting their apps to adhere to the guidelines of Material Design, the task has arguably become even harder.
Fortunately, there's an easy solution: CodeCanyon, a marketplace that has hundreds of native Android app templates you can use to jump-start your next project. You can save days or even months of effort by using one of them.
In this tutorial, I'll show you how easy it is to download and use an app template from CodeCanyon. We'll be working with a very popular template called Material Design UI Android Template App, which offers five different themes, over 80 ready-to-use screens, and hundreds of beautiful UI components. And if you're hungry for more Android app templates, scroll down after this tutorial for a hand-picked selection!
With over 3,000 sales, Material Design UI Android Template App is one of the most popular Android app templates available on CodeCanyon. To get it, sign in to CodeCanyon using your Envato account and purchase a license for it.
You can now download the template as a ZIP file named codecanyon-tLViUw3g-material-design-ui-android-template-app.zip. In addition to the source code, the file contains all the documentation you'll need to make the most of the template.
2. Building the Template
To start using the template, extract the ZIP file and open the Source code/android-AS directory using Android Studio. The IDE will then load the template and automatically download all its dependencies. Once that's done, you can press Shift-F10 to build and run the project.
If you're running Android Studio 3.5 or higher, the build should complete without any errors, and you should be able to see this screen on your device:
Congratulations! In just a few minutes, you managed to build and run your first native Android app template.
3. Exploring the Template
Like most app templates on CodeCanyon, Material Design UI Android Template App has a large variety of features. It has several activities and fragments you can use to quickly add beautiful screens to your apps, such as login screens or splash screens. For example, you can use the LogInPageActivity class to create different types of login screens.
If you want to add tabs to your app, instead of starting from scratch, you could try using one of the tab-oriented activities the template has, such as TabMediaActivity or TabShopActivity. Here are two sample tab interfaces:
Lists are an integral part of most Android apps, but creating them is hard. It involves designing layouts for list items and creating appropriate adapters that work efficiently. While using this template, though, you have access to several list item layouts and adapters. In fact, you'll notice that the template has a directory called adapter, which contains nothing but different types of adapters.
To find the list item layouts, go to the res/layout directory and look for files whose names start with list_item. For example, here's what the list_item_expandable_travel.xml and list_item_expandable_social.xml layouts look like:
If you prefer having cards as list items, consider using the list_item_google_cards.xml layout. But if that's too generic for your liking, you can try using layouts such as list_item_google_cards_media.xml and list_item_google_cards_travel.xml, which are ideal for media player apps and travel-related apps. Here are some sample card layouts:
It's worth noting that the lists you create with this template can support expandable list items, drag and drop, and the swipe-to-dismiss gesture right out of the box.
Navigation drawers are a common feature in apps that follow Material Design guidelines. Because this template focuses on Material Design, you'll find several implementations of navigation drawers in it. The LeftMenusActivity class has everything you'll need to create your drawer. You are, however, free to use one of the more domain-specific activities, such as LeftMenusMediaActivity or LeftMenusSocialActivity, if you think they're better suited for your app.
The default alert dialog you can create with the Android SDK is generally considered too simple to be a part of a well-polished Android app. And styling it so that it matches your app's overall look and feel is rather hard. That's why this template includes several custom dialogs, whose fonts, colors, and layouts can closely match those of your apps.
You can use the DialogUniversalInfoUtils class to create information dialogs that can easily fit into any type of app. Similarly, you can use the DialogUniversalWarningUtils class to create warning dialogs. For domain-specific dialogs, you should try experimenting with classes such as DialogSocialUtils and DialogTravelUtils.
In addition to full-fledged activities and layouts, the template has custom styles for common components such as buttons, progress bars, and input fields. You can use them to effortlessly make your user interfaces look more polished. For example, here are some sample checkboxes and text views:
4. Configuring the Template
The Material Design UI Android Template App supports push notifications with Firebase. In other words, you can use the Firebase Cloud Messaging service to send messages to the apps you create with this template. To enable this feature, all you need to do is generate a google-services.json file on the Firebase console and place it in the UIAppTemplate directory. To add any customizations, you'll have to modify the MyFirebaseMessagingService class.
Material Design has its own color system, and it's important that your app's color palette be based on it. The design language also expects your app to have primary, secondary, and accent colors. This template is aware of both requirements and makes it extremely easy for you to apply Material Design colors to your apps. In the res/values/colors_material.xml file, you can find the hex values of all common Material colors, such as Material Purple, Material Pink, and Material Deep Orange.
By modifying the res/values/styles.xml file, you can easily change the colors of the template. For example, by changing the colorPrimary item, you can change the primary color.
Are you wondering where to buy Android app templates? Envato Market has hundreds of other Android app templates that you can choose from. There are templates for games and complete applications, as well as comprehensive starter templates like the one we used in this post.
Here's a hand-picked selection of the best Android app templates from CodeCanyon. Whether you're looking to build an Android WebView app or Android material design components, we've got you covered.
Universal is our best-selling Android app template. With a five-stars rating and over 6,000 sales, this is a crowd-favorite.
If you're looking to buy Android app templates, this is the one to get. This multipurpose Android app template allows you to create many types of apps and its great for beginners.
It comes with 15+ content providers such as WordPress, social media, video platforms, Google WebView and more.
Clean and clear code. Fast support and top notch external documentation. Constant updates. Buy this app it's wonderful! -User Appnetwork
Are you looking for a professional restaurant Android app template? This Restaurant Finder is a great option. You can easily customize this restaurant Android app template to build a fantastic app. See what you'll get:
Chat app templates for Android are popular Android app templates. And the FireApp Chat is one of our top-rated items. This chat app template Android has everything you need for your next app:
built using Firebase SDK
phone authentication
group chat
voice and video calls
fingerprint lock
dark mode
record and share voice messages
and more!
Best Customer support and quality design, I'm really grateful. -User mondayclient71
If you have trouble deciding which template on CodeCanyon is right for you, these articles should help:
In this tutorial, I showed you how to download the Material Design UI Android Template App from CodeCanyon, work with it using Android Studio, and customize it to match your preferences.
With the skills you learned today, you can build your next app by simply picking the required layouts and components from the template and associating your data, assets, and business logic with them. Don't forget to browse through our extensive Android app templates library on CodeCanyon and get the ones you like!
This post has been updated with contributions from Maria Villanueva, a journalist and writer with many years of experience working in digital media.
Are you looking for an automated booking or reservation plugin that saves you and your customers time? Are you tired of losing business to your competitors? Are you looking for a way to streamline your online appointments and bookings?
Your website should make it easy for guests to view, reserve, and book available appointments. This is where WordPress booking and reservation plugins can help you meet your online business goals.
So whatever your business—from haircuts to hotels, and from health salons to consulting firms—WordPress booking and reservations plugins help customers book appointments on your site any time of day or night.
In this post, I'll share the best reservation plugins for WordPress today.
The Best WordPress Booking and Reservation Plugins
Looking for the best booking plugin for WordPress? Check out EventON, our best-selling WordPress booking plugin.
EventON is packed with 200+ useful features, such as highly customizable repeating events, multiple event images, unlimited event creation, and various calendar layout designs.
With a 4.5-star rating and more than 50,000 sales, customers are very happy with this WordPress booking plugin. User EAAcalendar says:
This calendar system is very, very all-encompassing. They made it extremely flexible and, to be honest, I have barely scratched the surface on all the features customizations that are possible.
Calendarize it! is another top-selling WordPress booking plugin. With more than 11,000 sales, users like it because it's packed with useful features and add-ons you can download with your purchase:
After two years of using this great plugin, I happily renew my 5 stars review and want to thank Richard and his team for the best support I got here on Envato. If you need a really flexible calendar, this is the best solution!
Booked is a powerful WordPress booking plugin that makes online booking a simple process. You can add as many calendars as you need and easily customize them.
Some of the best features of this WordPress reservation plugin are:
Bookly Pro WordPress Booking Plugin is a full-featured plugin that's easy to install, getting you up and running in a matter of seconds. It is fully customizable and mobile-ready, so customers can book appointments on the go. This WordPress booking plugin comes with an easy scheduling process that walks the user from booking to payment in a few simple steps.
The inclusion of SMS notifications, online payments, and Google Calendar sync sets it apart from many others.
Other notable features of this plugin include:
compatible with WooCommerce
multi-language support
unlimited number of staff members and services
integration with most payment systems
ability to allow or prevent caching of pages with booking form
Timetable is a powerful and easy-to-use schedule plugin for WordPress. It will help you to create a timetable view of your events in minutes!
It comes with booking functionality. You can take online reservations for any event within the available number of free slots.
Other awesome features include an events manager, event occurrences shortcode, timetable shortcode generator, and upcoming events widget. You can generate PDFs from your timetable view.
Fully compatible with Visual Composer, this WordPress booking and reservation plugin is perfect for your gym classes, school or kindergarten, medical departments, nightclubs and pubs, class schedules, meal plans, you name it.
Advance Seat Reservation Management for WooCommerce is suitable for businesses such as cinemas, trains, airlines, event venues, movie theatres, bus companies, and more.
Your customers can reserve seats through this WordPress reservation system plugin for WooCommerce. It works with WooCommerce products, carts, orders, and WordPress posts.
Hotel Booking is a complete hotel and vacation rental booking system. You can use this WordPress booking system for hotels, bed and breakfast, guest houses, apartments, villas, and even hostels.
It comes with all the functionality you need to run a fully functional hospitality business website and manage reservations. You can create beautiful listings of all your properties, control seasonal pricing and rates, and rent properties out online, with or without payment.
In addition, you can synchronize direct site reservations with popular travel channels via iCal through the admin channel manager.
You can now provide remote services directly from your appointment booking plugin. You can do it from a phone or computer via video conference with built-in live chat. Video conferencing is between one employee and one customer.
This is what makes Book An Appointment Online Pro the WordPress appointment plugin of choice for medical centers, beauty and hair salons, or car services.
While this feature is available only to users with active support, the benefits you reap are immeasurably more than the extra cost you invest in extended support.
You can create three different types of schedules: regular working hours, custom schedule, and shifts. To help avoid double booking, users can book an appointment only by available time slots. They get SMS reminders, and they can also pay using PayPal or Stripe.
Bookme is a multi-purpose WordPress booking plugin that can be used by all kinds of businesses, ranging from beauty salons and fitness centers to educational institutions and medical centers.
You can set up a wide range of services at different prices and build custom fields depending on your requirements.
You can offer numerous booking types, including default booking, group booking, consultant booking, add to cart booking, free booking, and booking with WooCommerce.
Customers can receive SMS notifications via Twillio API. They can also pay with multiple payment systems such as Stripe or PayPal.
If you want to build a booking business, then WooCommerce Booking and Rental Plugin will help you do just that. You will able to rent cars, bikes, dresses, tools, gadgets, and more.
You can add unlimited rental products, set your own pricing, block rental days and hours, set minimum and maximum booking days, have single-day booking, and set up a maximum time penalty.
You can set custom pricing for particular customers. The plugin also offers inventory management, and it's fully compatible with the latest WooCommerce and WordPress versions.
This WordPress booking plugin supports WPML, which allows your website to become multilingual.
Salon Booking is a complete and easy-to-manage appointment booking system for busy salons. It will make it easy for customers to make reservations on your website, and it will save you a lot of time with management tasks.
Salon Booking is perfect for hairdressing salons, barber shops, beauticians, therapists, spas, clinics, sport facilities rentals, and more.
HBook is a powerful and versatile plugin that is ideally suited for anybody who owns a business in the hospitality industry: a hotel, B&B, holiday apartment, or campground.
It comes equipped with a drag-and-drop form builder that lets you choose what customer details you want to gather. Its efficient booking management system includes:
calendar view to see your bookings at a glance
reservation list in a table form to view details of all bookings, add comments, change accommodation, update remaining balance, or send emails.
multiple payment methods: Stripe, PayPal, Square, Cardlink, Mollie, and more.
You can also synchronize your bookings with websites such as Airbnb, HomeAway, VRBO, and Booking.com. Finally, shortcode support allows you to add availability calendars, table rates, and booking forms anywhere on your website in seconds.
Like the other plugins in this list, Amelia lets your customers make appointments at any time of day and night. This plugin is easy to customize, helping you build your appointment booking forms in no time. What stands apart with this plugin is that you can keep your customers and employees notified and reminded of their appointments in real time with SMS notifications.
Some features include:
supports multiple employees, each with their services and availability schedule
supports multiple business locations
step-by-step appointment wizard makes booking easy
options to upsell during appointment booking
integration with WooCommerce, PayPal, and Stripe
supports on-site payments so your customers can pay in cash when they arrive
promote classes, seminars, workshops, conferences, or concerts on your WordPress website
set ticket prices for your events, create recurring events, or even accept donations for your events
It gives you a quick glimpse of the latest events created, letting you sort them by categories, view payments, and keep track of your attendees.
Visitors will be able to register and pay online for those events via PayPal, Stripe, or Authorize.net. The plugin also comes with shortcodes for calendars and single events.
To run a robust car rental business, you need an efficient, powerful online booking system. This is where Car Rental Booking System comes in. It is designed to support an unlimited number of locations, vehicles, and booking forms.
In addition to pricing rules for different cars, it has booking add-ons to order custom vehicle attributes and service restrictions related to the driver's age.
The booking process—together with multiple payment options—is simple and includes email and SMS notification.
Chauffeur Booking System is a powerful limo reservation WordPress plugin for companies of all sizes. It can be used by both limo and shuttle operators. It provides a simple, step-by-step booking process with online payments, e-mail and SMS notifications, WooCommerce, Google Calendar integration, and an intuitive back-end administration.
Complicated booking software takes forever to set up, slows down your website, and puts off customers. LatePoint to the rescue.
LatePoint is a simple, intuitive WordPress appointment booking plugin that makes it incredibly simple for your customers to schedule appointments.
The setup process takes less than five minutes. After that, you can create agents, add services, and set working hours. The rest is just a matter of inserting the booking shortcode button anywhere on your page, and your customers will be able to book appointments right away.
Customers can log in using popular social networks to pre-fill their personal information. Once they create an account, they can manage their reservations online.
LatePoint also has a powerful, clean, and modern admin dashboard for business owners to easily see reports of agent performance and manage services and customers.
Bookmify is the go-to WordPress booking plugin for businesses in many sectors: health and wellness, government, education, fitness and recreation, entertainment, and more.
It is simple, functional, versatile, powerful, and modern. The online scheduling system is equipped with a powerful user interface to help manage your day-to-day events, keep up with your schedule and billing, and send email campaigns—all from one online app.
The ARB Reservations plugin is the most flexible WordPress booking plugin for WooCommerce. It is perfect for businesses that require appointment booking: hotel rooms or resorts, appointments for courses, doctors, salons, renting products, and more.
What's really interesting about this WordPress booking plugin is that it has a "request for quote" feature, in which a customer can request a particular price and you can set custom pricing for that person.
This WordPress reservation plugin is a unique approach to the classic event calendar concept. It's fully responsive with a modern design. This WordPress booking plugin will display your events in a layout that's easy to read and navigate.
The WordPress booking plugin is trending thanks to its cool features, including:
compatible with Elementor
event filter
single event page
multiple calendar views: month, week, day, grid, map, agenda and more
We close the selection with another trending WordPress booking plugin. Event Schedule is a simple and versatile plugin that offers 12 schedule styles, each of them with a different design and features.
It's a great WordPress reservation plugin. You can sell tickets with WooCommerce, and it's 100% responsive and retina ready.
See what user lizYA01 says about it:
Beautifully designed and elegant plugin backed by the best customer support I have ever had from Envato. I recommend this plugin to anyone looking for a classy looking events calendar. Can't say enough about the professional support received!
4 Free Booking and Reservation Plugins Available for Download
As much as premium plugins offer more benefits and more features, there are a couple of free plugins that can help you with your business if you're on a tight budget. If you're just starting, a free plugin can give you time to gain recognition and build your brand without committing to a premium solution.
Hotel Booking Lite is the perfect booking plugin for anybody in the hotel and accommodation space. It allows you to simplify the booking experience of your customers. It offers real-time search, custom pricing, multiple currencies, and other excellent features.
Hotel Booking Lite also integrates seamlessly with most themes.
Booking Calendar is a flexible plugin for any business that operates on a booking basis. It is also fully responsive, so users on mobile, tablet, or desktop devices can book on the go. Booking Calendar also allows you to import .ics feeds from services that use that format, such as Airbnb and TripAdvisor.
Simple Booking Calendar is the perfect plugin to show the availability of your properties or equipment. With the free version of this plugin, you can responsively feature available space and save time you would otherwise spend on manually communicating with customers.
Sagenda allows you to book appointments and meetings with your clients online. Sagenda allows an unlimited number of bookings or customers. It also integrates with the popular PayPal payment system to enable customers to pay for bookings.
Tips for Choosing a Booking and Reservation Plugin
An online booking is a must if you wish to succeed in business in this digital age. Here are some suggestions for choosing the right plugin:
Simplicity: a good plugin should be user-friendly and easy to customize.
Budget: you should select a plugin that will not strain your operating costs or eat up profit margins.
Support: you need to go with someone who will walk you through any issues that might arise, especially during the initial stages.
Features: you might not always get a plugin that meets every need. However, make a checklist of features you can't do without—such as payments, analytics, and reminders.
Explore More Awesome WordPress Plugins and Resources
Looking for more premium and free WordPress plugins? Try our free course, which introduces you to the best WordPress plugins out there. Secure your site, make it run faster, optimize it for the search engines, and more.
Unleash the Power of CodeCanyon's WordPress Booking and Reservation Plugins Now!
There are many different kinds of WordPress appointment, booking, and reservation plugins available today. Choosing the right one can be crucial to the smooth running of your business. You need to select a plugin that fits your requirements.
When it comes to plugins for laying out the pages on your WordPress site, WPBakery Page Builder is a hard one to beat. This easy-to-use drag-and-drop page builder with over 200 unique addons will help developers and novices alike create just about any layout imaginable.
But for users looking to modify just one page in a specific way, this powerful page builder is probably overkill. That’s why we’ve scoured CodeCanyon for the most useful WordPress page layout plugins and come up with these 12 that will meet a variety of needs.
If you’re looking for just the right grid to display your blog posts, photos, products, testimonials, social media streams, services or whatever else you have in mind, the Essential Grid WordPress Plugin has got you covered.
This multipurpose grid enables you to display any content on your WordPress site in your choice of elegant grid form. First, you decide what source you want to use for your grid entry. Then, you customise the grid by choosing from three available styles, before selecting your required number of columns and rows and setting the spacing for the items. From there, you can add any number of skins available to customise your look further.
Notable features:
over 25 example skins included
widely varied content sources possible, including images, YouTube, and HTML5 self-hosted video
FlatFolio is another great option for those looking for an alternative grid layout. Aside from being highly customisable, the plugin has the additional benefit of offering both Carousel and Slider functions as well. You can customise the grid with logos, captions, coloured overlays, titles and subtitles, hover shadows, and more.
Notable features:
preview feature
carousel and slider features
unlimited item formats
various overlay effects
and more
For creatives and other users wanting to show off their visual content, FlatFolio is a versatile and easy-to-use layout choice.
User stefkouf says:
"Great plugin, very quick solution to my problem."
If you’ve ever wished for the freedom to place a widget in the content area of your WordPress site page, the Sidebar and Widget Manager has heard your prayers. The plugin allows you complete control of where you add widgets to your site’s pages by expanding the placement possibility beyond the sidebar and footer area to the page content area.
Notable features:
drag-and-drop grid manager
vertical or horizontal widget alignment
ability to display or hide any widget on any page
supports any kind of content
and more
Being able to add widgets to any area of your WordPress site page with the Sidebar & Widget Manager plugin is a great way to build your own unique page layout.
User JohnDoe_VI says:
"If you want to create a custom layout of a WordPress site, this is the plugin you want to have in your tool chest."
The Content Manager for WordPress plugin is probably the most versatile of the plugins in this list because it allows you to create any kind of layout you desire in three simple steps. Simply add a new page, create your desired layout with the drag-and-drop interface, and then add your content.
Notable features:
ability to add unlimited fully editable pages
10 layout colours
30 Google Font options
multiple language support
and more
User Harald777 says:
"Really good plugin and superb support. Would recommend this to every WordPress user who wants a flexible and simple content manager. Really great."
The Stupid Simple Testimonials plugin makes it super easy to add testimonials or quotes to your page layout. Using a simple shortcode that can be inserted in pages, posts, and widgets, the plugin features eight unique ways to customise your page layout.
Notable features:
grid layout automatically adjusts to match the total number of testimonials
six unique colour schemes provided to match your theme
ability to divide your testimonials into categories for easy management
ability to edit using the standard WordPress editor
and more
The Stupid Simple Testimonials plugin is a straightforward way to alter your page layout and will integrate your testimonials or quotes into your site in a crisp, professional fashion.
What’s a great site without an equally great menu layout to help your visitors navigate your content seamlessly? The UberMenu plugin is designed to facilitate just such easy navigation. The highly customisable and responsive plugin offers seven main menus and several submenu options to suit a wide variety of tastes and needs.
Notable features:
easy to add images and descriptions
Google Maps
choice of 18 layout variables
fully responsive and compatible with mobile and touch-enabled devices
extensive user-friendly documentation
and more
UberMenu works out of the box with the WordPress menu system, making it simple to get started and create gorgeous menus quickly and easily.
User lariosn says:
"UberMenu is simply fantastic and its support is just amazing."
If you’re looking for a clean and elegant way to keep your customers, clients, or followers updated on your public appearances, then adding the WordPress Pro Events Calendar plugin to your WordPress page layout might be the right solution for you.
Notable features:
responsive layout
let users submit events from the front-end
add special dates to your calendar like holidays
import events from an ICS feed or Facebook
User DrDanHall says:
"This calendar system is the best for the money. I had used EventOn but the constant add-on cost was unbearable. Pro Event calendar includes all the features I had for much less. Great system."
With the WordPress Content Boxes Plugin, it’s all about boxes. 43 stylishly designed boxes to be precise, any of which users can select to contain and showcase site content, like testimonials, social icons, team members, products, pricing lists, etc.
Media Grid is a terrific plugin that allows you to create unlimited responsive, filterable and paginated portfolios quickly and easily. You can create your own layout and mix any media to create unique galleries. The plugin allows for a high degree of customisation to every element of your gallery.
Notable features:
unlimited layout-free portfolios
visual, drag-and-drop grid builder
ability to create grids using any public post on your website
one-click grid cloning system
User seamusberkeley says:
"This is the best image plugin available—lots of flexibility and dynamic organization of images. Customer support is responsive too—Luca replied to questions promptly."
Created by the authors of the WPBakery Page Builder, Templatera is a WordPress template manager that allows users to create, manage and set access to templates based on the user role or content type.
Notable features:
easy content reuse across templates
edit content across templates from one central place
ability to import or export templates in XML format
and more
User rikfik says:
"This plugin is awesome! It saves me a lot of time build my pages. Great job. Thanks."
Quform is an advanced WordPress plugin that allows you to quickly and easily build multiple forms. This drag-and-drop form builder is feature-rich, easy to use, and has a wide variety of templates that enable you to build all kinds of forms ranging from complex quotes to booking forms and simple contact forms, without ever writing any code. A few clicks and you have fully functional forms—it’s that simple.
Notable features:
responsive forms
drag-and-drop form elements
file uploads, sent as attachments or saved to the server (or both)
live preview while building
User adynsol says:
"Amazing script, easy to install, very well documented and with a ton of configs. Nice work."
DHWCPage is a template builder that helps you create any layout for your WooCommerce page quickly and easily. The plugin, which requires WPBakery Page Builder to work, is easy to install and configure and requires no coding skills.
Notable features:
supports WooCommerce shortcodes
works with any theme
create a single product by category or product type
display the product description and review separately
User mydiamondlive says:
"A must have plugin for eCommerce websites that want to put extra design features for products and to stand out from the rest."
Conclusion
These 12 plugins just scratch the surface of page layout plugins available at Envato Market. So if none of them catch your fancy, there are plenty of other great options there to hold your interest.
The navigation drawer slides in from the left and contains the navigation destinations for your app.
An example of a popular Android app that implements the navigation drawer menu design is the Inbox app from Google, which uses a navigation drawer to navigate to different sections of the application. You can check it yourself by downloading the Inbox app from the Google Play store, if you don't already have it on your device. The screenshot below shows Inbox with the navigation drawer pulled open.
The user can view the navigation drawer when they swipe a finger from the left edge of the activity. They can also find it from the home activity (the top level of the app), by tapping the app icon (also known as the Android "hamburger" menu) in the action bar.
Note that if you have many different destinations (more than six, say) in your app, it's recommended that you use a navigation drawer menu design.
In this post, you'll learn how to display navigation items inside a navigation drawer in Android. We'll cover how to use the DrawerLayout and NavigationView API to perform this task. For a bonus, you'll also learn how to use the Android Studio templates feature to quickly bootstrap your project with a navigation drawer.
A sample project (in Kotlin) for this Android navigation drawer menu design tutorial can be found on our GitHub repo so you can easily follow along.
Prerequisites
To be able to follow this Android Studio navigation drawer tutorial, you'll need:
Fire up Android Studio and create a new project (you can name it NavigationDrawerDemo) with an empty activity called MainActivity. Make sure to also check the Include Kotlin support check box.
2. Adding the DrawerLayout and NavigationView
To begin using DrawerLayout and NavigationView in your project, you'll need to import the design support and also the Android support artifact. So add these to your module's build.gradle file to import them.
Here we created a DrawerLayout widget with the id drawer_layout. The tools:openDrawer property is used to display the navigation drawer toggle when the XML layout is open in Android Studio design view.
DrawerLayout acts as a top-level container for window content that allows for interactive "drawer" views to be pulled out from one or both vertical edges of the window.
After adding the DrawerLayout widget, we included a child layout which points to @layout/app_bar_main.
Here is my app_bar_main.xml resource file. This file simply has a CoordinatorLayout, an AppBarLayout, and a Toolbar widget.
Finally, we created a NavigationView widget. The official documentation says the following about NavigationView:
NavigationView represents a standard navigation menu for application. The menu contents can be populated by a menu resource file.
In the NavigationView XML widget, you can see that we added an android:layout_gravity attribute with value start. This is used to position the drawer—you want the navigation drawer menu design to come out from left or right (the start or end on platform versions that support layout direction). In our own case, the drawer will come out from the left.
We also included an app:headerLayout attribute which points to @layout/nav_header_main. This will add a View as a header of the navigation menu.
Here is my nav_header_main.xml layout resource file:
Here we have defined a Menu using the <menu> which serves as a container for menu items. An <item> creates a MenuItem, which represents a single item in a menu.
We then defined our first menu group using the <group>. A <group> serves as an invisible container for <item> elements—menu items in our case. Each of the <item> elements has an id, an icon, and a title. Note that a horizontal line will be drawn at the end of each <group> for us when shown in the navigation drawer.
A <item> can also contain a nested <menu> element in order to create a submenu—we did just this in our last <item>. Notice that this last <item> has a title property.
Note that when showing the navigation list items from a menu resource, we could use a ListView instead. But, by configuring the navigation drawer with a menu resource, we get the material design styling on the navigation drawer for free! If you used a ListView, you'd have to maintain the list and also style it to meet the recommended material design specs for the navigation drawer.
3. Initialization of Components
Next, we are going to initialize instances of our DrawerLayout and ActionBarDrawerToggle. Initialization is going to happen inside onCreate() in MainActivity.kt.
The ActionBarDrawerToggle sets up the app icon located on the left of the action bar or toolbar to open and close the Android navigation drawer. To be able to create an instance of ActionBarDrawerToggle, we have to provide the following parameters:
a parent context—for example, in an Activity you use this, while in a Fragment you call getActivity()
an instance of the DrawerLayout widget to link to the activity's ActionBar
the icon to place on top of the app icon to indicate that there is a drawer toggle in Android
the string resources for the open and close operations respectively (for accessibility)
We invoked the method addDrawerListener() on a DrawerLayout so as to connect an ActionBarDrawerToggle with a DrawerLayout.
Note that we also enable the app icon via setHomeButtonEnabled() and enable it for “up” navigation via setDisplayHomeAsUpEnabled().
We then forward the onPostCreate(), onConfigurationChanged(), and onOptionsItemSelected() activity callback methods on to the drawer toggle in Android:
class MainActivity : AppCompatActivity() {

    // ...

    override fun onPostCreate(savedInstanceState: Bundle?) {
        super.onPostCreate(savedInstanceState)
        toggle.syncState()
    }

    override fun onConfigurationChanged(newConfig: Configuration?) {
        super.onConfigurationChanged(newConfig)
        toggle.onConfigurationChanged(newConfig)
    }

    override fun onOptionsItemSelected(item: MenuItem?): Boolean {
        if (toggle.onOptionsItemSelected(item)) {
            return true
        }
        return super.onOptionsItemSelected(item)
    }
}
Synchronizes the state of the drawer indicator/affordance with the linked DrawerLayout... This should be called from your Activity's onPostCreate method to synchronize after the DrawerLayout's instance state has been restored, and any other time when the state may have diverged in such a way that the ActionBarDrawerToggle was not notified. (For example, if you stop forwarding appropriate drawer events for a period of time.)
4. Testing the App
At this point, we can run the app!
As you can see, launching the app will show the Android “hamburger” menu navigation drawer icon in the action bar. Try tapping this app icon to open the Android side menu drawer. Also, clicking on the navigation drawer items won't do anything—we're going to handle that part in the next section.
5. Handling Click Events
Now, let's see how to handle click events for each of the items in the navigation drawer. Note that clicking on any item is supposed to take you to a new Activity or Fragment—that's why it's called a navigation drawer!
First, your activity needs to implement the NavigationView.OnNavigationItemSelectedListener.
class MainActivity : AppCompatActivity(), NavigationView.OnNavigationItemSelectedListener {
    // ...
}
By implementing this contract or interface, we must now override the only method: onNavigationItemSelected().
This method is invoked when an item in the navigation menu is selected. We used the when expression to perform different actions based on the menu item that was clicked—the menu item ids serve as constants for the when expression.
Next, we have to initialize our NavigationView and set this listener inside onCreate() of our activity.
class MainActivity : AppCompatActivity(), NavigationView.OnNavigationItemSelectedListener {
    // ...
    override fun onCreate(savedInstanceState: Bundle?) {
        // ...
        val navigationView: NavigationView = findViewById(R.id.nav_view)
        navigationView.setNavigationItemSelectedListener(this)
        // ...
    }
// ...
Run the project again!
When you click on some items, a toast message is displayed—just what we expected. But remember that clicking on an item should take the user to a new Activity or Fragment (we ignored this here for brevity's sake).
You'll notice that when you click on an item, the Android side menu drawer still remains. It would be better if it closed automatically anytime an item was clicked. Let's see how to do that.
To close the drawer after a link has been clicked, simply invoke closeDrawer() on an instance of DrawerLayout and pass GravityCompat.START to the method.
Run the project one more time and see the result!
6. Handling the Back Button Being Pressed
When the drawer is open, it would be a better user experience not to close the home activity if the Back button is pressed. This is the way popular apps like Google's Inbox app work.
So, when the drawer menu design is open and the Back button is pressed, only close the drawer instead of the current home activity. Then, if the user presses the Back button again, the home activity should be closed.
Here's how we can achieve this:
override fun onBackPressed() {
    if (drawer.isDrawerOpen(GravityCompat.START)) {
        drawer.closeDrawer(GravityCompat.START)
    } else {
        super.onBackPressed()
    }
}
Run the project again and test it out!
7. Bonus: Using Android Studio Templates
Now that you've learnt about the APIs involved to create a navigation drawer, I'll show you a shortcut that will make it faster next time. You can simply use a template instead of coding a navigation drawer Activity from scratch.
Android Studio provides code templates that follow the Android design and development best practices. These existing code templates (available in Java and Kotlin) can help you quickly kick-start your project. One such template can be used to create a navigation drawer activity.
I'll show you how to use this handy feature in Android Studio.
For a new project, fire up Android Studio.
Enter the application name and click the Next button.
You can leave the defaults as they're in the Target Android Devices dialog. Click the Next button again.
In the Add an Activity to Mobile dialog, scroll down and select Navigation Drawer Activity. Click the Next button after that.
In the last dialog, you can rename the Activity name, layout name or title if you want. Finally, click the Finish button to accept all configurations.
Android Studio has now helped us to create a project with a navigation drawer activity. Really cool!
You're strongly advised to explore the code generated.
You can use templates for an already existing Android Studio project too. Simply go to File > New > Activity > Navigation Drawer Activity.
Top Android App Templates With Navigation Drawers From CodeCanyon
The templates that come included with Android Studio are good for simple layouts and making basic apps, but if you want to kick-start your app even further, you might consider some of the app templates available from Envato Market.
They’re a huge time saver for experienced developers, helping them to cut through the slog of creating an app from scratch and focus their talents instead on the unique and customised parts of creating a new app.
Here are just a small handful of the thousands of Android app templates available on CodeCanyon. If there's one that piques your interest, you can easily get started by making a purchase.
If you or your client have a food delivery business, getting an app up and running is crucial. That's why you should consider this multi-store grocery service app template. It includes three templates with stunning layouts and Android hamburger menus. There's no limit to the categories you can add, and you can also SMS and email order notifications.
Buying the Universal Android app template is just like downloading a Swiss Army knife. It can do it all, from WordPress and Facebook to Twitter and Soundcloud. In fact, there is a list of more than 15 content providers that this template supports. Users can access important information from the slick side menu design and easily make their way around their favorite sites.
MaterialX is a recommended download for any app developer. It includes more than 315 unique UI components across more than 31 categories. Create stunning Android side menu designs, buttons, dialog boxes, and more from this single download. If you want a quick way to add some much-needed style to your new project, get this template.
Do you have content hosted online that you want to turn into a mobile experience? Then check out the Universal Android WebView App template. It was developed in Android Studio and supports phones and tablets running Android 4.1 and above. The Android navigation drawer menu design is completely customizable, as are other components. It also supports AdMob for monetization.
Here's a cool Android app template that's useful if you want to get your creative designs out into the world. The Android Wallpapers app supports static images, GIFs, and 4K photos. This template also includes useful features like:
pinch to zoom
push notifications
AdMob advertisement support
Android Studio code
Find More Useful Android App Templates From Envato Tuts+
CodeCanyon is home to thousands of Android app templates across many different niches. You're free to browse around and find one for your project. But it's worth noting that our Envato Tuts+ instructors have done a lot of that work for you already. You can check out some of these articles to explore the world of Android app templates that you can start using today:
In this tutorial, you learned how to create a navigation drawer menu design in Android using the DrawerLayout and NavigationView API from scratch. We also explored how easily and quickly it is use the Android Studio templates to create a navigation drawer.


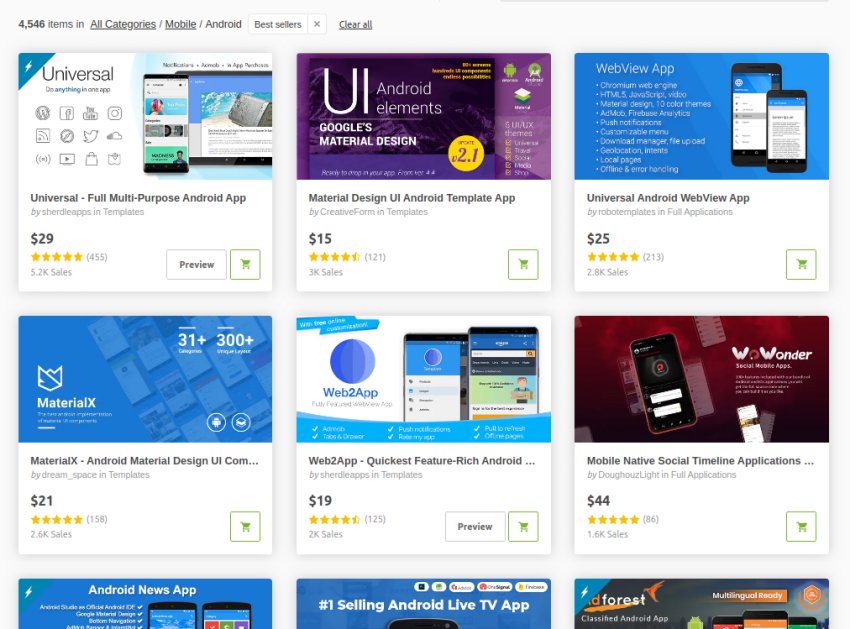


.png)


.jpg)