Quantcast
Channel: Envato Tuts+ Code
Viewing all 5161 articles
Browse latest View live

20 Best WordPress Calendar Plugins and Widgets (+5 Free Plugins)

$
0
0

Do you need a way to book appointments on your website? Do you need a way to show your business's upcoming events? Use high-quality WordPress calendar plugins and widgets for events, bookings, and appointments. I'll show you 25 of the best premium and free WordPress calendar plugins.

By adding a premium WordPress calendar plugin or WordPress schedule plugin to your website, you can provide your customers and potential customers with important information about your business and even collect payments for bookings.   

EventOn
EventOn is one of the many high-quality calendar WordPress widgets and plugins available on CodeCanyon.

The Best Calendar Plugins and Widgets on CodeCanyon

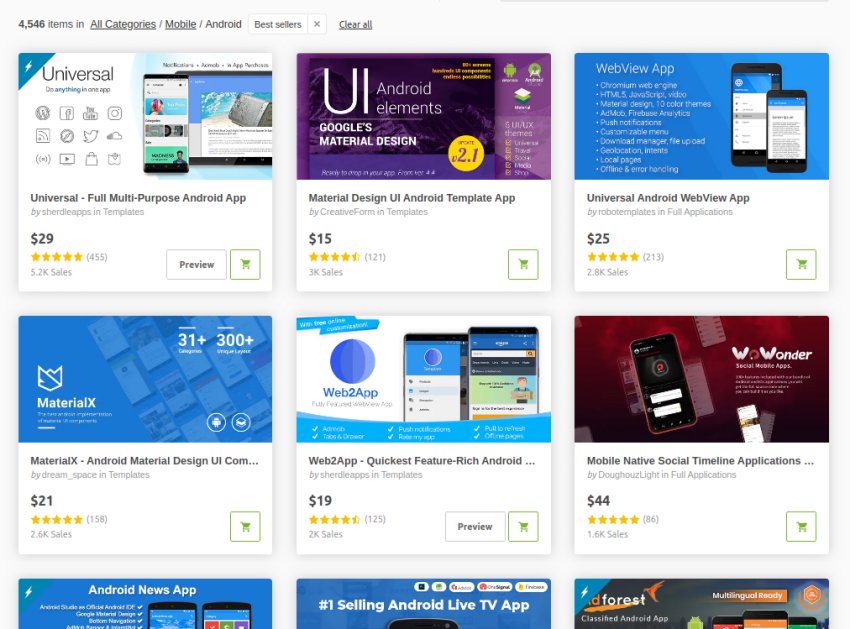
Explore over 7,000 of the best WordPress plugins ever created on CodeCanyon. With a low-cost, one-time payment, you can purchase these high-quality WordPress plugins and improve your website experience for you and your visitors. 

Here are a few of the weekly best-selling and up-and-coming calendar WordPress plugins and widgets available on CodeCanyon for 2020.

Best-Selling Calendar Plugins and Widgets
Weekly best-selling Calendar WordPress plugins and widgets on CodeCanyon  

These versatile WordPress calendar plugins and widgets allow you complete flexibility over the calendars and functionality of the calendars that you show your audience. Here a few of the notable features of the calendar widgets and schedule plugins listed here:

  • create custom events, classes, bookings, and meetings
  • appearance editor
  • filterable, sortable, and searchable booking list
  • Google Calendar integrations
  • WooCommerce integration
  • several online payment gateways
  • sharing on social media 

If you need to implement any type of calendar, booking, or scheduling into your WordPress website, then head on over to CodeCanyon and choose from the premium plugins available. 

Top 20+ WordPress Calendar Plugins and Widgets (From CodeCanyon for 2020)

Here are 20 of the best-selling WordPress calendar and schedule plugins that are available for you to download on CodeCanyon:

1. Bestselling: EventOn—WordPress Event Calendar Plugin

EventOn

EventOn is a multipurpose WordPress event calendar plugin that gives you all the things you need in a calendar. Not only can you customize each event with images, maps, icons, colors, and more, but you can also configure your calendar to search and sort in several different ways.

It has a clean, minimal design, and you'll be up and running quickly and easily.

EventOn is a nice, easy-to-use event calendar plugin that also offers a unique slider addon

2. Bestselling: Bookly—WordPress Appointment Booking Plugin

Bookly

Bookly is an incredible appointment booking system that blurs the line between a WordPress website and a web application. It is well designed, fully responsive, and even supports gestures. It also has free integration with Zoom.

It allows customers to book and cancel appointments, update personal information, and send payments. Bookly's customization options and useful features make it more than just a way to serve customers well—it also helps a website owner keep track of staff and appointments at the same time. 

You can create schedules for each staff member—you can even block out holidays. 

3. Noo Timetable—Responsive Calendar and Auto Sync WordPress Plugin

Noo Timetable - Responsive Calendar  Auto Sync WordPress Plugin

Noo Timetable is a super flexible WordPress event calendar with a fully responsive interface. This WordPress calendar is best for fitness, yoga and dance classes, but it can be easily adapted to any kind of event or office, like a medical consult.

Some of the best features of this WordPress event calendar are:

  • modern, up-to-date style
  • iCal file exporting
  • event filters
  • event navigation
  • event popups
  • unlimited color options

4. Trending: Eventer—All-in-One Event Management Plugin for WordPress

Eventer All-in-one Event Management Plugin

Eventer is your all-in-one event management WordPress plugin, with all the essential and premium features you could need. 

The Eventer plugin allows your website visitors to register for events online. Multiple ticket types can be made for any event: free or paid. Payments can be done via your choice of offline payment mode or online via PayPal. Recurring events for multiple dates have their own count of available tickets.

Use Eventer’s shortcode generator to show your events in multiple styles. Everything's fully responsive for all devices. It is also compatible with WooCommerce and WPBakery Page Builder. 

5. Calendarize it!

Calendarize it! supports WPBakery Page Builder, but it can also be used with any other popular page and layout builder by using shortcodes. 

In addition to its simple design, it comes with a powerful CSS editor that allows you to change colors, fonts, and style to match your brand theme. 

This WordPress calendar plugin supports single events, recurring events, arbitrary recurring events, and recurring events with exceptions. It also has advanced filtering with custom categories. 

6. Booked: Appointment Booking for WordPress

Booked Appointment Booking for WordPress

Booked is another great appointment booking option. It features an advanced appointment calendar which allows ease of management of appointments. It also gives you endless color possibilities when it comes to the design. 

Besides guest booking and customer profiles, it has customizable customer and admin emails. Other additional features include custom login and registration pages, time slots, and custom fields.  

7. Calendarista Premium—WordPress Appointment Booking & Calendar Plugin

Calendarista Premium - WordPress Appointment Booking  Calendar Plugin

Calendarista promises you will fall back in love with booking! 

It's fast and easy for businesses to add this WordPress booking and calendar plugin to their websites. They will quickly and easily be able to take online bookings. This versatile system works for all kinds of businesses: hotel, car rental, apartment rental, travel agency, beauty salons, restaurants, and more.

The plugin offers ten booking modes out of the box, three payment gateways, a custom form builder, a back-end calendar to view your appointments, and support for Google Maps and WooCommerce.

8. Events Schedule

Events Schedule - WordPress Events Calendar Plugin

Events Schedule is a simple yet powerful WordPress events calendar that lets you schedule classes and events in seconds. It is the perfect plugin for any event organizer.

When it comes to search and filter, Events Schedule offers five filter categories: namely type, location, instructor, day, and time of day.  

This fully responsive WordPress event calendar can integrate with Google Maps and WooCommerce. It also includes a countdown feature. 

Learn how to use the Events Schedule plugin with our hands-on, step-by-step tutorial.

9. Timetable Responsive Schedule for WordPress

Timetable Responsive Schedule for WordPress

Timetable Responsive Schedule for WordPress offers a new approach to WordPress calendar plugins. It includes plenty of event options, many shortcode options, and a great widget lineup, making it one of the best WordPress calendar plugins you'll find.

With it, you can create a timetable of events easily! Use the Timetable shortcode generator to create timetable views for classes, medical departments, nightclubs, tutoring, and so on.

Quickly create a timetable by:

  • adding a new event with day, time, category, and more
  • adjusting and configuring the design and appearance
  • generating your shortcode and placing it into a post or page

And that's it!

10. WordPress Pro Event Calendar

WordPress Pro Event Calendar

WordPress Pro Event Calendar stands out from the pack. What really sets it apart is the ability to import events from ICS feeds and Facebook. Best of all, WordPress Pro Event Calendar accepts events submitted by front-end users, making it easy for users to add events.

Other great features of this well-designed and fully responsive plugin include WPML support, fully responsive layouts, flexible event settings, and the ability to subscribe to a calendar. 

11. Event Booking Pro

Event Booking Pro

Event Booking Pro is an impressive WordPress calendar plugin that boasts over 600 settings! This WordPress calendar plugin is always adding more great features. 

There's no shortage of shortcodes. It supports CSV. Everything can be customized and styled as you like, making it fit into your WordPress theme design perfectly.

It also comes equipped with user-friendly event creation, unlimited events, offline and multiple bookings, and the ability to create coupons. Finally, it integrates with PayPal. 

It's a great option for setting up a fully functional event booking system. 

12. HBook: Hotel Booking System

The HBook hotel booking system is specifically built for hotels and B&Bs. It has a clean design that makes it very easy for customers to book directly from your website. 

The WordPress hotel booking plugin features powerful booking management that lets you view bookings and reservations. You can also synchronize your bookings with Airbnb. This snappy plugin includes seasons and rates tables, availability calendars, and customizable booking forms. 

It also comes with multiple payment gateways such as PayPal, Stripe, Square, and Mollie. 

13. WordPress Events Calendar Registration and Booking

WordPress Events CALENDER Registration and Booking

WordPress Events Calendar Registration & Booking plugin is feature-rich and has everything you need (and maybe more) to successfully set up a fully functional registration and booking system. It offers many options you'll only find in plugin addons. 

This "out of the box" solution includes a countdown timer for all your events and a stats dashboard that lets you keep track of payments and attendees and view the latest events and event categories.

14. Stachethemes Event Calendar

Stachethemes Event Calendar

This WordPress event calendar plugin offers everything you need to get started in creating events. It has a built-in booking system where users can book and pay for tickets and appointments. 

You can easily create single, multiple, and all-day events, or events that last for more than one day. You can showcase events in different ways, including a grid, box, map, agenda, and more. 

It also comes with a front-end submission form where users can submit events. Users can also share events via Facebook Messenger, WhatsApp, and Viber.

15. Amelia

Amelia

Amelia is a simple and powerful plugin for accepting online appointments and bookings. It is fully customizable and has a smooth UX that provides a seamless booking experience on just one page. 

It features a good range of elements and components that make it easy to create beautiful layouts, even when you have no coding experience.

Amelia also allows for Google Calendar synchronization. It's the perfect plugin for gyms, spas, law consultants, fitness experts, etc.

On top of multiple payment options, other key features include a powerful admin dashboard and real-time SMS notifications.

16. gAppointments: Appointment Booking Add-On for Gravity Forms

gAppointments Appoint Booking Addon for Gravity Forms

If you're already using Gravity Forms and need to integrate appointment booking, this date and time picker plugin is certainly worth a look. It comes with many options for service intervals and slots. 

It supports paid and non-paid booking and accepts any payment gateway. Combined with Gravity Forms, gAppointments is a powerful plugin for booking appointments.

17. Chauffeur Booking System

Chauffeur Booking System

As the name suggests, Chauffeur Booking System is a car reservation system suitable for companies of all sizes. It provides an easy way to book a vehicle based on distance, hourly rate, or a flat rate. It also supports WooCommerce and Google Calendar integration.

Other features include:

  • live route preview
  • unlimited booking forms
  • multiple payment methods
  • multiple currencies
  • geofencing and geolocation

 18. Webba Booking

Webba Booking

Webba Booking is specially designed and optimized for service providers, making it possible for them to save time and money. It provides a real-time, two-way Google Calendar synchronization. It also allows you to set different time zones, hence catering to customers all over the world.

It supports unlimited appointment schedules, and unlimited staff appointments and staff members. Finally, users can perform multiple bookings simultaneously and pay with Stripe or PayPal. 

19. FAT Event - WordPress Event and Calendar Booking

FAT Event - WordPress Event and Calendar Booking

FAT Event is a great WordPress event calendar. With this event manager plugin you can create a full calendar, timetables, upcoming events and recurring events. Multiple layouts like list, grid and carousel.

This WordPress event calendar plugin is perfect for many events and purposes. You can use it for school timetables, upcoming events in a venue, conference programs, agendas, and more.

  • This year's update features:
  • Email remainders
  • Email notification for admin
  • QR Code in email notification
  • WooCommerce integration
  • Coupon codes 

20. Events Shortcodes & Templates Pro Addon For The Events Calendar

Events Shortcodes  Templates Pro Addon For The Events Calendar

This WordPress event calendar is a premium add-on for The Events Calendar, a free website calendar plugin from WordPress. This was designed to extend the design and shortcode builder limitations of the free plugin. 

One of the best features about this WordPress event calendar plugin is that's SEO optimized, so your events can appear in Google search results. This add-on provides 15+ premium templates and comes with an easy shortcode builder and settings panel. 

With five stars, is one of our best-rated WordPress calendar add-ons. User mikeharris1963 says:

I love that this plugin lets me focus on content and takes away the pain for format. A few clicks and my calendar looks amazing.

21. SantaPress—WordPress Advent Calendar Plugin and Quiz

SantaPress - WordPress Advent Calendar Plugin  Quiz

We close the selection of the best calendar plugins for WordPress with this seasonal WordPress event calendar. SantaPress is an advent calendar plugin to surprise your visitors every day with a small gift until Christmas. 

This WordPress calendar comes with 8 beautiful layouts, over 200 door images and more great features (such as snowfall, hidden mode, and quiz mode etc). This cute WordPress event calendar makes your visitors want to come back every day!

User neo2freaks says:

It is the BEST Christmas advent calendar I saw on Envato. I love the quantity and the quality of the presets, as the well-coded snow and the idea of implementing a quiz in the calendar. Let it snow!

5 Free WordPress Calendar Plugins and Widgets for Download in 2020

While the premium plugins and widgets listed above have the most features, buying a premium plugin or widget may not be in your budget. That's why I've compiled a list of the top five free calendar plugins and widgets for 2020:

1. The Events Calendar

The Events Calendar

With this free plugin, you can create and manage events with ease. The features available in this plugin allow you to completely customize your calendar to fit your business's needs.

2. Simple Calendar

Simple Calendar is the easiest way to add Google Calendar events to your WordPress site. The WordPress calendar plugin has a ton of great features, including design templates, time zone settings, fully responsive calendars, and much more. 

3. All-in-One Event Calendar

All-in-One Event Calendar

The All-in-One Event Calendar offers a clean visual design with a comprehensive set of features to create an advanced website calendar system. Give this free plugin a try! You won't be disappointed. 

4. Sugar Calendar

Sugar Calendar is a simple and lightweight calendar that provides you with all the necessary features for event management. The easy-to-use interface and the minimal set of features in this plugin will help you get your event calendar up and running in no time. 

5. Booking Calendar

Whether you're running a real estate business, yoga class, or personal training, the Booking Calendar plugin can help you implement a great booking system. Add this plugin to your collection today!

How to Create a Calendar for a Yoga Class With WordPress Pro Event Calendar

Now that I have gone over all of the best free and premium plugins available on CodeCanyon, I will show you just how easy it is to create a calendar with one of the premium plugins.  We are going to go over how to create a simple calendar that displays the times of our yoga class on a calendar with the WordPress Pro Event Calendar plugin. 

1. Create a Calendar

Once you have installed the Pro Event Calendar plugin, we will head on over to WP Dashboard > Event Calendar > Calendars so we can create the calendar that we want to be displayed on our yoga studio website. Next, click the Add new calendar button to create a new calendar. We will fill in the Title field to say Yoga Calendar. Next, click the save button at the bottom of the calendar editor. 

2. Create an Event

Now that we have created our calendar, it's time to add our event. Navigate to WP Dashboard > Event Calendar > All Events. Click the Add New button to create a new event. We will title this event Yoga Class

In the right-hand column, we will set up the details for this event. Our yoga class is every Monday, Wednesday, and Friday at 2 p.m., so we need to reflect this in the event. Under Start Time, we will type in 2 p.m. Under Frequency, select Weekly. Then select the checkboxes next to Monday, Wednesday, and Friday

Setting start time and frequency

Finally, hit the Publish button, and the event will now be present on the yoga calendar. 

3. Add the Calendar to Your Website

Now it's time to add the calendar to the website. WordPress uses shortcodes to add the calendar to your website, so we will go back to WP Dashboard > Event Calendar > Calendars and copy the shortcode that is under Default Shortcode. We will then click WP Dashboard > Pages > Add New and title it Calendar

In the text editor, we will paste this shortcode. Hit the Publish button, and that's it. We have successfully created our yoga calendar, and it's now displayed on a new page that we created. 

Yoga Calendar Wordpress Pro Event Calendar

This short tutorial only scratched the surface of what this plugin can do. I also have a more in-depth tutorial on this powerful plugin, so be sure to check it out!

Discover More WordPress Plugins and Resources

Now, you've seen our best calendar plugins for WordPress and how to install and customize an event calendar plugin. But I'm sure now you'd like to see more WordPress plugins and learn more about it. I've got some useful resources for you:

Unlock the Power of CodeCanyon's WordPress Calendar Plugins and Widgets

To create a fully functional calendar and booking system on your WordPress website, download one of the many premium calendar plugins and widgets from CodeCanyon.

The feature-rich plugins on CodeCanyon will help ensure that the booking process is quick and easy, not only for your customers but also for you in the WordPress dashboard.

What are you waiting for? Get a WordPress calendar or booking plugin on your WordPress website today!


Best-Selling Calendar Plugins and Widgets
Weekly best-selling Calendar WordPress plugins and widgets on CodeCanyon  

This post has been updated with contributions from Maria Villanueva, a journalist and writer with many years of experience working in digital media.


27 Best Popup & Opt-In WordPress Plugins

$
0
0

Whether you are running a blog or an eCommerce business, you will need to convert your website visitors into subscribers in order to be successful. By adding a stylish and interactive popup and opt-in WordPress plugin to your website, you can easily convert your visitors into subscribers and eventually paying customers.

The popup and opt-in WordPress plugins available on CodeCanyon will allow you to integrate a popup or form into your website to capture your website user's email addresses, giving you the opportunity to market to them in the future.  

The Best WordPress Popup and Opt-in Plugins on CodeCanyon

Explore over 7,000 of the best WordPress plugins ever created on CodeCanyon. With a low-cost one time payment, you can purchase one of these high-quality WordPress plugins and improve your website experience for you and your visitors. 

Here are a few of the best-selling popup and opt-in WordPress plugins available on CodeCanyon for 2021.

Best-Selling Popup and Opt-In WordPress Plugins On CodeCanyon
Best-Selling Popup and Opt-In WordPress Plugins on CodeCanyon

Opt-in and popup plugins are necessary tools for converting website traffic. Without these tools, you would not be able to capture emails on your website, and your marketing campaigns will not be as effective. 

By integrating the premium plugins available on CodeCanyon into your website, you will have access to the best popup and opt-in plugins available. Here are a few notable features of these plugins:

  • social lockers
  • page-level targeting
  • customizable templates
  • sidebar widgets
  • slide in and modal popups

22 Best WordPress Popup & Opt-In Plugins

Here are 20+ of the best-selling WordPress popup and opt-in plugins that are available for you to download on CodeCanyon:

1. Trending: Popup Maker—WordPress Popup Plugin

Popup Maker - WordPress Popup Plugin

This is one of our newest and top-rated WordPress popup plugins. The Popup Maker allows you to customize your own popup according to your needs.

It's great for targeting and boost conversion rates and it features modern and clean style options. The best about the Popup Maker is its compatibility with any WordPress theme and no coding knowledge required. 

User Melowelei said:

Definitely the best popup plugin on the market! We had awesome and fast support. Thanks for this plugin.

User rjsavill said:

It's a very nicely designed interface which makes it very easy & satisfying to create popups! The customer support was great too. Quick responses & very helpful!

2. Modal Popup Box Elementor Addon

Modal Popup box Elementor Addon

The Modal Popup Elementor Addon is another of the newest WordPress popup plugins. This is used with Elementor Page Builder, where you can fully customize your popup. Features include:

  • unlimited design for content
  • modal popup width
  • modal appear effect
  • overlay color
  • unlimited design options
  • customizer close button
  • display settings
  • no coding knowledge required

3. Ansh Optin Forms For Elementor

Ansh Optin Forms For Elementor

This opt-in WordPress plugin is great if you're looking to grow your mailing list.  It works by adding email opt-in forms to your website, each of which can connect to your email marketing or email newsletter software. 

You can build simple and effective email opt-in forms with professional looking designs, in just minutes. Features include:

  • 20 email marketing integration
  • 30+ ready-to-use templates
  • easy to use
  • unlimited design options
  • fully-responsive design
  • custom forms

4. Popup Plugin for WordPress—Ninja Popups

Ninja Popups

Ninja Popups is one of the best WordPress popup plugins on Code Canyon, and that’s no wonder, as it offers a dazzling array of features and is integrated with a large number of email marketers. In spite of the plethora of features, this plugin’s drag-and-drop visual editor makes it very user-friendly.

Key features:

  • 60 popup themes
  • 8 opt-in panels
  • animation effects
  • 42 email marketing integrations
  • and more

5. Popup Plugin for WordPress—Green Popups

Layered Popups

Green Popups is another WordPress popup plugin that allows you to create your own cool multi-layered animated popups. If getting your hands dirty with code isn’t your style, you can use this plugin to take advantage of over 150 beautifully designed ready-made templates.

Key features:

  • works with 65 email marketing providers
  • visual popup editor
  • A/B campaigns and statistics
  • PageSpeed optimized
  • and more

6. Popup Plugin For WordPress—ConvertPlus

ConvertPlus

ConvertPlus has an enormous library of over 100 beautiful ready-made templates, including WordPress popup forms. It's specifically designed to convert your site visitors to email subscribers, social followers and customers using a wide variety of customizable popups that are triggered by various user actions.

Key features:

  • over ten popup display positions
  • 12 different visitor behavior triggers and filters
  • ability to re-engage inactive visitors with interactive popups
  • ability to tailor your offers to new, returning and logged-in visitors differently
  • and more

7. WP Unlimited Popups

WP Unlimited Pop-ups

WP Unlimited Pop-ups allows you to effortlessly create eye-catching and inviting popups without having to write a single line of code. This plugin comes with ten different popup styles for you to choose from to ensure it fits your website's theme. 

Here are a few notable features of this powerful plugin:

  • popup styling and customization
  • custom in and out animation
  • sequential display
  • page and post targeting

8. Popup Plugin for WordPress—Popup Press

PopupPress

PopupPress is a WordPress popup plugin that's all about variety. It allows users to insert any type of content in a popup, be it video, photo slider, disclaimer content, audio, text, or banner ads—you name it.

Key features:

  • accommodates a wide range of popup content
  • slider and lightbox included
  • different visitor behavior triggers and filters
  • fully customizable
  • and more

9. Opt-In Downloads—WordPress Plugin

Opt-In Downloads - WordPress Plugin

This plugin allows you to offer free downloads on your website in return for users' contact details. Any free download can be offered in return for contact details. What's great about this plugin is that it integrates with all the popular email service providers. This allows you to easily add new subscribers into your email service provider and set up sequences and workflows to market to the users who clicked your free download. 

Here are a few notable features of this plugin:

  • encrypted link sending 
  • GDPR compliant forms
  • translation ready
  • shortcode integration

10. Opt-In Panda for WordPress

Opt-In Panda for WordPress

Opt-In Panda for WordPress takes a different approach to opt-ins. This plugin allows you to lock a valuable portion of content on a webpage, by hiding or blurring it, and asks the visitor to enter their email address (opt in) to unlock the hidden content. Opt-In Panda will appeal to users who can easily create or already have premium content or freebies that they want to offer to subscribers only.

Key features:

  • four types of locks
  • integrates with all the major mailing services and plugins
  • subscribe visitors through Facebook, Twitter, Google, or LinkedIn
  • track your results with built-in analytics

11. ChimpMate Pro: MailChimp WordPress Assistant

ChimpMate Pro  WordPress MailChimp Assistant

ChimpMate Pro is an opt-in plugin designed specifically for Mailchimp WordPress users to help convert readers into subscribers. The WordPress email plugin is highly customizable and allows full control over when and where popups appear.

Key features:

  • WooCommerce Mailchimp integration
  • live editor
  • highly customizable themes
  • nine behaviour and trigger options
  • and more

12. Side Tabs: Layered Popups Add-On

Side Tabs  Green Popups Add-On

Extend the functionality of your website with Side Tabs, an add-on for the Layered Popups for WordPress plugin, which allows you to create small tabs and stick them to any window edge. Clicking the tab opens the associated layered popup. 

13. Popup Plugin for WordPress and Popup Editor

Master Popups

Master Popups is a powerful WordPress popup plugin for creating modal, full-screen, slide-in, inline and widget popups, as well as notification bars. The plugin provides users with a number of pre-made templates that are easy to customize so that you can add any type of content within your popups. 

The plugin works with email services like Mailchimp, Mautic, and GetResponse, but also allows you to capture subscriber info and save it directly to WordPress. Key features:

  • unlimited popups
  • various popup sizes
  • entrance and exit animations
  • overlay settings to adjust colors and opacity
  • sticky mode
  • and more

14. WordPress Vimeo YouTube Popup Plugin 

Wordpress Vimeo Youtube Popup Plugin

The longer your visitors stay on your site, the more engaged they'll be, and the more chance they'll convert. Videos have been proven to keep visitors on a website longer, so if you want to add videos to your site easily and seamlessly, why not try a popup? The WordPress Vimeo YouTube Popup Plugin allows you to easily create popup videos for your website that appears after a user clicks an element like an image or link. The videos used can be hosted by either YouTube or Vimeo. 

15. WP Flat Tour Builder

WP Light Tours Builder

Another innovative WordPress popup plugin, WP Flat Tour Builder allows you to create visual tours on your WordPress website in the form of a sequence of text, tooltips and dialog windows that guide the user through the different pages of the site. It can be launched automatically when a visitor arrives on a page or when the visitor clicks on a specific element.

Key features:

  • fully manage tours and steps
  • customizable
  • sequences can be tooltip, dialog, or text
  • and more

16. Ultimate Modal Windows

Ultimate Modal Windows

The Ultimate Modal Windows plugin allows you to create a wide variety of customizable WordPress popup forms and flyout panels and place them anywhere on your site. 

What’s more, the plugin also provides six user behavior triggering options so that you can choose how and when you want the popups and flyouts to appear.

Key features:

  • a powerful and easy-to-use editor
  • Mailchimp and GetResponse integration
  • ability to create any content, including feedback forms or social share buttons
  • a wide range of styling options
  • and more

17. Popups Generator

Popups Generator

Popups Generator is designed to make it easy to create a wide variety of popups on your site. It offers similar features and functions to Ultimate Modal Windows above, but an important difference is that it allows you to customize and fine-tune popup offers based on the activity of individual network users by using cookies.

 Key features:

  • insert any content via the built-in editor
  • create any kind of popup
  • ability to place popup anywhere
  • and more

18. Super Forms Popups Addon

Super Forms - Popups Add-on

An add-on for the Super Forms Drag & Drop Form Builder plugin, the Super Forms Popups Add-on doesn’t have the razzle-dazzle of some of the other popups featured here, but is a good solid choice for users looking to convert visitors to email subscribers.

Key features:

  • seven demo popups that can easily get you started
  • fully customizable
  • 12 different visitor behavior triggers and filters
  • popups can be made sticky
  • and more

19. WPBakery Page Builder Add-on Image Hotspot with Tooltip

Image Hotspot with Tooltip

WPBakery Page Builder Add-on Image Hotspot with Tooltip comes bundled with All In One Add-ons for WPBakery Page Builder, but for those who don’t own WPBakery, this standalone plugin enables you to add a hotspot icon with a popup tooltip to any image on your site.

Key features:

  • the tooltip feature supports text, images, video, and other kinds of content
  • hotspot icon’s position easily customizable
  • hotspot icons come in a variety of colours
  • and more

20. Mailchimper PRO—WordPress Mailchimp Signup Form Plugin

MailChimper PRO

Looking for a fabulous Mailchimp WordPress plugin? With Mailchimper PRO, you can create stylish newsletter subscription forms that will help you capture the attention of your website visitors.

This WordPress subscription plugin provides you with a number of gorgeous WordPress sign-up templates which are easy to customize to your taste. Use the predefined templates including various popup options to save time, or if you prefer you can use the Visual Builder provided to design your own custom forms. The plugin supports Mailchimp and a host of other database managers as well.

Key features:

  • visual builder for easy customization
  • popup and embed styles
  • connect with Google Analytics
  • social integration
  • view your subscribers directly on your WordPress admin

21. Opt-In Content Locker for WordPress

Opt-In Content Locker for WordPress

Opt-In Content Locker is a plugin that allows to lock important content on your WordPress website and display it for subscribed users only. 

It's one of our most popular opt-in WordPress plugins and it features:

  • modern and secure opt-in form
  • lock important content
  • regular locker mode
  • soft locker mode
  • MailChimp supported
  • CSV Export

22. Subscribe to Unlock Opt In Content Locker WordPress Plugin

Subscribe to Unlock Opt In Content Locker WordPress Plugin

This premium WordPress plugin makes it fast and easy to capture subscribers right from your WordPress site. It simply locks some specific content of your website until visitors subscribe to your site.

Some of this WordPress popup plugin features are:

  • 20 unlock forms templates
  • unlimited locker forms
  • intuitive lock mechanism
  • double opt-in confirmation
  • email blacklist function
  • popup page locker with countdown
  • soft and hard lock modes

5 Free Popup and Opt-in WordPress Plugins for Download in 2021

Paid popup and opt-in WordPress plugins will offer you the most comprehensive set of tools. These premium plugins have more features and often come with customer support, and the overall user experience is much higher.

However, you might not currently have the budget to spend on these premium popup and opt-in WordPress plugins and still need to convert your website viewers into subscribers. Below is a list of five of the best free popup and opt-in WordPress plugins. 

1. MailOptin

MailOptin

2. Optin Forms

Optin Forms lets you create stunning opt-in forms for your blog or website. All you have to do to get this form up and running is to select the email service provider that you are using, pick a form design, and style the form. All of this can be accomplished without any coding. 

3. Popup Maker

Popup Maker is an incredibly versatile and flexible plugin. You can create various types of popups that will suit your website. You can create email opt-in popups, contact form popups, announcements, cookie notices, and much more. 

4. Popup Builder

Create and manage powerful promotion modal popups for your WordPress website with Popup Builder. Some notable features of this plugin are popup animation control, unlimited popup creation, and styling customization.  

5. ITRO Popup Plugin

What is great about this plugin is its multilanguage support. This lightweight plugin is fully customizable and can suit all your popup needs for your WordPress website. 

How to Add a Popup Form to Your Website With ConvertPlus

To show you just how easy it is to add a popup form to your WordPress website, I am going to create a modal popup using the ConvertPlus plugin

Once you've installed the plugin, head on over to WP Dashboard > Convert Plus > Modal Popup. This will open up the Modal Designer dashboard, where we will then click the Create New Modal button. From the next screen, we will be able to select the template that we would like to use. We will select the sixth template on the page. Hover over the template and click Use This

Modal Popup Templates ConvertPlus

Now it's time to edit the modal popup to fit our specific needs. We want this modal popup to be very simple. We would like to offer a free download through this modal pop and have the user click a button to receive this free download. 

First, we will remove the ConvertPlus logo. Click on the logo and, in the left-hand editor, click None from the drop-down menu. Next, we are going to change the text on the popup. We will change the top text to say "Get Your Free Download Now!" 

Adding text to modal popup

Now we will change the second-level text to say "Click The Button Below." Then we will change the "Shop Now" text to say "FREE DOWNLOAD." Finally, we will add our download link by inserting our link in the Button link field in the left-hand editor. 

To make this modal popup go live on our website, we will click the gear icon on the far left-hand side of the popup editor. Click the Modal Status drop-down menu and click on the Enable Modal On Site button. There you have it! Your modal popup will be present on all of your WordPress website pages. 

Modal Popup ConverPlus

The Best WordPress Plugins on CodeCanyon

Explore thousands of the best WordPress plugins ever created on CodeCanyon. With a low-cost one time payment, you can purchase one of these high-quality WordPress plugins and improve your website experience for you and your visitors. 

Here are a few of the best-selling and hot new WordPress plugins available on ThemeForest for 2021.

Install a Popup and Opt-In WordPress Plugin Now! 

If you are looking to convert your website traffic into subscribers and paying customers, then purchase a premium Wordpress popup and opt-in WordPress plugin from CodeCanyon.

These powerful plugins will allow you to create any type of popup or opt-in form you require, style the popup or opt-in form, and display it on specific pages of your website. These plugins give you all the tools necessary to boost your subscriber count. 

While you are on CodeCanyon, feel free to check out the thousands of premium WordPress plugins available, as well as the best-selling, trending WordPress plugins of the year.

And if you want to start customizing your WordPress site with some simple code, try our free course on PHP for WordPress.

This post has been updated with contributions from Maria Villanueva, a journalist and writer with many years of experience working in digital media.

12 Best WordPress Weather Widgets & Plugins (With 5 Free)

$
0
0

Are you looking to display weather forecasts on your WordPress website? A visually pleasing and powerful WordPress weather widget for your website is indispensable. 

WordPress weather widgets allow you and your customers to plan for the weather. These plugins include WordPress weather widget sidebars, local weather widgets, and weather forecast widgets. This will let your potential customers know what local weather they can expect at your venue, whether it's a golf course, a wedding destination, or a restaurant with patios.  

SW Weather WordPress Plugin
One of the many weather WordPress plugins available on CodeCanyon.

The weather WordPress widgets and plugins available on CodeCanyon seamlessly integrate an upcoming weather forecast display on your website to keep everyone informed about the weather at your venue. 

Even though we’re powerless against Mother Nature, you and your customers can plan around it. 

The Best Weather Widgets for WordPress on CodeCanyon 

Discover over 7,000 of the best WordPress plugins ever created on Envato Market's CodeCanyon. With a cheap one-time payment, you can purchase one of these high-quality WordPress plugins. 

Here are a few of the best weather widgets for WordPress available on CodeCanyon for 2020.

Weather WordPress Plugins
Weather WordPress plugins available for sale at CodeCanyon

7 Best WordPress Weather Widgets and Plugins (From CodeCanyon for 2020)

Here are seven top-rated WordPress weather widgets and plugins that are available for you to download on CodeCanyon.

1. Best-Selling: Simple Weather Plugin

Simple Weather Best Selling WordPress Plugin

The Simple Weather plugin displays the current weather via widgets and shortcodes that you can display anywhere on your WordPress website.

These WordPress weather widgets for your website and shortcodes are easy to set up and are packed with all the options you need like location, GPS coordinates, customizable update intervals, day and night temperatures, background colors, and more. 

If you use WPBakery on your site, the publisher also offers Weather for Visual Composer.

2. Astero WordPress Weather Plugin

Astero WordPress Plugin Weather Widget

The Astero WordPress Weather Plugin includes much of what you'll ever want in a weather plugin for your WordPress website. This top-selling plugin comes with clean lines, multiple sizes and styles, and a solid feature set that makes this weather widget for your website look good even if the weather isn't. 

Other great features of this WordPress plugin weather widget include HTML5 geolocation with IP fallback, local cache, and support for 600+ Google fonts.

3. Weather for Visual Composer

WordPress Plugin Weather Widget for Visual Composer

Weather for Visual Composer (WPBakery) is perfect for websites that need to add some basic weather functionality in a stylish way. It displays the current weather as simple text or an elegant box widget. It's easily customizable with a set of stylish icons that give it a modern look. It has an easily changeable Celsius/Fahrenheit setting and supports 17 languages. 

For those used to working in WPBakery, getting everything set up using this WordPress weather forecast plugin is as easy as dragging the element into your layout and setting a location.

4. Always Sunny WordPress Weather Widget

Always Sunny WordPress Plugin Weather Widget

One of the more in-depth WordPress weather plugins available, the Always Sunny plugin gives a wide range of data and implementation options.

You can place this plugin on your pages in two ways: as a WordPress weather widget sidebar or as an embeddable shortcode. This mix makes it just as easy to show weather data in your sidebar as it is easy to drop it within a page’s content.

Beyond the basic weather measurements of temperature and weather patterns, this plugin throws a few other data points into the mix. Cloud coverage, wind patterns, and humidity levels make it a great addition for golf course websites, vacation spots, and restaurants with outdoor dining.

5. WP Weather Widget and WPBakery Add-on

WP Weather Widget and WPBakery Add-on Temperature Plugin WordPress

This WordPress weather plugin comes with a customizable element that can easily be dropped into your page template. It also includes a widget that can be used by any WordPress builder.

With all of the standard WPBakery element customization options and five layouts to choose from, you can quickly adjust your weather information to fit your page. Using the OpenWeatherMap API, this temperature plugin for WordPress lets you display the temperature, daily highs and lows, humidity, and more. If you need a weather widget for your website, WP Weather Widget makes a nice option.

6. Elfsight Weather - WordPress Weather Plugin

Elfsight Weather - WordPress Weather Plugin

Elfsight Weather is an easily adaptable WordPress weather plugin. Enter any point, using a ZIP code or GPS coordinates, and it will display current weather information for any location on the map. Your audience will be able to check the updated info on temperature, air pressure, humidity percentage, and active weather. 

The temperature plugin for WordPress has a weather forecast feature to show the forecast for the week ahead or for the next 12 hours. With this plugin, you can choose the colors you prefer for your widget display.

7. aWeather Forecast 

aWeather Temperature Plugin WordPress

The aWeather Forecast plugin is a uniquely designed weather WordPress widget. It can display weather conditions with its cast of 18 animated icons, 4 animated headers, and full-color customization. This is one of the most charming weather widgets you'll find!

This weather widget for your website can display the current weather icon and temperature, current weather conditions, wind speed and direction, pressure, humidity, and more. Not bad for a nifty little temperature plugin for WordPress.

5 Free Weather Widgets for WordPress

Without a doubt, paid weather WordPress plugins will offer you the most comprehensive set of tools and features. Features, customer support, and overall user experience will be better with these premium plugins. However, you might not currently have the budget to spend on these premium weather plugins and still need to show the weather forecast to your website visitors. 

That's why I have collected a list of five of the best weather WordPress plugins available for free online. 

1. WP-Forecast

This WordPress weather plugin that's free will let you display weather data from AccuWeather and WeatherBug. You can also customize the display features such as location and language.

2. Weather Atlas Widget

Weather Atlas Widget weather wordpress plugin free

The Weather Atlas WordPress plugin weather widget features a responsive design, a detailed forecast, and weather icons. It works well for a weather WordPress plugin that's free. This plugin is easy to set up and use. 

3. Weather Underground

weather underground wordpress weather plugin free

This is a simple weather forecast plugin for WordPress. This WordPress weather plugin is free and fits perfectly with many different templates out of the box, including the default WordPress theme.

4. Location Weather

location weather wordpress weather plugin free

Location Weather is an easy-to-use and customizable WordPress weather plugin that's free. It allows you to add unlimited up-to-date weather information to your web pages or through a WordPress weather widget sidebar.

5. Weather Station

weather station weather wordpress plugin free

This weather WordPress plugin is free and collects meteorological data from public or personal weather stations and can display it in many elegant ways on your website. Like most other weather WordPress plugins, it can be installed with a shortcode. 

How to Customize the aWeather Weather Forecast Plugin for WordPress 

Now that we've gone over all the best premium and free weather WordPress plugins available, you might be wondering how you can add them to your website. 

Let's take a look at how you can customize a premium weather plugin so it can fit seamlessly into your website. 

1. Insert aWeather Into Your Website

First, we need to insert the aWeather plugin into the site once the plugin is installed. Choose Appearance > Widgets from the WordPress admin sidebar. From there, we will look for the aWeather Forecast tab under Available Widgets. We would like the widget to appear in the footer of our website, so click on the tab and choose Footer. The widget will now be added to our website, and we can begin customizing it. 

Adding aWeather To Footer

2. Type in Your OpenWeather Map API ID

Next, click on the aWeather widget under the Footer section of the widget editor. This will open up the customization options for the widget. 

In order for the widget to display the current weather forecast for your desired location, we must add an API key in the OpenWeatherMap App ID text field. To do this, click on the Get App ID link next to the field title. 

You'll then need to create an account on the OpenWeather website in order to obtain the API keys. Click the Sign-Up link on the webpage. Once you've signed up with a valid email, click on the API keys link on the second-level menu header. Copy and paste the API key called default back into the OpenWeatherMap App ID text field. Your widget will now be ready to display current forecasts from around the world. 

Getting OpenWeather API key

3. Configure the Display

Finally, we can adjust the widget to display the weather forecast how we would like. Under the aWeather widget, type in "London, UK" as we would like to show the weather forecast for London. Next, click the drop-down menu titled Units format, and choose Fahrenheit. Lastly, click the save button at the bottom of the widget. You can now view the weather widget on the footer of all your pages. 

aWeather widget display

Find WordPress Video Tutorials From Envato Tuts+ on YouTube

You're using the Envato Tuts+ website to find some excellent WordPress plugin weather widgets, but did you know we're also on YouTube? You can learn about graphic design, video editing, and everything in between on our YouTube channel.

Learn useful tips, tricks, and skills with our WordPress video tutorials and guides. Here's a quick peek at what you can find from Envato Tuts+ on YouTube.

Install a WordPress Weather Widget or Plugin Now! 

If you've got a business that relies on the weather, then add a stylish-looking weather WordPress plugin from CodeCanyon. 

The WordPress weather widgets and plugins available will allow you to seamlessly integrate a weather display into your website and give you the option to customize the display so it will fit with your website's theme.

Need icons to go with your new plugin? You can find free weather icons on Envato Elements.

Also, there are thousands of other high-quality WordPress plugins on CodeCanyon that can help enhance your business's website. Have a look through this large collection of plugins, and you'll find helpful plugins in all different types of categories, from marketing to eCommerce to social media.

Find the perfect WordPress plugin to help your business succeed and motivate your customers. You can find even more plugin ideas and inspiration in our new free course on finding the best WordPress plugins for your site.

This post has been updated with contributions from Nathan Umoh. Nathan is a staff writer for Envato Tuts+.

Best WordPress Form Builder Plugins for 2021

$
0
0

If you own a WordPress site, forms are indispensable for creating a satisfying user experience and increasing your conversion rates. You need forms for clients to get in touch with you easily, answer simple survey questions, leave feedback and testimonials, and so on. But you don’t need to have coding experience to create forms. You can use WordPress form builder plugins!

ARForms
ARForms is an example of WordPress Form Builder Plugins available on CodeCanyon

What Is a WordPress Form Builder Plugin?

A WordPress form builder plugin allows you to create forms for your website quickly and easily, without any specialized coding knowledge. 

Some form builders for WordPress come with tools to build different kinds of forms that serve different purposes. These are the multipurpose or all-in-one plugins. 

Other form plugins build forms that serve a very specific purpose: for example, building a cost estimation and payment form. 

Best-Selling WordPress Form Builder Plugins for 2021

For just a one-time payment, you can get yourself one of the most comprehensive, feature-rich WordPress available on CodeCanyon today! They are easy to use, and you don't require any coding skills. 

Topselling WordPress Form Builders

What to Look for in a Form Builder Plugin

  • Responsiveness: the ability to create websites that easily and efficiently scale to any devices—desktops, tablets, smartphones—should be a no-brainer. 
  • Drag-and-drop / ease of use: saves time whether or not you know how to code.
  • Customization & flexibility: your form builder has to be able to build the kinds of forms you need.
  • Shortcodes: so you can add forms anywhere on your website.
  • Integration: your forms might need to integrate with other services like marketing, payment, or monetization plugins. 
  • Regular updates: if a plugin is not up-to-date, it's likely not secure, and it might have compatibility problems with current versions of WordPress.
  • Security: does the seller do regular audits to identify and fix security vulnerabilities that may arise from the use of the plugin?

Multipurpose Form Builder Plugins

Plugins in this category are like a one-stop shop where you can get different kinds of forms that serve different functions. 

1. Quform 

Quform

Quform is an advanced WordPress plugin that allows you to quickly and easily build multiple forms. This drag-and-drop form builder is feature-rich, easy to use, and has a wide variety of templates that enable you to build all kinds of forms ranging from complex quotes to booking forms and simple contact forms, without ever writing any code. A few clicks and you have fully functional forms—it’s that simple. 

Some features available in Quform include:

  • responsive forms
  • drag-and-drop form elements
  • file uploads, sent as attachments or saved to the server (or both)
  • live preview while building
  • export directly to an .xls.xlsx.csv.ods, or .html file

2. FormCraft

FormCraft - Premium WordPress Form Builder

A form doesn’t need to be boring. It can be aesthetically beautiful and technically excellent. With the FormCraft plugin, you get forms that are both. The forms are well-designed and appealing. You don’t get that stock template kind of feeling. With its drag-and-drop style editor, FormCraft is a breeze to use. You simply drag the item you need from the menu and drop it in place on the form you have chosen. Boom! Form built. 

FormCraft forms also have multiple layers for customizing. You can easily change your fonts and colors. You can even upload your own logo and add a background image—among other things—to create a form adapted to your brand and personality. 

FormCraft has been designed with responsiveness at its core, so your web forms will look sharp and beautiful on every device. 

This form creator plugin for WordPress comes integrated with free and paid add-ons that extend the capabilities of what a form template can do. Available add-ons include Mailchimp integration, GetResponse, Campaign Monitor, Signature Pad, and more.

3. eForm

eForm

If you’re looking for the most comprehensive form management system, you will find it in the eForm form builder plugin. With the quick and easy, drag-and-drop form builder, you can build the many forms your business needs in order to function efficiently: quizzes, surveys, data collection, cost estimation with payment, and user feedback of all kinds. You can customize product names, numbers, and invoice IDs. The form builder also allows for custom coupon codes for discounts. 

All submissions are stored in your eForm database, so you can view, track, analyze, and act on the data you have captured. A user portal also allows registered users to review and track their submissions.

eForm is fully integrated with the best email marketing tools: Campaign Monitor, Get Response, AWeber, and Mailchimp. Email addresses are saved in your eForm database, so it’s easy to send targeted marketing to particular groups of users.

For fast, secure, and easy payment, eForm form builder is integrated with PayPal, Stripe, and WooCommerce. And you can enable more payment systems.

4. NEX-Forms

Nex-Forms

NEX-Forms is a highly flexible and customizable form builder plugin that gives you the freedom to style your layouts and add your own background images. This drag-and-drop form creator has a layout grid system of five preset columns—including unlimited grid nesting—that can be dragged into any position on the form to create your own layouts. 

It also has math logic to perform cost calculations based on user selections and advanced conditional logic to show and hide form elements based on your users' input. On the back end, the NEX-Forms admin panel will give you a real desktop application feel with no page refreshing. Everything is done with a single versatile admin tool. 

Other interesting features of this WordPress forms creator include:

  • GeoLocation stats so you can see where your form submissions came from!
  • Submission Reports and Exports: generate reports from your form submissions based on your own criteria. Your reports can also be exported to CSV and/or PDF!
  • Interactive Forms: interact in real time with your users.

5. ARForms

ARForms - WordPress Form Builder

ARForms is a form builder plugin with a clean, easy-to-use interface, a solid design, and great functionality. It comes with a full-featured multi-column facility, including the option to resize any column by simply dragging the border between fields. Easy, fast, flexible. Also, you don’t need to pay extra for a popup form plugin. It’s already built in!

Want to see how your forms will look when you publish them? Want to check mobile and tablet viewports? The preview button enables you to see how your forms will look without leaving the form editor. 

So if you’re looking for complete flexibility to create forms that suit your needs, you can’t go wrong with this WordPress form builder plugin.     

Specialized Form Builder Plugins

Plugins in this category specialize in building only one kind of form. If you need to build a specific kind of form that is covered by one of these plugins, you might get better functionality than you would with a multipurpose WordPress form builder. 

6. WP Cost Estimation & Payment Forms Builder 

WP Cost Estimation & Payment Forms Builder

You want your customers to get an accurate estimate of their request, you want them to be able to easily make payments using PayPal or Stripe, and you also want to send and receive customer emails automatically via Mailchimp or another mailing list service. 

You can do all that using WP Cost Estimation & Payment Forms Builder—a specialized plugin that is used to create cost estimation and payment forms. It also has a booking system to manage calendars, events, and reminders directly from the back-end. 

This plugin's amazing features allow you to focus on your clients' needs. These features include:

  • powerful Form Designer tool to customize your forms
  • estimations and payments work with subscriptions
  • discount coupon code management
  • confirmation email can be sent to the customer too
  • complex custom calculations are defined with an intuitive visual interface
  • orders can be exported as .csv or emailed as .pdf

All this, and it works with WooCommerce and Easy Digital Downloads too! 

7. TotalPoll Pro: Responsive WordPress Poll Plugin 

TotalPoll Pro - Responsive WordPress Poll Plugin

Do you want to create attractive, engaging polls that integrate into your WordPress website easily? TotalPoll Pro has a relatable, user-friendly interface designed to make poll creation hassle-free. The templates can be customized to create visually compelling polls. 

  • Optimized for touchscreens: your polls will always look amazing whether on a laptop, tablet, or smartphone. 
  • You can track votes daily, weekly, and monthly. You can also track custom field values with votes. 
  • Trace every vote with an informative log (showing status, IP, browser, and time) to identify any cheating attempts.
  • Integrate your polls everywhere with a shortcodewidget, or even a direct link.

TotalPoll Pro supports multiple languages including Arabic, English, German, French, Italian, Mandarin, Portuguese, Spanish, Hindi, Japanese, Russian, Swedish... And there are more languages coming.

8. Modal Survey: WordPress Poll, Survey, and Quiz Plugin

Modal Survey: WordPress Poll, Survey, and Quiz Plugin

The success of a website highly depends on the visitors, so a customer satisfaction survey is key to improving the content. 

Modal Survey gives you the power to create any customer satisfaction survey or customer feedback survey on your pages easily with the Visual Poll Builder.

It's the most comprehensive survey plugin in the market.  

9. Contact Form CF7

Contact Form Seven CF7 Multi-Step Pro

If you have a very long form with too many fields, people will get tired of filling it out, and they will leave the website. You will lose customers!

Instead, you can increase your web submission rate by breaking up your form into multiple steps with the Contact Form CF7 plugin. This plugin provides a step-by-step UI for long forms with many fields. 

This is the most appealing way to display a long form to your visitors. You can also customize the colors to suit your theme. 

Download a WordPress Form Builder Plugin From CodeCanyon Now!

There are many different kinds of WordPress form plugins available today.  Some form builder plugins allow you to create forms that serve a specific business function—for example, cost estimation and payments or surveys and polling. Others are multipurpose and give you the ability to create all the kinds of forms your business needs. 

You need to choose a plugin that fits your requirements. The plugins we’ve featured have a solid reputation and are all available on CodeCanyon.

Topselling WordPress Form Builder Plugins

For more about WordPress forms and form builders, check out some of our other posts!

How to Upload a File in PHP (With an Example)

$
0
0

In this article, I’ll explain the basics of file upload in PHP. Firstly, we’ll go through the PHP configuration options that need to be in place for successful file uploads. Following that, we’ll develop a real-world example of how to upload a file.

Configure PHP Settings

There are a couple of PHP configuration settings that you'll want to check beforehand for successful file uploads. In this section, we’ll go through each and every option which is important in regards to PHP file upload. These options can be configured in the php.ini file.

If you're not sure where to find your php.ini file, you can use the php_ini_loaded_file() to locate it. Just create a PHP file on your server with the following line, and open it from the browser.

Here is an excerpt from a setup file with some useful defaults.

The Key Settings

file_uploads

The value of the file_uploads directive should be set to On to allow file uploads. The default value of this directive is On.

upload_max_filesize

The upload_max_filesize directive allows you to configure the maximum size of the uploaded file. By default, it's set to 2M (two megabytes), and you can override this setting using the .htaccess file as well. Two megabytes isn't very much by today's standards, so you might have to increase this. If you get an error that file exceeds upload_max_filesize when you try to upload a file, you need to increase this value. If you do, be sure to also increase post_max_size (see below).

upload_tmp_dir

Sets a temporary directory which will be used to store uploaded files. In most cases, you don't need to worry about this setting. If you don't set it, the system default temp directory will be used.

post_max_size

The post_max_size directive allows you to configure the maximum size of POST data. Since files are uploaded with POST requests, this value must be greater than what you've set for the upload_max_filesize directive. For example, if your upload_max_filesize is 16M (16 megabytes), you might want to set post_max_size to 20M.

max_file_uploads

It allows you to set the maximum number of files that can be uploaded at a time. The default is 20, a sensible amount.

max_input_time

It's the maximum number of seconds a script is allowed to parse the input data. You should set it to a reasonable value if you're dealing with large file uploads. 60 (60 seconds) is a good value for most apps.

memory_limit

The memory_limit directive indicates the maximum amount of memory a script can consume. If you're facing issues during upload of large files, you need to make sure that the value of this directive is greater than what you've set for the post_max_size directive. The default value is 128M (128 megabytes), so unless you have a very large post_max_size and upload_max_filesize, you don't need to worry about this.

max_execution_time

It's the maximum number of seconds a script is allowed to run. If you're facing issues during upload of large files, you can consider increasing this value. 30 (30 seconds) should work well for most apps.

Now let's build a real-world example to demonstrate file upload in PHP.

Create the HTML Form

Once you’ve configured the PHP settings, you're ready to try out the PHP file upload capabilities.

Our GitHub repo has some sample code which I'm going to discuss throughout this article. So, if you want to follow along, go ahead and download it from GitHub.

We’re going to create two PHP files: index.php and upload.php. The index.php file holds code which is responsible for displaying the file upload form. On the other hand, the upload.php file is responsible for uploading a file to the server.

Also, a file will be uploaded in the uploaded_files directory, so you need to make sure that this folder exists and is writable by the web-server user.

In this section, we’ll go through the key parts of the index.php file.

Let’s take a look at the index.php file on GitHub:

You can use the following CSS to give the form a more appealing look.

The CSS basically hides the original file input and styles its accompanying span and label elements.

Although it may look like a typical PHP form, there’s an important difference in the value of the enctype attribute of the <form> tag. It needs to be set to multipart/form-data since the form contains the file field.

The enctype attribute specifies the type of encoding which should be used when the form is submitted, and it takes one of the following three values:

  • application/x-www-form-urlencoded: This is the default value when you don’t set the value of the enctype attribute explicitly. In this case, characters are encoded before it’s sent to the server. If you don’t have the file field in your form, you should use this value for the enctype attribute.
  • multipart/form-data: When you use the multipart/form-data value for the enctype attribute, it allows you to upload files using the POST method. Also, it makes sure that the characters are not encoded when the form is submitted.
  • text/plain: This is generally not used. With this setting, the data is sent unencoded.

Next, we output the file field, which allows you to select a file from your computer.

Apart from that, we’ve displayed a message at the top of the form. This message shows the status of the file upload, and it’ll be set in a session variable by the upload.php script. We’ll look more at this in the next section.

So that sums up the index.php file. In the next section, we’ll see how to handle the uploaded file on the server side.

Create the Upload Logic

In the previous section, we created the HTML form which is displayed on the client side and allows you to upload a file from your computer. In this section, we’ll see the server-side counterpart which allows you to handle the uploaded file.

Pull in the code from the upload.php file on GitHub. We’ll go through the important parts of that file.

In the upload.php file, we've checked whether it’s a valid POST request in the first place.

In PHP, when a file is uploaded, the $_FILES superglobal variable is populated with all the information about the uploaded file. It’s initialized as an array and may contain the following information for successful file upload.

  • tmp_name: The temporary path where the file is uploaded is stored in this variable.
  • name: The actual name of the file is stored in this variable.
  • size: Indicates the size of the uploaded file in bytes.
  • type: Contains the mime type of the uploaded file.
  • error: If there’s an error during file upload, this variable is populated with the appropriate error message. In the case of successful file upload, it contains 0, which you can compare by using the UPLOAD_ERR_OK constant.

After validating the POST request, we check that the file upload was successful.

You can see that the $_FILES variable is a multi-dimensional array, the first element is the name of the file field, and the second element has the information about the uploaded file, as we’ve just discussed above.

If the file upload is successful, we initialize a few variables with information about the uploaded file.

In the above snippet, we’ve also figured out the extension of the uploaded file and stored it in the $fileExtension variable.

As the uploaded file may contain spaces and other special characters, it’s better to sanitize the filename, and that’s exactly we’ve done in the following snippet.

It’s important that you restrict the type of file which can be uploaded to certain extensions and don’t allow everything using the upload form. We’ve done that by checking the extension of the uploaded file with a set of extensions that we want to allow for uploading.

Finally, we use the move_uploaded_file function to move the uploaded file to the specific location of our choice.

The move_uploaded_file function takes two arguments. The first argument is the filename of the uploaded file, and the second argument is the destination path where you want to move the file.

Finally, we redirect the user to the index.php file. Also, we set the appropriate message in the session variable, which will be displayed to users after redirection in the index.php file.

How It All Works Together

Don't forget to create the uploaded_files directory and make it writable by the web-server user. Next, go ahead and run the index.php file, which should display the file upload form which looks like this:

File Upload UI

Click on the Browse button—that should open a dialog box which allows you to select a file from your computer. Select a file with one of the extensions allowed in our script, and click on the Upload button.

That should submit the form, and if everything goes well, you should see the uploaded file in the uploaded_files directory. You could also try uploading other files with extensions that are not allowed, and check if our script prevents such uploads.

Resolving Common Errors

A lot of things can go wrong during a file upload which might result in errors. You can check the exact error that occurred during the upload using $_FILES['uploadedFile']['error']. Here is the explanation of those errors:

File is Too Large

UPLOAD_ERR_INI_SIZE and UPLOAD_ERR_FORM_SIZE occur when the size of uploaded file is more than the value specified in php.ini or the HTML form respectively. You can get rid of this error by increasing the upload size limits or letting the users know about them beforehand.

Temporary Folder is Missing

UPLOAD_ERR_NO_TMP_DIR is reported when the temporary folder to upload the file is missing. UPLOAD_ERR_NO_FILE is reported when there is no file to upload.

Partial Upload or Can't Write to Disk

You will get UPLOAD_ERR_PARTIAL if the file could only be uploaded partially and UPLOAD_ERR_CANT_WRITE if the file could not be written to the disk.

A PHP Extension Stopped the File Upload

Sometimes, you will get the error UPLOAD_ERR_EXTENSION because some extension stopped the file upload. This one will require more investigation by you to figure out which extension caused the problem.

Here is the full code from upload.php which will show users a message on the upload page in case of success or failure of the upload. The information about the success of failure of the upload is stored in the $_SESSION['message'].

Learn PHP With a Free Online Course

Today, we discussed the basics of file upload in PHP. In the first half of the article, we discussed the different configuration options that need to be in place for file upload to work. Then we looked at a real-world example which demonstrated how file upload works in PHP.

If you want to learn more PHP, check out our free online course on PHP fundamentals!


In this course, you'll learn the fundamentals of PHP programming. You'll start with the basics, learning how PHP works and writing simple PHP loops and functions. Then you'll build up to coding classes for simple object-oriented programming (OOP). Along the way, you'll learn all the most important skills for writing apps for the web: you'll get a chance to practice responding to GET and POST requests, parsing JSON, authenticating users, and using a MySQL database.

Make a Simple Android App: a Digital Business Card

$
0
0

With the increased number of physical interactions turning virtual, it is essential to adapt to newer ways to put yourself out there. Handing out business cards were great ways to network at events in the past. However, with majority of the events going virtual, why not your business card too?

In this tutorial, you will learn about the basics of using core Android Studio views such as TextView, ImageView, and View Groups such as ConstraintLayout. By the end of this tutorial, you will build a digital version of your own business card as an app that they can share with anyone you meet!

Prerequisites

To follow along with this tutorial, you'll need:

You can learn how to install Android Studio here on Envato Tuts+.

1. The Design

Before moving into Android Studio, let's look at the sample business card design that we will be converting into an Android app. A great way to visualize what you want to build is to draw it out on a piece of paper or make a sketch on an illustration software. The below design was sketched on Figma.

Business card app design made in Figma

2. Set Up a New Android Studio Project

To create a new project for your business card, start by launching Android Studio.

You will see the Welcome to Android Studio window. Select Start a new Android project. You'll see some options for starter templates—choose Empty Activity from the listed activity types.

Next give your project a descriptive name. In our case, we will just call it "Business Card App". Keep the rest of the settings at their default. 

Project Setup Details

Once you're done, Android Studio will build your project.

3. The Layout Design

Now that we have a new project, we need to design the card! The design that will be shown through the app originates from the layout files in Android Studio. Let's look at how to customize them.

First, switch to the Android file view by clicking the dropdown in the Project pane. Expand the app > res > layout folder. Open activitymain.xml from inside that folder by double-clicking on the file name. activitymain.xml is where the layout for your main activity is defined.

activitymain.xml Hierarchy

For any layout file, you have three ways to work on the design of the activity:

  1. Code: This is where you can code your design in XML.
  2. Design: This is where you can add views by just dragging and dropping onto the visible area. 
  3. Split: This is where you work on the design with drag-and-drop and the XML code side by side.

In this tutorial, we will be using both the code and design views. There are two other panes that you need to know about for the design view:

  • Palette: This is where you can view some of the most commonly used views and widgets. 
  • Component Tree: As you add different views and view groups to your screen, the hierarchy of elements is displayed here. 
Palette and tree

Introduction to Constraint Layout

ConstraintLayout is the recommended layout for views in Android Studio because it flattens the layout hierarchy, creating simpler layout code. This means that every element can be directly a child of the ConstraintLayout without creating nested relationships of layouts within layouts.

ConstraintLayout requires that each view should have at least one horizontal and one vertical constraint. If the screen size changes, the views are automatically adjusted to the new screen setting/width. 

By default, you will notice a ConstraintLayout and a TextView for the "Hello World" text. Delete the TextView by selecting it in the component tree and pressing delete. 

Add an Image View

Most business cards contain a professional picture of you or your company. To add this, we will be using the Android ImageView component. 

ImageView is responsible for displaying image resources called drawables. Drawables are any graphic assets that can be drawn or shown on the screen, such as PNGs or shapes.  

To display an image in the ImageView, you will need to add the image to the drawable directory. You can do this easily from within Android Studio. To add an image to the drawable directory, first delect the Resource Manager Pane. Then press the Add Resources to module button and choose Import drawables. Now select any drawable file that you want for the logo on your business card and press Import.

Import drawable

Great! Now that our image is added to the drawable directory let's use it in an ImageView

First select ImageView from the Palette and drag it onto the design view of the layout editor. You will be asked to choose a drawable—choose the image you imported in the previous step. Add a unique id to the image view by selecting the attributes pane. 

Finally, to position your image in the layout, select the bubbles at the corners of the logo and drag them to the edges of the screen. This will add vertical and horizontal constraints to the image that will keep it scaled to fill the entire activity.

Alternatively, you can use the XML code below and add the ImageView. Make sure to change the srcCompat value to the name of your image. 

Add a Text View 

TextView allows you to display text to the user of the application. You can customize many of its attributes such as textSize, textColor, and textStyle.

We need to show the person's details such as name, title, and phone number. You add a text view in a similar way to how a image view was added in the previous section. First select TextView from the Palette and drag onto the design view of the layout editor. 

Now, to size and position the text view,  drag the bubbles to each side to the parent container's left and right. Then drag the bubble at the top of the TextView to the bubble at the bottom of the ImageView.

Alternatively, this can be accomplished by writing XML code as below. You can also modify attributes such as textSize, id and the text itself in the XML code too. 

Similarly, we need to add the remaining TextView on screen and constraint them to the previous TextView. To do this, follow the below code sample: 

To add a separator between the previous TextView and the ones we plan to create next, let's add a horizontal line. Here's how you can do that:

The purpose of a business card is to make connections! So we cannot miss out on adding our personal information. Let's add the TextView for our phone number, email, location, and website.

4. The Color Palette

Throughout the app, we will be using a material color palette that we created using the color tool on Material.io

To add the additional colors go to Res > Values > colors.xml and modify the values to the ones below:

On running the app, you will see the result as below:

Final screenshot of app

5. Refactoring

If you used the layout editor's design view to drag and drop views, you would notice that the id is randomly generated. Having an id such as textView9 is not very helpful as it does not convey what the TextView displays. 

It is good practice to refactor and add descriptive ids for the views that you use in your project. Similarly, another good practice is to declare the strings used throughout the app in strings.xml. This allows for easy translation in case you decide to have the app in different languages. 

To modify the string declaration for any of the TextView we created first click the warning triangle in the Component Tree. This will open up the message with more detail and a suggested fix option. Then click on the Suggested Fix to let Android Studio fix the issue for you

Conclusion

In this tutorial, I showed you how to create your very own business card app using some core Android components. While this is just the start, the possibilities to expand are endless! You can add a QR code, multiple pages, or a share functionality that directs users to more information. 

Premium Android App Templates From CodeCanyon

Note that you can use these same techniques to start an app using one of the premium app templates available from CodeCanyon—an online marketplace that has hundreds of Android app templates, which are very feature-rich and tailored to every domain. You can save days or even months of effort by using one of them.

CodeCanyon mobile Android app template bestsellers

If you have trouble deciding which template on CodeCanyon is right for you, these articles should help: 

Build a Music App With an Android App Template

$
0
0
Final product image
What You'll Be Creating

Developing a beautiful user interface for Android apps can be a time-consuming endeavour. Here are some of the steps we typically go through to design an app:

  • We begin to brainstorm and then draw (with paper and pen) what the UI should look like. In other words, we do a wireframe of the app. 
  • We create the actual design of the UI from the wireframe in design software like Photoshop or Sketch. 
  • We translate the UI design to actual code in Android Studio. Here we code the business logic. It's recommended we also adhere to the material design principles. 

And this is only the tip of the iceberg—designing an app is a lot of work! All these tasks can be time-consuming—especially if you're the only one doing them. 

However, in this already highly competitive app market, you have to move fast and make sure your app has a beautiful user interface (in addition to making sure your code is bug-free) or else users will go and install your competitors' apps. 

Fortunately, CodeCanyon offers a wide range of beautiful application templates to kickstart your mobile app project. In this tutorial, I'll help you get started with one such template, called Android Material UI Template 3.0. We are going to build a material design music player for Android using this template and also explore some of its useful functionality. 

If music be the food of love, play on. — William Shakespeare

Prerequisites

To be able to follow this tutorial, you'll need Android Studio 3.0 or higher. 

1. Get the Template

To begin building the music app, you'll need an account with Envato Market. So sign up if you haven't already, and purchase the Android Material UI Template 3.0 on CodeCanyon. You'll see how much work it saves you!

Envato Android Material UI Template 30

After you've successfully purchased the template, the template's source code is available in a ZIP file—so make sure you download that ZIP file to your computer. 

2. Unzip the File

Now visit the folder where the ZIP file was downloaded and unzip or extract it. 

Folders available in root folder

When you enter the root folder and click on the Project folder, you'll see a list of template folders. Here is what I have on my Windows 10 machine after extracting it. Note that when you purchase this template, you have access not only to the Music App template but also to eight other templates (as you can see in the image above). 

3. Import the Template

Fire up Android Studio 3 and select File New Import project... 

Make sure to navigate to the folder where the extracted template is located and select the Music App template to import. 

After a successful import, an Android Gradle plugin update dialog will pop up. It's recommended you click on the Update button—to allow Android Studio to upgrade our Gradle plugin to the latest version (3.0.0) for us. 

Update Gradle plugin dialog

When Gradle has finished syncing your project automatically, you'll come across this error in Android Studio because we have successfully upgraded our Gradle dependency to 3.0.0

Android Studio logcat error

To resolve this, visit the project app's module build.gradle file and use outputFileName instead of output.outputFile inside the release build type configuration settings. Make sure yours is similar to the one in the screenshot below. 

Project Gradle file

Inside the same build.gradle file, also do the following:

  • Update your buildToolsVersion to '26.0.2'.
  • Set targetVersion and compileSdkVersion to 26.
  • Make sure the Android artifacts are updated too.

These Android artifacts are available at Google’s Maven repository. So visit your project's build.gradle file to include it. 

By adding the artifacts, we have taught Gradle how to find the library. Make sure you remember to sync your project after adding them. 

Notice that this template uses the Picasso artifact to load and display the images. You can easily swap it for Glide instead if you want. 

Now, if you run the project, you'll get an error displayed on Android Studio Logcat. 

Project error displayed on Android Studio logcat

To resolve this error, go to /data/Tools.java and remove the getAPIVersion() method. Make sure you modify the following methods—in the screenshot below—in your code to be similar to what we have here.

Project methods in Toolsjava

You can see how well structured the project files are. You're advised to dive in and take a look at the source code (it's easily understandable). While there, you can freely modify any part of the code to suit your needs. 

Project files structure in Android Studio

For example, if you don't like the colour choices used for the template, nothing is stopping you from visiting the colors.xml resource and modifying them to suit your taste. 

Project colorsxml resource folder

4. Test the App

Finally, you can run the app! 

Tutorial project result

You can tell that this music app interface is well designed. By default, the first tab is selected—it shows a list of songs available. Click on any of the songs and enjoy the music that's being played (though only one song is available in the app). 

Note that this template doesn't list the songs available on the host device. Instead, it comes with its own dummy data (for demonstration purposes). So you'll need to code the functionality for listing the songs on the host device. The dummy data class generator is located at /data/Constant.java

Project Constantjava

If you click the caret inside the current playing song container (located at the bottom of the screen), it will open up a nice-looking detail activity about the current song playing. Here we can easily implement more functionalities such as shuffle, repeat, and move to the next or previous song. Note that these functionalities aren't implemented by default in the template.  

Music app showing detail of the current song playing

Observe that this beautiful template interface is an Android tabbed interface using ViewPager. If you swipe right, you'll see the list of albums with pictures in the tab.  

Music app showing a list of albums in current tab

If you swipe right again, you'll see the list of artists displayed in the current tab. 

Music app showing a list of artists in current tab

Swiping to the last tab shows the playlists. Here, you can even add a new playlist by clicking the "+" toolbar menu. 

Music app showing list of playlists in current tab

Remember, if you want to make some money from this app by displaying ads, you can easily integrate it with AdMob. To learn about how to integrate AdMob with an Android app, check out my tutorial here on Envato Tuts+.

More Amazing Music App Design Templates From CodeCanyon

You'll save a lot of time by creating with music app design templates. If you want to see other options you have, I've grabbed a some of the best music apps to create for music streaming on Android from CodeCanyon.

1. Android Music Player—Online MP3 (Songs) App

Of all the music app design templates found on CodeCanyon, this is the best seller. Users can stream songs as well as play music on their phones. Songs can be filtered by category through the app, Unlike an Android music player template that's free, the UI also includes dark mode. The Android Music Player template is one of the best choices for code beginners, experts, and everyone in between.

Android Music Player App Template

2. Your Radio App

The name "Your Radio App" is fitting for this Android music template. Users can find and listen to the music that interests them thanks to unlimited categories. It also supports a sleep timer, favorites, sharing, and more personalized features. Try it out if you want a material design music player for Android. 

Your Radio App Materia Design Music Player for Android

3. Global: Radio, News, Podcast and Backend

Looking for a fully-featured Android music app template? Try out Global. Not only does it do radio music streaming, but it can handle news and podcasts, too. You'll also find useful features, like:

  • unlimited radio stations
  • podcast downloads
  • backend admin control
  • share functionality

Try out Global if you want a useful alternative to an Android music player template that's free. 

Global Best App to Create Music On Android

4. Android Online Radio

With a more than 4.5 rating on CodeCanyon, Android Online Radio is one of the top music app design templates available. The UI is sleek and modern, and comes in dark mode. Take advantage of Google AdMob to monetize your work. If you've been wanting a material design music player for Android, you'll like this template.

Android Online Radio Material Design Music Player for Android

5. Cherry—Android Online Music Player with Admin Panel

Cherry rounds out our list of music app design templates from CodeCanyon. This music Android app theme supports both on and offline listening. Users can run Cherry in the background while they use other apps. It even supports multiple languages, so you can reach a larger audience. Very few Android music player templates that are free can say that.

Cherry Best App To Create Music on Android

Learn to Code Android With Envato Tuts+ Tutorials

Learning how to code is a useful skill, but it does take time to pick up. If you're ready to start learning, you'll want to check out the Envato Tuts+ YouTube channel. You'll find useful coding video courses and tutorials. There are even links to full Envato Tuts+ coding courses!

You can get started with this free course on becoming a web developer:

Written Android Tutorials From Envato Tuts+

Head over to Envato Tuts+ for even more helpful Android and coding tutorials! Learn everything from converting WordPress websites into mobile apps using AJAX in PHP and jQuery, and a lot more. Here are a few tutorials to get you started:

Keep Coding, Keep Learning!

App templates are a great way to jumpstart your next development project or to learn from other people's work. This article showed you how we quickly created a nice-looking music app using Android Material UI Template 3.0 on CodeCanyon. We also went through some of the best apps to create for music streaming on Android. Remember, if you're looking for inspiration or you're building an application and need help with a particular feature, then you may find your answer in some of these templates.

Envato Market has hundreds of other Android app templates that you can choose from. There are templates for games and complete applications, as well as comprehensive starter templates like the one we used in this post. So take a look, and you just might save yourself a lot of work on your next Android app.

If you want to explore more iOS apps and templates, then check out some of our other posts on CodeCanyon app templates!

This post has been updated with contributions from Nathan Umoh. Nathan is a staff writer for Envato Tuts+.

Creating Pretty Popup Messages Using SweetAlert2

$
0
0

Every now and then, you will have to show an alert box to your users to let them know about an error or notification. The problem with the default alert boxes provided by browsers is that they are not very attractive. When you are creating a website with great color combinations and fancy animation to improve the browsing experience of your users, the unstyled alert boxes will seem out of place.

In this tutorial, you will learn about a library called SweetAlert2 that allows us to create all kinds of alert messages which can be customized to match the look and feel of our own website.

Display Simple Alert Messages

Before you can show all those sweet alert messages to your users, you will have to install the library and include it in your project. If you are using npm or bower, you can install it by running the following commands:

You can also get a CDN link for the latest version of the library and include it in your webpage using script tags:

Besides the JavaScript file, you will also have to load a CSS file which is used to style all the alert boxes created by the library:

Once you have installed the library, creating a sweet alert is actually very easy. All you have to do is call the Swall.fire() function. Just make sure that the function is called after the DOM has loaded.

There are two ways to create a sweet alert using the Swal.fire() function. You can either pass the title, body text and icon value in three different arguments or you can pass a single argument as an object with different values as its key-value pairs. Passing everything in an object is useful when you want to specify values for multiple arguments.

Note that older versions of SweetAlert2, use a swal() function instead of Swal.fire(). If you try to use the old swal() function you will get the error "Cannot call a class as a function".

When a single argument is passed and it is a string, the sweet alert will only show a title and an OK button. Users will be able to click anywhere outside the alert or on the OK button in order to dismiss it.

When two arguments are passed, the first one becomes the title and the second one becomes the text inside the alert. You can also show an icon in the alert box by passing a third argument. This can have any of the five predefined values: warningerrorsuccessinfo, and question. If you don't pass the third argument, no icon will be shown inside the alert message.

Configuration Options to Customize Alerts

If you simply want to show some basic information inside an alert box, the previous example will do just fine. However, the library can actually do a lot more than just simply show users some text inside an alert message. You can change every aspect of these alert messages to suit your own needs.

We have already covered the title, the text, and the icons inside a sweet alert message. There is also an option to change the buttons inside it and control their behavior. By default, an alert will only have a single confirm button with text that says "OK". You can change the text inside the confirm button by setting the value of the confirmButtonText property. If you also want to show a cancel button in your alert messages, all you have to do is set the value of showCancelButton to true. The text inside the cancel button can be changed using the cancelButtonText property.

Each of these buttons can be given a different background color using the confirmButtonColor and cancelButtonColor properties. The default color for the confirm button is #3085d6, while the default color for the cancel button is #aaa. If you want to apply any other customization on the confirm or cancel buttons, you can simply use the confirmButtonClass and cancelButtonClass properties to add a new class to them. Once the classes have been added, you will be able to use CSS to change the appearance of those buttons. You can also add a class on the main modal itself by using the customClass property.

If you interacted with the alert messages in the first example, you might have noticed that the modals can be closed by pressing either the Enter or Escape key. Similarly, you can also click anywhere outside the modal in order to dismiss it. This happens because the value of allowEnterKeyallowEscapeKey, and allowOutsideClick is set to true by default.

When you show two different buttons inside a modal, the confirm button is the one which is in focus by default. You can remove the focus from the confirm button by setting the value of focusConfirm to false. Similarly, you can also set the focus on the cancel button by setting the value of focusCancel to true.

The confirm button is always shown on the left side by default. You have the option to reverse the positions of the confirm and cancel buttons by setting the value of reverseButtons to true.

Besides changing the position and color of buttons inside the alert messages, you can also change the background and position of the alert message or the backdrop around it. Not only that, but the library also allows you to show your own custom icons or images in the alert messages. This can be helpful in a lot of situations.

You can customize the backdrop of a sweet alert using the backdrop property. This property accepts either a Boolean or a string as its value. By default, the backdrop of an alert message consists of mostly transparent gray color. You can hide it completely by setting the value of backdrop to false. Similarly, you can also show your own images in the background by setting the backdrop value as a string. In such cases, the whole value of the backdrop string is assigned to the CSS background property. The background of a sweet alert message can be controlled using the background property. All alert messages have a completely white background by default.

All the alert messages pop up at the center of the window by default. However, you can make them pop up from a different location using the position property. This property can have nine different values with self-explanatory names: toptop-starttop-endcentercenter-startcenter-endbottombottom-start, and bottom-end.

You can disable the animation when a modal pops up by setting the value of the animation property to false. The library also provides a timer property which can be used to auto-close the timer once a specific number of milliseconds have passed.

In the following example, I have used different combinations of all the properties discussed in this section to create four different alert messages. This should demonstrate how you can completely change the appearance and behavior of a modal created by the SweetAlert2 library.

Creating Toasts with SweetAlert2

You have probably seen small messages or alerts that appear on smartphones every now and then. These messages appear near the bottom of the screen over all other content and disappear after some time. They are useful when you want to inform users about something like completion of a download file etc.

You can turn any alert into a toast notification by setting the value of toast parameter to true. Toasts will show up in the middle of the screen if you don't specify a position with the position parameter because position defaults to center when left unspecified.

A lot of alerts and toasts that you add to your website will probably use the same value of attributes for consistency. For example, lets say you want to create two separate toasts one for successful sign in and another for wrong password. You can use the mixin() method to avoid any duplication. This method returns an extended version of Swal that consists of all the supplied parameters as default values. You no longer need to supply same values again and again to different alerts.

Here is an example:

Storing the mixin in a variable allows us to call fire() at some later point with parameters that either specify a new value of override default values. The following CodePen demo shows all three toasts in action.

Important SweetAlert2 Methods

Initializing different sweet alert messages to show them to users is one thing, but sometimes you will also need access to methods which control the behavior of those alert messages after initialization. Fortunately, the SweetAlert2 library provides many methods that can be used to show or hide a modal as well as get its title, text, image, etc.

You can check if a modal is visible or hidden using the isVisible() method. You can also programmatically close an open modal by using the close() or closeModal() methods.

If you happen to use the same set of properties for multiple alert messages during their initialization, you can simply create a new Sweet Alert instance with Swal.mixin(). Pass a configuration object and Swal.mixin() will return a new instance with those configurations pre-set.

Note that this functionality was provided by the setDefaults() and resetDefaults() methods in Sweet Alert 7.x and earlier.

You can get the title, content, and image of a modal using the getTitle()getContent(), and getImage() methods. Similarly, you can also get the HTML that makes up the confirm and cancel buttons using the getConfirmButton() and getCancelButton() methods.

There are a number of other methods which can be used to perform other tasks like programmatically clicking on the confirm or cancel buttons.

Final Thoughts

The SweetAlert2 library makes it very easy for developers to create custom alert messages to show to their users by simply setting the values of a few properties. This tutorial was aimed at covering the basics of this library so that you can create your own custom alert messages quickly.

To prevent the post from getting too big, I have only covered the most commonly used methods and properties. If you want to read about all the other methods and properties which can be used to create advanced alert messages, you should go through the detailed documentation of the library.


10 Best Live Chat Plugins for WordPress in 2021

$
0
0

Live chats plugins are the easiest, fastest and most efficient way to connect with your customers and resolve their problems without delay. There is no risk of missing your customers messages. You can support your customers anywhere, anytime, even on your phone. They, in addition, provide direct engagement with potential leads who would move on to the next website if there is no chat facility.

In fact, WordPress live chat plugins offer the instant personalized experience that customers are looking for. Live chat cements trust and has the potential to help grow your business. 

Best-Selling Live Chat Plugins on CodeCanyon

For an affordable one time price, you can choose from and purchase premium live chat plugins for WordPress available on CodeCanyon and increase customer engagement, satisfaction and retention for your business. 

Topselling live chat plugins on CodeCanyon

Live chat plugins carry many benefits for your business and your customers. Some of these include: 

  • instant solutions for customers 
  • ability to gain insights from user data 
  • personalized experience that boosts customer satisfaction
  • increase customer retention
  • convert leads into customers 
  • increased engagement with existing and potential customers

At CodeCanyon you will find WordPress chat plugins that will vastly improve how you provide exccellent service to your customers. 

Best Live Chat Plugins for WordPress in 2021 

Talking directly with your customers has never been easier! Let's have a look at some of the best live chat plugins for 2021.

1. Live Chat Unlimited

Live Chat Unlimited

Using Live Chat Unlimited you can offer smarter and faster support to your customers directly from the website. And if you're away, there is a form to show you're offline. This multiple license version for installation on unlimited websites integrates smoothly with WPML and Polylang plugins for multi-lingual support. In addition to supporting more than one operator, all your visitors messages are encrypted. If you're looking for to install only on a single website then check out the single license version called Live Chat Complete

2. Ninja Team Facebook Messenger for WordPress

Ninja Team Facebook Messenger with Live Chat

The Messenger live customer chat plugin allows you to integrate the Facebook Messenger experience directly into your website. Customers can interact with your business anytime with the same personalized, rich-media experience they get in Messenger. 

The messenger chat plugin automatically loads recent chat history between the customer and your business, so you can continue the conversation even after they have left your webpage. No need to capture their information to follow up, just use the same conversation in Messenger.

3. All in One Support Button and Callback Request

Contact Us All-in-one-button plus call back request
All in One Support Button with Callback Request

All in One Support Button displays on every page of your site and provides as many contact methods as you want. You can choose which contact methods will be displayed on desktop and mobile versions of your site separately. That way you can set one link for desktop version and another for mobile. Among social communication channels supported include: Facebook Customer Chat, WhatsApp, Zendesk chat,  VK chat, Skype, Slack, Viber, Telegram, Email and so many more. 

4. WP Flat Visual Cha—Live Chat and Remote View for Wordpress

WP Flat Visual Chat - Live Chat & Remote View for Wordpress

If you are ready to see your support ratings soar, then consider WP Flat Visual Chat! With this plugin you can provide live support thanks to the unique 2-way remote desktop viewer build right into the live chat for WordPress. This way you can visually guide your clients to the right item by sharing a screen. You just need to select the element or item you wish to share, and engage in a visual two-way chat with your customers. It is also equipped with comprehensive chat settings built into the front-end so you can modify your text to suit your brand style and tone of voice easily, with no coding required.

5. Support Board—WordPress Chat Plugin

Support Board - WordPress Chat Plugin

How about automating your customers' communication using artificial intelligent-driven bots and chat system with platforms you use the most? Then Support Board is the right WordPress plugin for you. This richly designed, lightweight and fast, high-performance live chat plugin is ideal for businesses of all sizes. It has a clean and modern admin interface that allows you to manage all conversations from one place. It can integrate with Slack and Diagonal Flow to offer more customer engagement options. 

6. Maxbot—Chatbot Builder WordPress Plugin

Maxbot - Chatbot Builder WordPress Plugin

You can create chatbots or intelligent virtual assistants in minutes without requiring any coding or technical knowledge. You simply need WordPress Chatbot Builder. It’s simple to create different logic blocks and link them to respective triggers. You don’t need to use any external API. It does not depend on any other services. It scales well and can handle hundreds of conversations at a time. This tool lets you build a human-like bot that engage clients and pique their curiosity to continue the conversation. 

7. Facebook Chat—Facebook Messenger for WordPress

Facebook Chat - Facebook Messenger for WordPress

You can turn visitors into shoppers and increase sales by integrating Facebook chat into your website. Visitors can easily contact you on this Facebook Messenger live chat plugin right from your website. You will be able to respond faster to their needs through this Facebook live chat plugin. This plugin comes with many customization options and premade layouts. You can set it to appear on specific pages or for a certain group of visitors, choose start-chat triggers, and even create your own welcome message. 

8. WooWBot—ChatBot for WooCommerce

WoowBot- Chatbot for WooCommerce

Conversational commerce is the future of eCommerce. A live chat bot like WoowBot can help customers with product search, order status, support and more. It will connect with them on a personal level through natural interaction that mimics the everyday world.  You can even use WoowBot shortcode to create single page shopping experience! You have the option to integrate WoowBot with Facebook Messenger, Whatsapp, Viber, Skype and more, just in case customers want to speak with a real human. 

9. WordPress Whatsapp Chat

WordPress Whatsapp Chat

WhatsApp Chat plugin is the fastest way for your website visitors to get in touch with you via their favorite messenger. You will stay connected anytime and from anywhere. Customizable and easy-to-use, the plugin offers a full range of styling settings and responsive layouts. You have diverse display positions, option to add your company logo, caption text, an inviting welcome message, and the ability to choose categories of visitors that will see the chat. 

10.  WhizzChat

whizzchat-a-universal-wordpress-chat-plugin

WhizzChat is a multipurpose chat plugin that is perfect for directory listing websites, social networking websites, active online communities and so on. It has all features required for communication in online communities where users chat with each other and share files, images, etc.

It also has customer service live chat features that make it easy for users to communicate with the admin or support. These features include: 

  • admin to customer chat 
  • customer to seller chat

Free Live Chat Plugins for WordPress 

If you're on a very tight budget or have no budget at all, free live chat plugins may be the way to go. Most of them have enough features to get you up and running, but as your business expands you will need to consider premium plugins.

1. EngageBay Live Chat

EngageBay Live Chat

With the EngageBay live chat plugin for WordPress, you can quickly and easily add live chat support to your WordPress website. It allows for instant communication with on-site visitors and customers and enables prompt resolution to their questions or concerns.

2. Tidio Live Chat

Tidio Live Chat

Tidio Live Chat is a live chat service which allows you to communicate with your customers easily with the help of chatbots. After 1-minute installation, a Tidio Live Chat widget appears on your website and lets your customers get real-time personal help by answering questions and resolving their doubts. 

3. Live Chat (Messenger API) and Polylang

Live Chat (Messenger API) + Polylang

Integrate Messenger custom chat on your website for free. Modify colors, choose languages, integrate with PolyLang, change positions and much more… It’s easy!

4. Smartsupp Live Chat 

Smartsupp Live Chat

Smartsupp live chat is one of the most popular live chat solutions in Europe, used by 283,000 websites. Start a personal conversation with your visitors, enage them using automatic messages, and turn them into happy customers. Measure your customer care quality with detailed statistics. Get a better understanding of customer behavior thanks to visitor recording.

5. Customerly—Free Live Chat Suite

Customerly -Free Live Chat Suite

Talk with your visitors in real-time for free using Customerly. You can live chat with video chat and screen sharing. The conversation dashboard can easily handle live chat, Facebook Messenger chats and email. Mobile Apps to reply your live chat on-the-go

Install a Live Chat Plugin for WordPress Now!

As you can see, there's a wide range of live chat plugins available. At CodeCanyon you will find  premium live chat plugins for WordPress that will help your website customer engagement ratings go through the roof.

TopSelling live chat plugins for WordPress

Learn More About WordPress Live Chat Plugins 

Here are more articles to help you learn more about live chat plugins for WordPress and how to harness their power so your business can excel!

10 Best Android Game Templates

$
0
0

If you are familiar with the Android SDK, you probably know that using it to create a new game from scratch is no mean feat. Choosing the right game engine, supporting multiple screen sizes and DPIs, implementing error-free gameplay, and managing player data are all demanding tasks that can take days, if not weeks, to complete.

Thankfully, there's CodeCanyon, an online marketplace that, among other things, is teeming with well-thought-out game templates. By using one or more of those templates, you can skip most of the tedious aspects of game development and focus only on the bits that are unique to your game.

In this article, I'm going to introduce you to some of the most feature-rich and awesome Android game templates available on CodeCanyon.

Android Game Templates on CodeCanyon

There are currently over 1000 premium Android game templates available on CodeCanyon. All of them offer free updates for lifetime and 6 months of support. Besides original ideas, you can easily find clones of popular games and customize them to create your own unique version.

CodeCayon Android Game Marketplace

The prices for some of the templates are as low as $5. Don't miss out on the chance to save a lot of your time and money.

1. Zumbla Deluxe

Zumbla Deluxe home screen

Zumbla Deluxe, developed by gradle, is a recently launched Android game template you can use to create beautiful tile-matching games. If you think there are enough match-three and puzzle games available on Google Play already, I'm sure you'll change your mind once you take a look at the template's rather unique graphics and game mechanics.

Right out of the box, the games you build with Zumbla Deluxe will conform to both the marble shooter and match-three game genres. If you're not satisfied with the default Mayan-inspired sprites they use, you can effortlessly reskin them to match your preferences.

2. Block Puzzle

Block Puzzle gameplay

Block Puzzle is another Android game template developed by gradle. As you may have guessed by looking at the screenshot above, this template is ideal for creating simple yet addictive Tetris clones.

The template comes with smooth animations, colorful graphics, and awesome sound effects, all of which are easy to customize so long as you're familiar with Android Studio.

Additionally, Block Puzzle has support for AdMob ads built right into it. Therefore, you should have no trouble adding banner or interstitial ads to the games you build with it.

3. Bubble Adventure

Bubble Adventure gameplay

Bubble Adventure, developed by monkey-creative, is a match-three game template with cute graphics and intuitive game mechanics. If you're someone who wants to quickly publish several fully monetized casual games on Google Play, this template is for you. It features easily reskinnable assets, AdMob ads support, and support for both phones and tablets.

Because the Bubble Adventure Android game template offers lots of levels, combos, and boosters, the games you develop with it will have a high replay value and earning potential.

4. Online Word Quiz

Online Word Quiz gameplay screens

Trivia quizzes tend to be very popular on Google Play. If you're interested in tapping into this market, you should give the Online Word Quiz template a try. It's an Android game template that allows you to build both word quiz games and image puzzle games.

Developed by leenah_albanna, this powerful template uses the Firebase Realtime database to store all your game data, including questions, answers, and puzzles. This means that even after publishing your games, you can continue to add more content to them, thus minimizing uninstall rates.

The template also supports in-app purchases, push notifications, and analytics.

5. Slot Machine Deluxe

Slot Machine Deluxe gameplay

Slot machine games are highly addictive and can be extremely profitable. They also have zero learning curve. With the Slot Machine Deluxe template, developed by Droid_Coder, you can create games in this genre in a matter of minutes.

Because this template is built using the native Android SDK, you can be sure that the games you create with it will have optimal performance with smooth animations on all devices running Android 4.4 or higher.

For monetization support, the Slot Machine Deluxe template uses the latest version of the AdMob Ads SDK.

6. Monster Truck

Monster truck is an amazing driving game with high quality graphics. You have to run along the length of a track filled with random obstacles. This is a very popular kind of game. Monster Truck comes with a large number of randomly built levels.

Monster Truck Game Template

You can change all aspects of the app like its name, icons, graphics and sound. There is integration for both AdMob banner and interstitial ads. It also comes with an integrated Google Play Games leaderboard. The game looks equally good on small as well as large screens. The background music and sound effects make the game play very addictive.

Watch the video preview on the game's description page.

7. My Coloring Book

My Coloring Book gameplay

Coloring book apps can be therapeutic for adults and extremely fun for kids. With My Coloring Book, you can create your own coloring book app without writing a single line of code.

This template from Envato author iQueen comes with over 100 different levels, AdMob ads support, and a very intuitive user interface.

Because it's built using the cocos-2d-x multi-platform game development framework, games you develop using this template will be able to run on Android, iOS, and Windows too.

8. Quizix

Quizix is a native Android game template with lots of features. The gameplay consists of trivia questions from a category picked by users. There is a single text- or image-based question on each screen with two, three or four options. Users score points by answering the questions correctly.

Quizix Game Template with AdMob

The categories, sub-categories and questions are added by you in the back-end. The app takes care of rest of the functionality. The admin panel is built using Laravel and notifications, authorization and leaderboard data is handled by Firebase.

Here are a few more features of the game:

  • AdMob integration
  • full RTL support
  • random quiz questions
  • bulk question upload
  • social login

9. Jumper

Jumper is an addictive arcade game similar to Doodle Jump. The aim of the game is for the players to keep jumping from one platform to another. You have to get as high as possible. The direction of jump for the player is determined by the tilt of the device.

Jumper Game Template

The game comes with lots of additional elements to make it more interesting. You can add things like coins, powerups, trampolines and bombs etc. to make the game even more interesting. It is also possible to tweak the difficulty levels of the game by adding and removing bars.

Jumper comes with integration for AdMob interstitial Ads and Facebook Share feature.

10. Classic Highway Car Avoidance Game

This is similar to the highly popular racing game that most of us have played at one time. The idea is pretty simple. You just have to avoid hitting incoming vehicles on the road. There are boosters and checkpoints on the highway to increase score and speed. This keeps the game exciting.

Highway Racing Game Template

You can tweak a lot of things within the game as a developer. For example, it is possible to change the types of vehicles and add other objects like trees in the game screen. The game comes uses inbuilt device accelerometer to move the car around.

Some other features of the template include:

  • integration with Admob
  • the ability to pause game
  • 22 different sprites
  • top 10 high scores
  • and more

You can read more about the game and its features on the description page.

Tips for Finding the Right Game Template

As I mentioned earlier, there are over 1000 Android game templates available on CodeCanyon. It can take a while for you to find one that meets all your needs. The following tips will help you pick the right template quickly.

1. Searching for Templates

You can always just check each template one by one. However, starting with a basic idea of the type of game you want to create will give you a head start when selecting a template. You can also filter the games by use of tags included by developers. For example, you can search for 2D arcade games.

2. Think About Monetization

The next thing you want to do is decide your ultimate plan for the game. Most people who are creating games usually run ads to earn revenue. You can get a game with AbMob integration to do this. Another nice idea is strategic product placement within the game. This can be achieved by editing the sprites to add company logo and product. You should look for games that have editable sprites if you want to go down this path.

Free Android Game Templates

You can also find some free Android game templates by searching for them on GitHub. However, there are a few things that you should keep in mind. These free game templates are more suited for learning purposes than for being made into commercial apps. There is also a good chance that they won't be updated regularly, making it hard for you to take advantage of latest developments in Android gaming ecosystem.

Here are a few free Android game templates to help you get started.

11. Memory Game

This is a very basic memory game for kids with three different themes an six difficulty levels. It does not have any integration for ads or other complicated screens.

12. Android Chess

This is a chess game developed using Java. It comes with a lot of useful features like training mode for beginners, online and offline mode, and chess puzzles. The graphics are pretty simple and there is no integration for ads.

13. IonicMathGame

This is a very basic Maths game based on the Ionic framework. Users have to mark the correct answers in time to score points.

14. Casual Chess

Casual chess is developed using Ionic and Firebase. It allows you to invite your friends to play a chess game with you by sharing a link. It does not implement any other fancy features and comes with a very basic UI.

15. 2048 Android

This is an Android port for the 2048 game. It basically consists of a WebView that loads locally stored HTML files of the game.

Conclusion

If there's one thing Android users can't get enough of, it's new games that are fun and beautiful. That's probably why a majority of the top-grossing apps on Google Play are games. Indeed, if you are a budding Android developer looking to find success on Google Play, creating a new game is your best bet. I hope you use one of the Android game templates you learned about in this article to kickstart the development of your next game.

Put one of these templates to use right now, or check out some of the other game templates available on CodeCanyon. In addition to games, CodeCanyon also sells complete templates for lots of other kinds of apps. Learn more about them right here on Envato Tuts+!

How to Upload an HTML File to WordPress

$
0
0

In this article, we’ll discuss a couple of different ways that you can upload an HTML file to your WordPress website.

Why Do You Need to Upload an HTML File to WordPress?

When you’re working with a WordPress website, you can use anything from static posts, pages to fancy dynamic features like image galleries, magazines, and eCommerce. You to implement many of these advanced features by just installing and configuring free plugins from the WordPress marketplace.

On the other hand, when it comes to layout and theming of your website, WordPress allows you to choose from thousands of ready-made professional themes available in the market. When you combine these themes with page builder plugins, you can completely customize your front-end the way you want to. And if that's not sufficient, you can customize a theme or build your own theme to give a completely different look to your website.

Having said that, sometimes you would want to upload a specific HTML file which you’ve got from your old site and you just don’t want to touch the rest of your WordPress installation. Specifically, if you might have an HTML file which displays a completely different layout than your existing website, and you want to display it for specific campaigns. Or you might want to verify your website with Google by uploading an HTML file to the document root of your website.

Whatever the reason, we’ll go through a couple of ways to upload an HTML file to your WordPress website in this post.

How to Upload an HTML File?

Let’s quickly summarize the different ways you could use to upload an HTML file:

  • use the FTP client software
  • use cPanel
  • use the back-end editor

FTP Client Software

This is one of the easiest ways to upload files from your computer to the WordPress website. If you’ve got FTP access to your website, you could use the FTP client software to connect to your website and upload necessary files. Thus, keep your FTP credentials handy if you want to use this option. You'll need to have a host, username, password and port.

There are different FTP clients available, and you need to choose one for your OS version. If you’re using *nix-based systems—Linux and Unix— you could use popular options like lftp, gFTP or FileZilla. On the other hand, WinSCP is one of the most popular options for Windows users. Apart from this, you could also use the FireFTP extension which is installed as an add-on in the Mozilla Firefox browser.

Once you’ve installed your favorite FTP client, go ahead and open it. Enter the necessary information as shown in the following screenshot and connect. I’ve used the gFTP client.

gftp UI

Once you connect to the server, you should be able to see the list of files available in your WordPress installation. On the left hand side, gFTP lists files on your local computer and it displays remote site files on the right hand side.

Now, it’s time to upload the desired file from your local computer to WordPress. On the left hand side, navigate to the directory where the HTML file resides, select the file, and finally drag and drop it on the right hand side. Alternatively, you could also double-click that file to upload it.

Once you’ve uploaded the file, make sure that the file is uploaded properly by visiting the http://your-wordpress-website/myhtmlfile.html URL in your browser.

So that’s how you can upload files from your computer to WordPress by using the FTP client software. In the next section, we’ll discuss how you can use cPanel to achieve the same thing.

CPanel

In this section, we’ll see how you could upload an HTML file to your WordPress with the help of cPanel. Of course, you need to have cPanel access on your host to use this option! You can learn more about free WordPress hosting options here at Envato Tuts+.

Using cPanel is pretty similar to using FTP. You need to navigate to the WordPress installation directory and upload any desired files.

Go ahead and login to your cPanel. On your dashboard, you should be able to see the following different options.

Cpanel Dashboard

Next, click on the File Manager link on your dashboard, and that should take you to the screen which lists different files on your server. Navigate to the desired WordPress installation directory where you want to upload the HTML file. It should display files as shown in the following screenshot.

File Manager UI

On the top of the screen, it displays different buttons that allow you to perform different file operations. Among them, the Upload button allows you to upload files from your computer and that’s what we’re going to use in our case.

Go ahead and click on the Upload button, and it would display a popup screen as shown in the following screenshot.

Upload File Popup

Basically, it’s asking you to choose the file which you want to upload. Click on the Select File button and choose the desired file from your computer. And then cPanel should upload the selected file to the desired directory. Once the file is uploaded successfully, you should be able to see the uploaded file in the list of files under your WordPress installation directory.

If there’s any error uploading your file, it will display a helpful message which allows you to take necessary actions to fix the cause of the error. Mostly, errors are related to the directory permissions or the size of your file exceeding the upload limit.

In this way, cPanel allows you to upload files from your computer to your WordPress website. In the next and last section, we’ll see how you can upload a file from the WordPress dashboard.

WordPress Dashboard

In this section, we’ll discuss how you can upload HTML files with the help of the built-in media manager available on your WordPress dashboard.

Before you go ahead and exercise this option, however, you'll need to make changes in your WordPress configuration file. By default, WordPress allows you to upload files that match with specific extensions for security purposes. Mostly, you could upload files that belong to valid media files like .jpg, .gif, .png, .pdf etc. On the other hand, you can’t upload files that have extensions like .html, .js, .php and so on.

So if you want to upload a file which is not a valid media file and doesn’t belong to one of the valid media extensions in WordPress, you need to make a special change in your WordPress configuration file. Note that it must be a temporary change and you must undo it once you finish uploading files. I would recommend you to use this option only if you know what you’re doing.

Go ahead and open the wp-config.php file with your favorite text editor. The wp-config.php file resides in the root of your WordPress installation. Add the following snippet at the end of your file.

Once you’ve done it, upload the updated wp-config.php file to your WordPress site. With these changes in place, you would be able to upload .html files from your computer. 

Next, head over to your WordPress dashboard and navigate to Media > Add New. It would display the following screen.

Add New File - Media Manager

Click on the Select Files button which allows you to choose files from your computer that you want to upload. Select the desired files and they'll be uploaded right away as shown in the following screenshot.

Uploaded File Preview

Now, navigate to the Media > Library section, and it should display the list of files. Click on the file which you’ve just uploaded to see file details. You would see the File URL field which contains the link of this file as shown in the following screenshot.

Uploaded File URL

You could copy it and paste it in your browser to see if it works. This is the link which you would need to access this file in your front-end.

So that’s how you can upload files with the help of the Media manager from your WordPress dashboard. Don’t forget to undo your changes in the wp-config.php file as it would be a dangerous security problem to keep it open.

Conclusion

Today, we discussed different options that you could use to upload an HTML file to your WordPress website. Feel free to post if you have any queries or doubts using the feed below.

Install a Premium WordPress Widget or Plugin Now! 

There are thousands of high-quality WordPress plugins on CodeCanyon that can help enhance your business's website. Have a look through this large collection of plugins, and you'll find helpful plugins in all different types of categories, from marketing to eCommerce to social media.

Find the perfect WordPress plugin to help your business succeed and motivate your customers. You can find even more plugin ideas and inspiration in our new free course on finding the best WordPress plugins for your site.

This post has been updated with contributions from Nathan Umoh. Nathan is a staff writer for Envato Tuts+.

AI Plugins for WordPress & WooCommerce for 2021

$
0
0

Have you tried answering every question from every customer that comes to your website? How about making personalized real-time product suggestions to every customer on your website? Or suggestions about what to read next?

While it is possible to do this manually, these tasks can all be better handled by the computer with machine learning.

Artificial intelligence allows computers to perform these tasks easily. You just have to give it instructions and set parameters on AI-powered plugins for your WordPress website. AI and machine learning are now more accessible than ever, thanks to intuitive, smart plugins from CodeCanyon. 

What is Artificial Intelligence?

AI is used to improve our daily lives by making certain processes more efficient and allowing a computer to do complicated tasks automatically. Examples of this are the automatic language translation apps like Algorithmia that can translate speech in one language into text in another language.

Some everyday uses of artificial intelligence include:

  • smart assistants
  • customer support chatbots
  • recommendation engines
  • content curation
  • image recognition
  • spam filters
  • text to speech
  • language translators 
WP AI Assistant
WP AI Assistant is an example of AI-based WordPress Plugins available on CodeCanyon

In this article we'll look at AI-powered plugins for WordPress from CodeCanyon that will enable artificial intelligence and machine learning algorithms to elevate your business above its competitors. 

Best-Selling AI Plugins for WordPress in 2021

Looking for the perfect AI-based plugin for your WordPress website? The AI revolution is here, you don't want to get left behind. In 2021 make it your goal to integrate AI into your website and watch your business soar! You will find a great selection of premium AI plugins on CodeCanyon. 

Bestselling AI powered plugins on CodeCanyon

If you're still on the fence about integrating AI and machine learning into your business, here is what AI-powered plugins can do for your WordPress website:

  • improve personalization with your customers to provide content that is relevant to their needs
  • personalize answers to their questions and help direct them to products they really want 
  • increase your conversion rates by turning leads into customers and subscribers
  • automate tasks so you can devote more time to building your business
  • boost user engagement
  • help you make wise business decisions through insight gained from user behavior 

AI Plugins for WordPress on CodeCanyon

Now, let’s review some of the top AI plugins for WordPress available on CodeCanyon. These premuim AI-based plugins come at a very reasonable price. Each one can help your business use the power of artificial intelligence and machine learning by investing in customer engagement and satisfaction.

1. Best-Seller: WP AI Assistant

WP AI Assistant

This unique WordPress plugin allows you to create a virtual AI-powered smart assistant on your website that visitors can engage with. WP AI Assistant will advice customers on purchase decisions, redirect them to specific pages, and even send discussions to admin by email. It is WPML ready so you can translate all your AI custom content. 

2.Trending: Speaker–Page to Speech Plugin for WordPress

Speaker - Page to Speech Plugin for WordPress

Speaker is a WordPress Plugin designed to convert website page content into human-like speech. It converts text into human-like speech in more than 235 voices across 40+ languages and variants. It supports the standard of the Speech Synthesis Markup Language (SSML) that allows you to fine-tune speech for each article on your website. You can pause, intonate, and read numbers in the usual format for humans.

3. Bestselling: Facebook Messenger Chat with Bot

Facebook Messenger Chat with Bot

Your customers can now receive answers instantly when you are not online. This plugin uses Facebook Messenger Bot API technology to build an intelligent bot for your WordPress website. 

4. AI Chat Support Board

Chat Support Board

The Support Board plugin helps you automate your customers’ communication with artificial-intelligence-driven bots and a chat system integrated with the most-used platforms. Save time and use the software you already know and love. Communicate with your customers directly in Slack. Connect Dialogflow and use rich messages on the fly.

5. WooCommerce Chat Bot and Marketing App for Support Board

WooCommerce Chat Bot & Marketing App for Support Board

With this add-on for Support Board, you can now take conversational marketing to a whole new level via automated chatbots. People love communicating via chat because it's fast, easy and actually feels like a conversation. Replace or enrich traditional marketing channels like emails and forms with the chatbot. Send discounts, follow-up messages, returning visitor messages, abandoned cart reminders follow-up and cross-selling in a conversational way.

6. AI Product Recommendations for WooCommerce

AI Product Recommendation for WooCommerce

By using AI Product Recommendation for WooCommerce, you can harness the unmatched power of AI-powered product recommendation to automatically generate more visitor engagement and in turn improve your sales. This plugin can recommend the best products for your visitors through cross-selling, product recommendation, and related products. It comes with detailed documentation to help through all the steps during set up. 

7. WooCommerce Dynamic Pricing and Discount with AI

WooCommerce Dynamic Pricing and Discount with AI

Skip the strenuous manual process of configuring pricing and discounts withWooCommerce Dynamic Pricing & Discounts with AI.

This comprehensive plugin has an elaborate pricing and discount tool kit that helps customize pricing structure on your WooCommerce store, implement different types of discount-based prices, and add coupons to any product or category. 

You can boost sales on your store with attractive festive and seasonal offers for returning customers based on their purchases history. You can take advantage of Black Fridays, set up end-of-the-season clearance sales and much more.

8. Voicer–Text to Speech Plugin for WordPress

Voicer - Text to Speech Plugin for WordPress

Voiсer is a WordPress plugin designed to convert text into human-like speech. The basis of the plugin is the Google Cloud Platform, which ensures the reliability and speed of the plugin anywhere in the world. 

The Voicer WordPress plugin converts text into human-like speech in more than 200 voices across 30+ languages and variants. With this easy-to-use plugin, you can create life-like interactions with your users and transform your customer service.

9. AI Related Posts

AI Related Posts

AI Related Posts  taps into the awesome power of AI-powered article and post recommendation to improve your organic visibility on search engines and as a result increase your page views, reduce your bounce rates, and improve your SEO rankings. 

10. Innue—AI Chatbot with Facebook

Innue - live chat software ai chatbot and facebook

Innue is the perfect chatbot for customer service or information acquisition. This intelligent interactive agent chatbot helps automate communication with the customer and create personalized customer experiences at scale. It can understand what a user wants and is prepared to meet users’ requests. It can display all conversations, information and menus on all devices, including desktops, tablets, and smartphones.

Free AI Plugins for WordPress 

Premium AI-powered plugins for WordPress come with most comprehensive set of features and can greatly boost the functionality of your website.

But if your budget does not currently allow you to spend on these premium plugins, don't worry, I've put together a list of four free AI plugins with impressive free features.

1. My Chatbot

My Chatbox

Create your own branded chatbot for your WordPress website, powered by Google Dialogflow.

2. SEO Gun

SEO Gun

AI-based WordPress tag generation and internal links plugin.

3. EventAgent.ai

EventAgent.ai

EventAgent.ai (E.ai) is the next generation in AI-driven online event calendars. E.ai learns from your organization and promotes your events for you with social network postings and promotional emails. E.ai is not just a calendar. It’s a whole marketing department.


4. E-MAILiT—WordPress Share Buttons Plugin

EMAILIT - WordPress Share Buttons Plugin

There around 126 social sharing services and each tracks site owners and users with no options of opting out. E-MAILiT is the only share button that gives you the option to decide whether to track you for advertising purposes or not. Other share buttons always track you, E-MAILiT does not. 

Get AI Plugin for Your Website Now!

Don't miss out on this opportunity to move your business into the future of the web in 2021!  High quality customer-focused AI-powered plugins on CodeCanyon are very affordable and give your website the edge that is needed to succeed. 

Bestselling AI powered plugins on CodeCanyon

If you want to learn some other ways of using AI, check out these related posts from Envato Tuts+.

PHP Integers, Floats, and Number Strings

$
0
0

Working with numbers in PHP seems to be a trivial concept, but it can be quite confusing. It looks easy at first because PHP provides automatic type conversion. For example, you can assign an integer value to a variable, and the type of that variable will be an integer. On the next line, you can assign a string to the same variable, and the type will change to a string. Unfortunately, this automatic conversion can sometimes break your code.

There are a lot of types for numeric values as well. In this tutorial, you'll learn about integers and floats in PHP, as well as the functions which can be used to determine the type of numbers that we are dealing with and convert between them. You'll also learn how to convert integers and floats to and from numerical strings.

Different Types of Numbers in PHP

Integers

The most basic type of number in PHP is the integer. As you might already know, integers are numbers without any decimal part. For example, 2 is an integer, and so is 235298 or -235298. On the other hand, 2.0 and 3.58 are floats. We will discuss them in more detail later.

One important thing to remember is that it is not necessary that a number be of type int if it does not have a decimal part. For example, 16 * 2.5 is exactly 40, but the type of this result will still be a float. When you are multiplying numbers, the final result will be of type float if at least one of the operands was a float. It doesn't matter if the final number has a decimal part or not.

Also, the maximum possible value an integer can have in PHP on your system can be obtained using the constant PHP_INT_MAX. A value greater in magnitude than the value returned by PHP_INT_MAX will be stored as a float even if it looks like an integer.

Generally, you would expect the result of the multiplication of two variables of type int to be of type int. However, it is not true in the case of an overflow. Multiplication of five or six different numbers can easily take you outside the bounds of the int type. For example, the result of 128*309*32*43*309 is a float on my system because it exceeds the value of PHP_INT_MAX, which is 2147483647.

You can use the is_int($value) function to check if a number is of type integer. There are two aliases of this function, called is_integer($value) and is_long($value). Both of them will give the same result.

Floats

The next most common type of number that you will deal with is a float. Unlike integers, which were simply numbers without decimal points in most cases, a number of type float can be represented in a variety of ways. The values 3.1412.05.87E+10, and 3.56E-5 are all floats.

PHP will automatically convert a number to the float type whenever decimals or very large numbers are involved. The float type can commonly store numbers with magnitude approximately equal to 1.7976931348623E+308. However, this is platform dependent.

The value 1.7976931348623E+308 may seem like a very large value—and it is!—but floats have a maximum precision of only about 14 digits. Any number with more digits than that will lose its precision. That means you can store a very large number, but you won't be able to keep the information about its exact value—in many cases, a float is only an approximation.

There are two functions which can be used to determine if the value you are dealing with is a float. These functions are is_float() and is_double(). Actually, is_double() is just an alias of is_float(), so you can use any one of them and get the same result.

Infinity and NaN

There are two more kinds of numerical values that you might have to deal with when writing programs related to mathematics. These values are infinity and NaN (not a number). Both these values require a little explanation because they are different from what you might expect.

Infinity in PHP is different from infinity in real life. In PHP, any numerical value above approximately PHP_FLOAT_MAX on a platform is considered infinity. So 1.8e308 will give you float(INF) on var_dump(). You can check if a numerical value is finite or infinite using the is_finite() and is_infinite() functions.

Similarly, NaN stands for Not a Number, but it doesn't check if a value is numerical or not. The value NaN is used for the result of mathematical operations which are not possible in mathematics. For example, log(-1) will be NaN. Similarly, acos(5) will also be NaN. You can check if the value returned by a mathematical operation is not a number by using the function is_nan().

Numerical Strings in PHP

Just as PHP dynamically changes the type of different numbers based on how their values are used or assigned, it can also infer the value of different numerical strings for you to convert them to numbers.

The function is_numeric() can help you determine if a string or variable is indeed numeric or not. This function will return true for numbers written in octal, binary, or hexadecimal notation. It will also return true if the numbers are written in exponential notation like +16.52e39.

Starting from PHP 7.0.0, when you pass a string to is_numeric(), it only returns true if the string consists of an optional sign, some digits, an optional decimal, and an optional exponential part. This means that a numerical string written in hexadecimal or binary format will return false from PHP 7.0.0 onward.

PHP will implicitly cast any valid numerical string to a number when the need arises. The following examples should help you understand this process better.

As you can see, all valid numerical strings were converted to their respective values before addition or other operations were performed. The type of $num in the end depends on its final value.

In the last case, the hexadecimal string "0xfedd24" is not converted to its decimal value because PHP 7 does not consider it to be a valid numerical string.

Casting Strings and Floats to Integers

Every now and then, you will need to cast one type of numerical value into another. PHP has a variety of functions and techniques to do so. Most of the time, the conversion will be implicit, and you won't have to worry about it. However, if you have to do the conversion explicitly, the techniques mentioned here will definitely help.

You can use (int) or (integer) to convert any value to an integer. In the case of floats, the values will always be rounded towards zero. Another way to cast strings and floats to integers is with the help of the intval() function. Both (int) and intval() work in the same manner.

You should note that casting overflowing strings to integers will set the final value to the maximum permissible integer value. However, casting a float whose value is more than the maximum permissible integer value will result in the value oscillating between -2147483648 and 2147483647!

In certain situations, you might need to deal with very large numbers without losing any precision. For example, it is impossible to get an accurate result of the multiplication of 987233498349834828 and 3487197512 using the * operator. It will give you 3.4426781992086E+27 after float conversion. Calculating the actual answer, which is 3442678199208600117812547936, will require the use of libraries like BCMath. BCMath works by storing numbers as strings and doing arithmetic operations on them manually. Just remember that if you use BCMath, you will be dealing with strings instead of integers and floats.

Certain libraries will want you to only pass numbers of type int to their methods, but you might unknowingly supply them a float value. This might happen because the value seems like an int because it doesn't have a decimal part. This would almost certainly result in an error if the library uses a function like is_int() to check if the passed number is of integer type. In such cases, it is always wise to first cast that number to int using either (int) or intval() and then pass it to any functions or methods of the library.

One example of when such a situation could come up would be when you are dealing with mathematical functions like floor()ceil(), etc. floor() and ceil() will always return a float, even if you pass them an int!

One problem with casting floats to integers is that you will lose the decimal part of the numbers. This may or may not be desirable. In such cases, you can use functions like floor() and only cast the number to int type if its actual value is equal to the value returned by floor().

Let's say you have a library which allows you to do fractional arithmetic, and it throws exceptions when you pass a number to its setNumerator() method that is not of type int. A variety of operations might turn a number into type float even if it is still an integer within the minimum and maximum bounds of type int. Using something like the code above will help you deal with such cases easily.

Tips for Working With Numbers in PHP

Numbers themselves can be infinitely large, but our computers have limited computer memory. This can lead to problems when working with numbers in a programming language.

Problems With Fixed-Size Integers

The largest number you can store as a standard integer on a 64-bit machine is 9223372036854775807. Any calculations with a result greater than that cannot be done with simple integers and require other solutions. This means that you should not use regular integers when there is a chance that the result might go above these limits. One option for larger numbers is to use floating-point numbers. However, they have their own drawbacks! 

Problems With Floating-Point Numbers

Floating-point numbers are very common for everyday calculations. However, anything that you do with numbers which relies on comparing them for equality can result in problems. This is because floating-point numbers have limited precision, so comparisons between them aren't always perfect. Not only that, but computers are binary systems, and our number systems are decimal. The conversion between them is not always accurate. For example, 0.1 cannot be accurately represented in binary—similar to how 1/3 cannot be exactly represented in a fixed number of decimal digits. There is always some loss of precision. 

For applications like graphics rendering or games, this loss of precision is not a problem. However, for banking or eCommerce applications, it could create major issues. One way to avoid this error is to convert the numbers you are working with into integers! For example, anything that costs $12.01 can be stored with integers internally as 1201 cents. Always consider using regular integers instead of floating points when precision is necessary.

Unlimited Precision Numbers

The best way to get around the limitations mentioned in the above two points is to store numbers as strings. An arbitrary precision library like BCMath in PHP can help you with this. It comes with many useful functions to make it easier for you to add, subtract, divide and multiply very large numbers without losing precision.

As you can see, the bcpow() function can set the precision to an arbitrary value defined by the third parameter.

Of course, this functionality comes at a cost—using BCMath is significantly slower than the built-in number types in PHP. It's best to use the built-in numeric types unless you need the extra precision and range. 

Final Thoughts

This tutorial has covered different ways in which PHP stores numbers and how you can determine if a number is of a particular type. For example, you can use functions like is_int() and is_float() to determine the type of a number and proceed accordingly.

As you saw in the tutorial, PHP supports automatic type conversion. This means that sometimes smaller integers like 5 or 476 could have been stored as floats without you realizing it. Using these numbers in functions which only accept int values might result in exceptions or errors. We learned that a simple solution to this problem is to explicitly cast such numbers to int if they don't have a decimal part and their values don't change upon casting.

After reading this tutorial, you should be able to determine the type of a number or the final type of a result after using a variety of operations with predefined functions and also explicitly cast them to a specific type after doing some checks.

As always, if you have any questions or additional tips, you are welcome to comment.

Learn PHP With a Free Online Course

If you want to learn PHP, check out our free online course on PHP fundamentals!


In this course, you'll learn the fundamentals of PHP programming. You'll start with the basics, learning how PHP works and writing simple PHP loops and functions. Then you'll build up to coding classes for simple object-oriented programming (OOP). Along the way, you'll learn all the most important skills for writing apps for the web: you'll get a chance to practice responding to GET and POST requests, parsing JSON, authenticating users, and using a MySQL database.

WordPress Troubleshooting: PHP Installation is Missing the MySQL Extension

$
0
0

In this quick article, we’ll discuss how to troubleshoot the "missing the MySQL extension" error when you are installing WordPress.

If you’re installing WordPress or you’ve moved your website to a different server, you may encounter the following error:

Your PHP installation appears to be missing the MySQL extension which is required by WordPress.

This can be frustrating for you as a WordPress admin, if you don’t know the cause of this error. Today, we’ll try to go through the possible solutions that could fix this error.

Before we go ahead and discuss the possible solutions, let’s quickly fetch the code which displays this error.

As you can see, WordPress is trying to load a couple of extensions that are related to MySQL. Specifically, it’s checking for the availability of the mysql, mysqli and mysqlnd PHP extensions. If WordPress finds that none of these extensions are installed and configured with your PHP, it won’t be able to work with your MySQL database. And thus, it complains so that you can take the necessary actions to fix it.

In this post, we’ll discuss the possible solutions you could use to fix this issue.

Verify the MySQL Extension Installation

The root cause of this error is the unavailability of the PHP extensions that are required for database operations. So the first thing is to check if one of the MySQL extensions are installed and enabled on your server. There are a a couple of ways you could do it.

First create an info.php file with the following contents.

Upload this file to the document root of your WordPress website. Next, open the https://your-wordpress-website/info.php URL in your browser and it should display the PHP configuration information as shown in the following screenshot.

Phpinfo

Now, try to find the mysql or mysqli extension section. If one of these are installed and configured in your PHP installation, you should be able to find them as shown in the following screenshot.

Mysqli Section

If you don’t find it, it means that it’s not installed on your server. In this case, you just need to install the mysql or mysqli extension, and you’re good to go.

If you want to install it yourself, take a look at my article explaining how to install specific PHP extensions on your server. You’ll need to have root access to your server shell in order to be able to install it yourself. If you don’t have access or you don’t want to mess with server admin, you could ask your hosting provider and they should be able to do it for you pretty quickly.

In most cases, this is the root cause of this error. After installing the necessary extension, your WordPress site should start working.

On the other hand, if you find that the necessary extensions are installed and configured properly, and still you’re getting this error, you could go through the next section to see if that works for you.

Verify the WordPress Version

It could be that you’re running an old WordPress version, but that PHP and related extensions are upgraded to the latest version on your server. For example, if you have moved your site to a new hosting provider, this could cause a version incompatibility between your WordPress and PHP versions.

If you find that you’re running old WordPress version, I would recommend you to upgrade your site to the latest version. When you upgrade your WordPress, it replaces old files with new files and that may fix this error. You can learn how to upgrade your WordPress version in this article.

Of course, even if you don't have any errors, it’s recommended to upgrade your WordPress periodically to the latest stable version. This will help protect you against any security vulnerabilities that may exist in the older WordPress version.

Conclusion

Today, we discussed a couple possible solutions to the "missing the MySQL extension" error in WordPress. Let me know in the comments below if you have any other questions! And check out some of our other posts for more WordPress tips and tricks.

Display WooCommerce Categories, Subcategories, and Products in Separate Lists

$
0
0
Final product image
What You'll Be Creating

WooCommerce gives you a few options as to what you can display on your archive pages:

  • products
  • categories (on the main shop page) or subcategories (on category pages)
  • both products and categories.

When I'm setting up a store, I normally select the third option: products and categories/subcategories. This means visitors to my store can either select products right from the home page or refine their search by clicking through to a product category archive.

However, there's one failing with this approach: It displays the categories/subcategories together, with no separation between the two. This means that if your product images have different dimensions from your product images, the layout can look a bit messy. Even if your images are the same size, if one of the lines in the archive page includes both categories and products, the absence of an 'Add to Cart' button for categories makes that row look untidy, as not all of its elements have the same dimensions.

In this tutorial I'll show you how to display categories in a separate list before displaying products.

To do this, we'll follow four steps:

  1. Identify the code WooCommerce uses to output categories and subcategories on archive pages.
  2. Create a plugin for our code.
  3. Write a function to put categories or subcategories before product listings.
  4. Style the output.

But before you start, you'll need a WooCommerce installation with some products added, and product categories and subcategories set up.

What You'll Need

To follow along, you'll need:

  • A development installation of WordPress.
  • A code editor.
  • WooCommerce installed and activated.
  • Products added—I've imported the dummy product data that comes with WooCommerce; for details of how to do this, see this guide.
  • A WooCommerce-compatible theme activated—I'm using Storefront.

Before We Start: The Default Options

Let's take a look at what WooCommerce gives us by default.

I've started by adding some images to my product categories and subcategories, as the WooCommerce dummy data doesn't include those. I've simply used an image of one of the products from each category or subcategory, as you can see in the screenshot:

Product categories added in WordPress admin

Now let's take a look at how WooCommerce displays the product categories and products in archive pages.

If you haven't already, open the Customizer, select the WooCommerce tab, and click on Product Catalog

WooCommerce product catalog in Customizer

Under Shop page display, select Show categories & products, and under Category display, select Show subcategories & products.

Displaying categories and products in the Customizer

Click Publish to save your changes and visit your site's shop page. Mine looks like this:

Shop page with categories and products

Because I have four categories and a grid of three images side by side, the first two products are shown alongside one of the categories.

I want to make my categories and subcategories more prominent, and simply present them separately from the product listings. So let's do that.

Identifying the Code WooCommerce Uses to Output Categories and Products in Archives

The first step is to identify how WooCommerce outputs categories and subcategories. So let's delve into the WooCommerce source code to find the relevant function.

The file WooCommerce uses to display archive pages is archive-product.php, which is in the templates folder.

Inside that file, you can find this code, which outputs the categories and products:

So there's a woocommerce_product_subcategories() function which is outputting the categories or subcategories before running the loop which outputs the products. 

The function is pluggable, which means we could override it in our theme. Unfortunately that doesn't quite work as WooCommerce has built-in styling for clearing items, which would appear at the beginning of a row with the default display. 

So instead of that, we'll turn off display of categories and subcategories on our archive pages, so that just products are displayed. Then we'll create a new function that outputs the product categories or subcategories, and hook it to the woocommerce_before_shop_loop action, making sure we use a high priority so that it fires after the functions which are already hooked to that action.

Note: Because WooCommerce adds clears to each third product listing, we can't use the woocommerce_product_subcategories() function or an edited version of it to display the categories. This is because it will clear the third, sixth (and so on) category or product listed, even when we use this function to display categories separately. We could try to override that, but it's simpler just to write our own function.

So let's create a plugin which does that.

Creating the Plugin

In your wp-content/plugins directory, create a new folder and give it a unique name. I'm calling mine tutsplus-separate-products-categories-in-archives. Inside that, create a new file, again with a unique name. I'm using the same name: tutsplus-separate-products-categories-in-archives.php.

Open your file and add this code to it:

You might want to edit the author details as this is your plugin you're writing. Save your file and activate the plugin via the WordPress admin.

Writing Our Function

Now let's write the function. But before you start, turn off category listings in the admin screens. Open the Cusomizer, click the WooCommerce option, and click on Product Catalog. For each of the Shop Page Display and Default Category Display options, select Show products. Save your changes by clicking Publish.

Your shop page will now look something like this:

Shop page with no categories

In your plugin file, add this:

Now add this code inside the function:

Let's take a look at what that function does:

  • It identifies the current queried object and defines its id as $parentid.
  • It uses get_terms() to identify terms with the currently queried item as their parent. If this is the main shop page, it will return top-level categories; if this is a category archive, it will return subcategories.
  • Then it checks if there are any terms, before opening a for each loop and a ul element.
  • For each term, it creates a li element, and then outputs the category image using woocommerce_subcatgeory_thumbnail(),  followed by the category name in a link to its archive.

Now save your file and refresh the main shop page. Mine looks like this:

Unstyled category listings

The categories are displayed, but they need some styling. Let's do that next.

Styling the Category Listings

So that we can add styling, we need a stylesheet inside our plugin, which we'll need to enqueue.

In your plugin folder, create a folder called css, and inside that, create a file called style.css.

Now, in your plugin file, add this above the function you've already created:

This correctly enqueues the stylesheet you've just created.

Now open your stylesheet and add the code below. WooCommerce uses mobile first styling, so that's what we'll be using too.

I've copied the exact widths and margins from the styling used by WooCommerce.

Now check your main shop page again. Here's mine:

Final shop page

Here's the Clothing category archive:

Final clothing archive page

And here's how it looks on smaller screens:

Category listings on mobile

Summary

Product categories are a great feature of WooCommerce, but the way they're displayed isn't always ideal. In this tutorial, you've learned how to create a plugin that outputs product categories or subcategories separately from the product listings, and then you've styled your category listings.

You could use this code to output a list of categories or subcategories elsewhere on the page (for example below the products), by hooking the function to a different action hook within the WooCommerce template file.

If you currently run a shop that you're looking to extend, or you're looking for some additional plugins to study as it relates to WooCommerce, don't hesitate to see what plugins are available on CodeCanyon.

The Best WooCommerce Plugins for 2021 on CodeCanyon

CodeCanyon offers the most flexible and feature-rich WooCommerce WordPress plugins on the market and will add another dimension of functionality to your online store that users are accustomed to.

Whether you need to implement custom fields and uploads, display multiple currencies, or offer memberships, the diverse WooCommerce plugins available on CodeCanyon can help you accomplish these tasks. 

In addition to all the high-quality WooCommerce plugins available, there are also thousands of other high-quality WordPress plugins on CodeCanyon that can help enhance your website. Take look through the extensive library of plugins and you will find all types of plugins including forum, media, and SEO plugins.

Take advantage of the massive library of high-quality WordPress plugins on CodeCanyon now!

Best Selling WooCommerce Plugins On CodeCanyon
Best selling WooCommerce plugins on CodeCanyon.

If you want some help picking the WooCommerce plugin that's right for you, check out these other posts here on Envato Tuts+:


WordPress Troubleshooting: Where is php.ini?

$
0
0

In this quick article, we’ll discuss the different options that you can use to locate the php.ini file in WordPress. It’s good to know where it is, since you'll sometimes need to modify some settings in that file.

For example, you may have seen this error in your WordPress site:

“uploaded file exceeds the upload_max_filesize”

This tells you that the file you are trying to upload in WordPress exceeds the configured file size in the php.ini configuration file. So, you might need to increase this maximum size in the php.ini file. 

Having said that, if you know the location of the php.ini configuration file, it allows you to configure a lot of other options as well related to PHP.

What is the php.ini File?

First of all, you should know that WordPress is built on the PHP programming language. Every time a WordPress page is loaded, PHP has to run on the server. And when PHP is run, it looks for a php.ini file in some specific locations and loads it. This file configures how PHP works and has a big impact on PHP software like WordPress.

it’s certainly possible that you've never needed to modify php.ini. PHP can run happily with the settings provided in the default php.ini file, since PHP ships with these default recommended settings. In fact, there are no critical configuration parameters that you must set in order to run PHP.

However, the php.ini file provides a couple of important settings that you want to make yourself familiar with. In fact, for PHP developers, it’s inevitable, and you’ll encounter it sooner rather than later.

How to Locate the php.ini File in WordPress

In this section, we’ll see how to find the php.ini file which is loaded when you run WordPress. This can be tricky—the location of the php.ini file vastly varies by the environment you’re running PHP with.

The best way to know the location of the php.ini file is to use the phpinfo() function. It will tell you where php.ini is located, and it will also output all the important PHP configuration information.

You can run phpinfo() by creating a .php file and calling that function. Go ahead and create the phpinfo.php file with the following contents and place it in your document root.

Now upload this file to the root directory of your WordPress installation. Next, run the https://your-wordpress-site.com/phpinfo.php URL in your browser, and you should see the output of phpinfo(). Look for the following section.

The phpinfo Function

As you can see, there are two sections. The first one, Configuration File (php.ini) Path, indicates the default path of the php.ini file in your system. And the second one, Loaded Configuration File, is the path from where the php.ini file is being loaded when PHP is run.

So you can edit the php.ini file indicated in the Loaded Configuration File section, and that should work in most cases. Once you identified the php.ini file location, don’t forget to delete the phpinfo.php file from your site.

If you don’t have access to the location of the php.ini file, you could try the solution described in the next section.

Locate the php.ini File With cPanel

In this section, we’ll see how you could edit the php.ini file to your WordPress with the help of cPanel. Of course, you need to have cPanel access on your host to use this option!

Go ahead and login to your cPanel. On your dashboard, you should be able to see the following different options.

Cpanel File Manager

Next, click on the File Manager link on your dashboard, and that should take you to the screen which lists files on your server. Navigate to the root WordPress installation directory. It should display files like what is shown in the following screenshot.

File Manager List

Now, try to find the php.ini file in the list, and if it doesn’t exit, you could create a new file under the document root.

How to Fix the upload_max_filesize Error

In this section, we’ll see how to fix the upload_max_filesize error. Once you’ve found the location of the php.ini file for your WordPress site, you just need to change the following settings in that file.

If you’re editing the existing php.ini file, you just need to change the values as per your requirements. On the other hand, if you’ve created a new file, you’ll need to add it.

With these changes in place, you should not get the file size error anymore, as we’ve increased the file size limit significantly. Of course, you could adjust the above settings as per your requirements.

And with that, we’ve reached the end of this article.

Conclusion

Today, we discussed how you could find the php.ini file in your WordPress installation. Along with that, we also discussed how to change settings in that file. Feel free to post your queries using the feed below. And check out some of our other useful WordPress troubleshooting resources!

Useful WordPress Troubleshooting Resources

Here’s a list of tutorials and other resources to help you troubleshoot problems with WordPress.

How to Paginate Data With PHP

$
0
0

I can remember years ago when I first began coding in PHP and MySQL, how excited I was the first time I got information from a database to show up in a web browser.

For someone who had little database and programming knowledge, seeing those table rows show up onscreen based on the code I wrote (okay so I copied an example from a book) gave me a triumphant feeling. I may not have fully understood all the magic at work back then, but that first success spurred me on to bigger and better projects.

While my level of exuberance over databases may not be the same as it once was, ever since my first 'hello world' encounter with PHP and MySQL I've been hooked on the power of making things simple and easy to use.

As a developer, one problem I'm constantly faced with is taking a large set of information and making it easy to digest. Whether its a large company's client list or a personal MP3 catalog, having to sit and stare at rows upon rows upon rows of data can be discouraging and frustrating. What can a good developer do? Paginate!

Looking for a Quick Solution?

If you're looking for a quick solution, there's a great collection of pagination scripts and helpers over at Envato Market.

This PHP pagination class is really useful. It can be implemented with any PHP supported database engine, it’s very easy to customize and implement, supports two displays by default, has multicolor design schemes, and more.

PHP Pagination Class Preview

1. Pagination

Pagination is essentially the process of taking a set of results and spreading them out over pages to make them easier to view.

Preview

I realized early on that if I had 5000 rows of information to display not only would it be a headache for someone to try and read, but most browsers would take an Internet eternity (i.e. more than about five seconds) to display it. 

To solve this I created a simple, flexible, and easy to use PHP class that I could use for pagination in all my projects.

2. The Database

Gotta love MySQL. No offense to the other database systems out there, but for me, all I need is MySQL. And one great feature of MySQL is that they give you some free sample databases to play with at https://dev.mysql.com/doc/#sampledb.

For my examples, I'll be using the world database (~90k zipped) which contains over 4000 records to play with, but the beauty of the PHP script we'll be creating is that it can be used with any database. Now I think we can all agree that if we decided not to paginate our results that we would end up with some very long and unwieldy results like the following:

All Records Output

So lets gets down to breaking up our data into easy to digest bites like this:

Preview With Pagination

Beautiful isn't it? Once you drop the pagination class into your code you can quickly and easily transform a huge set of data into easy to navigate pages with just a few lines of code. Really.

3. The Paginator

This example will be composes of two scripts, the reusable paginator class and the index file that will display the table items and controls.

Paginator.class.php

The paginator class will have only two methods and the constructor, we will build it gradually explaining each step as we move forward.

This definition only set's the paginator required member variables, since this is a helper class and it's destined for pagination only it will rely on a valid connection to the MySQL server and an already defined query that we will append the parameters necessary to paginate the results. We'll start with the constructor method.

Quite simple right? This method only set's the object's database connection and the necessary query, after that it calculates the total number of rows retrieved by that query without any limit nor skip parameters, this total is necessary to create the links for the paginator.

Note that for simplicity we are not doing error checking or any other validation of the given parameters, but in a real world application these checks will be necessary.

Retrieving Results

Now let's create the method that will actually paginate the data and return the results.

Let's analyze this one step at a time, first we set the limit and page parameters, which by default are set the 10 and 1 respectively. Then we check if the user is requiring a given number of rows or all of them. Based on this and the page parameter, we set the LIMIT term of the query. Note that we take one from the page number because our script counts from 1 instead of from 0.

After this we simply evaluate the query and get the results. Finally we create a new results object which contains the limit, page and total parameters of the executed query as well as the data for each of the retrieved rows.

Displaying Pagination Links

Now let's write the method used to get the pagination links.

This is a rather long method, so look over it in more detail..

First we evaluate if the user is requiring a given number of links or all of them. If the user is requesting all links, then we simply return an empty string since no pagination is required.

After this we calculate the last page based on the total number of rows available and the items required per page.

Then we take the links parameter which represents the number of links to display below and above the current page, and calculate the start and end link to create.

Next we create the opening tag for the list and set the class of it with the list class parameter and add the "previous page" link, note that for this link we check if the current page is the first, and if so, we set the disabled property of the link. We also display a link to the first page and an ellipsis symbol in case that the start link is not the first one.

Next we add the links below and above the current page based on the previously calculated start and end parameters. In each step we evaluate the current page again the link page displayed and set the active class accordingly.

After this we display another ellipsis symbol and the link to the last page in case that the end link is not the last one.

Finally we display the "next page" link and set the disabled state when the user is viewing the last page, close the list and return the generated HTML string.

That's all there is to the Paginator class, of course we could add setters and getters for the database connection, limit, page, query and total parameters but for simplicity we'll keep it this way.

4. The Index Page

Now we'll create the index.php file, which is in charge of using the Paginator class and displaying the data. First let me show you the base HTML.

Quite simple, this file only displays a table that we will populate with the information retrieved from the database, note that for this example I'm using Bootstrap for basic page styling.

Using The Paginator

Now for make use of our Paginator class add the following PHP code at the top of the document.

This script is quite simple, we just required our Paginator class, note that this code assumes that this file is in the same directory as the index.php file, if this is not the case you should update the path accordingly.

Then we create the connection to our database using the MySQLi library, retrieve the paginator parameters from the GET request and set the query, since this is not an article on MySQL or any of that I will not get into details about the connection or the query used here.

Lastly we create the Paginator object and retrieve the results for the current page.

Displaying The Results

Now to display the obtained results add the following code to the table body.

Here we simple are iterating through the results data attribute containing the cities records and creating a table row for each one of them.

Pagination Links

Now to display the paginator links add the following code below the table.

To the paginator createLinks method we pass the obtained links parameter and the CSS class for the pagination links used from Bootstrap. Here is the result of the created page.

Final Output

How to Implement AJAX Based Pagination

In this section, we'll quickly go through how you could convert the above example into the AJAX based pagination. We'll revise all the files and discuss the changes that we will need to do.

Firstly, let's update the index.php file as shown in the following snippet.

First of all, we've moved the HTML code which is required to build the pagination into the ajax_pagination.php file so that we can reuse it. Next, we've loaded the jQuery library and pagination.js file at the end of the file.

The ajax_pagination.php file looks like this.

It's pretty much the same.

Next, let's have a look at the pagination.js file.

It does a couple of things here. Firstly, it binds the click event to the every pagination link. Next, when the link is clicked it makes the AJAX call to fetch the listing data of the corresponding page and updates the page.

Finally, you need to update the createLinks method as shown in the following snippet.

Basically, we've added the data-page attribute in the every link so that we could get the page number when user clicks on the link.

And with these changes in place, you've turned your pagination into AJAX-based pagination!

Conclusion

This should provide you with everything that you need to know in order to get up and running with pagination in your application.

Learn PHP With a Free Online Course

If you want to learn PHP, check out our free online course on PHP fundamentals!


In this course, you'll learn the fundamentals of PHP programming. You'll start with the basics, learning how PHP works and writing simple PHP loops and functions. Then you'll build up to coding classes for simple object-oriented programming (OOP). Along the way, you'll learn all the most important skills for writing apps for the web: you'll get a chance to practice responding to GET and POST requests, parsing JSON, authenticating users, and using a MySQL database.

This post has been updated with contributions from Sajal Soni. Sajal belongs to India and he loves to spend time creating websites based on open source frameworks.

Real-Time News Data With the mediastack API

$
0
0

The demand for content on the web is stratospheric. You don't have to produce your own content, but you do need to supply content that's reliable. 

To offer relevant, up-to-date content, you need a reliable, up-to-the-minute source of news data gathered from a wide range of popular sources from around the world, including CNN, MSNBC, BBC, Al Jazeera, and more. 

That's where the mediastack API comes in! The mediastack API makes it easy to bring your website or app access to the latest news data. 

There is a reason why mediastack is the trusted news data API resource of more than 2,000 major companies worldwide.

  • It collects news data from 7,500+ globally renowned news sources.
  • It consistently offers thousands of relevant news and blog articles per day.
  • It powers live news feeds, data analytics platforms, and trend analysis applications around the globe.

That's not all—the API is also used by tens of thousands of individuals, universities, and non-profit organizations requiring a reliable source of live news data.

Whether you run a non-profit organization, a small business resources website, a community news aggregator website, or simply want to run an RSS feed on your blog, the mediastack API gives you the same sources of news data that all the big players use on a daily basis. 

What Is the mediastack API?

mediastack API

mediastack is a powerful, easy-to-use REST API interface that retrieves articles from news sources and blogs worldwide. It delivers results within milliseconds in lightweight, easy-to-use JSON format. 

It is powered by a rock-solid, scalable, and highly available technical infrastructure capable of dealing with millions of API requests per minute.

Every minute, the mediastack API interface is automatically collecting news from 7,500+ global news sources and blogs worldwide, parsing it, and sending it out to API clients. 

How Can You Use the mediastack API?

The mediastack API makes it easy to add news features to your website:

  • live news feeds
  • trending issues in your industry
  • historical news information and timelines
  • and much more!

Features: Why Use the mediastack API?

The mediastack API is incredibly rich in features, allowing users to get fast results once they have it set up. Let's have a quick look at some of the features: 

1. Cloud-Based and Fast

The mediastack API is cloud-based and lightweight and delivers lightning fast results to all your API requests in milliseconds.

2. JSON-Format Results

It returns structured and readable news data in easy-to-use JSON format.

3. Customized Feeds

You can customize your feed to offer visitors only the information they want to see.

4. Secure

All data is securely delivered through 256-bit SSL encryption.

5. Scalable

It is highly scalable and can handle millions of API requests per minute, thanks to the rock-solid apilayer cloud infrastructure it is built on.

6. Thousands of News Sources

It boasts 7,500+ sources, including international news publishers and blogs from 50+ countries. 

7. Real-Time Updates

News data is updated on a minute-by-minute basis.

8. Round-the-Clock Monitoring

In order to ensure a high level of accuracy and data consistency, all of the sources are monitored round the clock for technical or content anomalies. 

9. Current and Historical News

You get access to real-time news data as it's happening, historical news data from past news articles, and the latest news headlines. 

10. Multilingual

At the time of writing, the mediastack API supports 13 languages. 

11. Easy Integration

Integrates smoothly with programming languages like PHP, Node.js, Go, Python, and others. The API is very beginner-friendly. You just need API access keys to get started.

12. Well Documented

It also comes with highly accessible documentation that shows you how to do API requests and more. 

How It Works

The mediastack API is built upon a RESTful and easy-to-understand request and response structure. 

  • The API comes with a single HTTP GET endpoint, with a series of parameters and options you can use to narrow down your news data results. 
  • You can filter by dates and timeframes, countries, language, sources, and search keywords.
  • API responses are provided in lightweight JSON format.

Successful mediastack API requests return the following fields: author, title, description, URL, source, image, category, language, country, and publishing date. 

Quick Tutorial

Here is an example of the information returned from a successful mediastack API query.

mediastack

It's very easy to get set up and start using mediastack. This short tutorial will show you how.

To get started, first sign up for a free account at mediastack. Once you've registered, you'll be taken to the mediastack API quick start screen. From here, you can get your API key and try some example API queries.

Now you can perform a request. Using your API key

Now you can perform a simple API request for live news data, historical news data, and news sources. Using your API key, let's perform a request. 

The quick start guide shows the following format for the query.

request interface with access key

Click the example to try the request, or enter it into your address bar:

http://api.mediastack.com/v1/news?access_key=YOUR ACCESS KEY

Be sure to copy your access key into this URL to try it. If your API request was successful, the mediastack API will return pagination information as well as a data object, which contains a separate sub-object for each requested date/time and symbol. 

successful mediastack api request

Note that requests you make on the free plan are not encrypted, so you must use the HTTP protocol for free requests. If you try to use HTTPS, you will get the message that "Your current subscription plan does not support HTTPS encryption". If HTTPS is important to you, then you'll need to go with a paid plan.

The final step is integrating the mediastack API into your application. For a specific integration guide, you can learn more from the official mediastack documentation, including code examples for JavaScript, PHP, Python, and more. 

Should you require assistance of any kind, please contact the mediastack support team.

Pricing

mediastack has several news data subscription plans. Your subscription plan requirement will depend on how many monthly requests you would like to process through the mediastack API. 

mediastack

Free

If you make fewer than 500 news requests per month, then this is the plan for you. It gives access to all sources of news in any of the 13 languages. However, you will receive delayed news data, and your data is not HTTPS encrypted. No credit card is required. 

The free plan is a great way to get started, but it is very limited compared to the full API. The free plan cannot be used to create a commercial product.

Standard

This tier gets you 10,000 requests per month. At the time of writing, this plan is $24.99 per month. If billed yearly, you save 20%. It also gives you access to great features like real-time news updates, access to historical data, HTTPS encryption, and technical support.

Professional (Most Popular)

With this plan, you enjoy the full set of features that come with Standard, in addition to supporting up to 50,000 news requests per month. This plan currently costs $99.99 per month and, if billed annually, costs an equivalent of $79.99 per month. 

Business

This plan gives you all the tools in Professional, including up to 250,000 news requests per month. It costs $249.00 per month, or $199.99 per month if billed annually. 

Enterprise

If you need a higher volume of requests, then you can reach out directly to mediastack for a custom plan. You will get custom pricing that's tailored to your needs. 

Conclusion

The mediastack API is a trusted news data supplier for more than 2,000 major companies worldwide. The API is also used by tens of thousands of individuals, universities, and non-profit organizations requiring a reliable source of live news data. The interface is easy to use and comes with detailed documentation that explains how to use the request and response parameters and more. 

Best WordPress Support Plugins for 2021

$
0
0

 Having a professional and competent customer support system helps your website stand out from your competition and grab the attention of your potential customers. But building the best customer support for your website requires the right tools.

Thanks to WordPress support plugins you can effortlessly setup a dynamic support system that will offer comprehensive customer support, build trust in your visitors and help grow your business. 

 All in one button with call back request
An example of WordPress Support Plugins available on CodeCanyon

In this article we'll feature a handpicked selection of impressive WordPress support plugins on CodeCanyon. These plugins are designed to help you give your customers the best support by instantly answering their questions. 

Best-Selling WordPress Support Plugins on CodeCanyon in 2021

CodeCanyon is the perfect place to find an amazing range of WordPress support plugins for your website for a low one-time payment. Grab one of these premium WordPress Support plugins and create a lasting impression that will help you turn your visitors into repeat customers.

Topeselling support plugins for WordPress

The best WordPress support plugins offer fast and easy-to-use tools that customers can use to find solutions to their problems. They also offer logical systems for addressing queries. In addition to helping deliver professional support, they also allow for integration with numerous social platforms that customers use for fast communication. 

Best WordPress Support Plugins 

Let us go over some of the best WordPress support plugins on CodeCanyon.

1. FAST—WordPress Support Ticket Plugin

FAST - WordPress Support Ticket Plugin

FAST is a professional support ticket system that is easy for your customers to use. It will give you and your team up-to-the-minute updates using email and Slack notifications. WooCommerce mode allows you to add a support system to your shop. Customers can select the order and product that they need support with as they create a support ticket.

2. SupportEzzy—WordPress Ticket System 

SupportEzzy - WordPress Ticket System

WP SupportEzzy is an elegant support tickets system for WordPress built as a stand-alone VueJs app that runs on a single WordPress page of your website. This app does not interfere with your existing WordPress theme and plugins and will work with any WordPress site.

You can use the app as a part of your existing website or create a new WordPress installation and run this app on a homepage for dedicated support portal.

3. Support Board—WordPress Chat Plugin

Support Board - WordPress Chat Plugin

Support Board is a WordPress plugin that helps you automate your customers’ communication with artificial intelligence-driven bots and a chat system integrated with the most-used platforms. 

Sync your users and structured data automatically. In just a matter of minutes, without a single line of code, the WordPress chat will be ready to use.

It supports multisite websites and multiple languages. You can integrate and communicate with your customers directly in Slack. You can even connect Dialogflow and use rich messages on the fly.


4. All-in-One Support Button and Callback Request

All in One Support Button + Callback Request

All-in-One Support Button displays on every page of your site and provides as many contact methods as you want. You can choose what contact methods will be displayed on desktop and mobile versions of your site separately. You can set one link for desktop version and another for mobile.

5. WooCommerce Support Ticket System

WooCommerce Support Ticket System

The WooCommerce Support Ticket System seamlessly integrates into your WooCommerce installation, adding a system to manage user and order support tickets. In this way, the shop admin can easily track and give support for orders and users' issues!

Note: This plugin, like the latest versions of WordPress, requires PHP version 5.5 or higher.

6. WordPress Whatsapp Support 

WordPress Whatsapp Support

More than 1 billion people in over 180 countries use WhatsApp. The WordPress WhatsApp Support plugin provides a better and easier way for visitors and customers to communicate directly with your support team. It runs on your own WordPress site, allowing you full control over your support via WhatsApp.

Fully compatible with WhatsApp Business and regular WhatsApp accounts. Integrates with WooCommerce, WPBakery Page Builder, Dokan, and WPML. 

 7. WordPress Support All-In-One

WordPress All-in-one Support

If you’re looking for an advanced versatile plugin for instant messaging support, look no further. 

The All-in-One Messaging Button will be displayed neatly at the bottom right corner of your page 

  • When clicked or tapped, 7 different IM app buttons will be shown.
  • It’s not only convenient but also encourages your visitors get in touch with you.
  • You get their contacts in your database for later promotion campaigns.

8. Pinky Chat

Pinky Chat is a faster way to quickly handle your customer service, you can talk to your customer in real time over the web. Additionally, you can track analytics for your website, viewing the visitor’s path and geolocation details. Finally, the live chat widget works with any website: static HTML websites, WordPress, OpenCart, Joomla, Drupal, or PHP scripts.

9. ChatBubble—All in One Social Support Floating Button

ChatBubble - All in One Social Support Floating Button

Get in touch with your website visitors and customers directly from your favourite messaging app with the ChatBubble WordPress plugin. It is easy to set up. Just add your social media usernames or phone numbers and you're ready to go. ChatBubble supports more than ten Social Media platforms.

Free Support Plugins for WordPress

If you are on tight budget there are free support plugins with great features that allow you to communicate with your website visitors. However, if you expand, these features may not be able to scale with your business and you might need to consider premium plugins. 

1. WP Support Ticket 

WP Support Ticket

Using this plugin you can create your own customer support system and customers on your website can generate support tickets whenever they require assistance. You solve their issues by posting replies to the tickets. The customers will get email notifications when you post a reply message to the ticket.

2. SupportCandy

Support Candy

This plugin adds to WordPress the features of a complete helpdesk ticket system. Easy to configure and easy to use, it is simply a step ahead when it comes to simplicity, functionality and extensibility. It is translation ready.

3. Awesome Support—WordPress HelpDesk & Support Plugin

Awesome Support

The free version of this plugin is loaded with lots of features that allow you to provide competent support for your customers.

4. KB Support

KB Support

KB Support is the ultimate WordPress plugin for providing support and help-desk services to your customers. It's enriched with features, so you can be sure that right from activation, KB Support will provide the perfect help-desk solution for your agents to support your customers.

The built-in knowledge base allows customers to find solutions to their issues during the ticket submission process, reducing the overall number of support queries received by your help desk.

Get Your WordPress Support Plugin Today!

Finding the right support plugin that helps you solve your customers problems in the best possible way is the first step to building a customer support system for your website. CodeCanyon has just what you need when it comes WordPress Support plugins. 

Topselling support plugins for Wordpress

And while you're here, check out some of our other posts on WordPress and WordPress plugins!

Working With Tables in React, Part One

$
0
0

One of the most common user interface elements for presenting your data is a table. It turns out that there are many aspects to control when working with tables, such as:

  • defining columns and headers
  • various cell formats (text, numbers, check boxes)
  • resizing
  • filtering
  • dynamic growing
  • styling

In this two-part series, you will learn about the ins and outs of working with tabular data in React using the React Bootstrap Table component. You'll be able to create sophisticated and professional-looking tables with little effort and yet be able to customize every aspect.

Getting Started  


To start, you should be familiar with React itself. If you need a primer on React, Envato Tuts+ has a great series to help you get started with React. In this tutorial, we'll focus on working with React Bootstrap Table2.

To start, create a react app with the create-react-app command. You can learn how to set create-react-app up in React Crash Course for Beginners.

now navigate to the project folder and install React Bootstrap Table 2 and Bootstrap.

Create a Basic Table

We will start with a basic table. We first import the BootstrapTable component and CSS as shown below.

First, we initialize the data and column variables and then assign the data to the BootstrapTable component.  The data contains the names of some characters from the hilarious show Arrested Development

The Bootstrap component takes in the following attributes.

  • keyField
  • data
  • columns

The render() method renders a table with three columns: "ID", "Name", and "Value".

To view the table, issue the command, npm start--reload. The configuration created by create-react-app watches over your code and recompile whenever you change anything, so you only need to run it once. Then, every change will automatically be reflected.

Here is the result:

basic table

Note that each column has exactly the same width.

Working With Columns

You can control many aspects of the columns. In particular, the column widths can be specified in absolute units,, as percentages, or left unspecified. The column width of unspecified columns is the remainder divided equally. For example, for our basic table, let's specify the columns as follows:

  • first column: 20%
  • first column: 60%
  • first column: 20%

You can also manage the alignment of text and columns as well as the style of headers and columns. Here is an example of how to specify different column widths, text alignment, and custom styles:

The table now looks like this:

column sizing

Styling Your Table

You saw how to style individual columns and headers, but styling can go much further. React Bootstrap Table 2 provides a lot of options for customization. First, you can simply add the striped and hover attributes to the BootstrapTable component to get alternate background colors on each row.

Let's apply the striped and hover properties to our table.

striped table

Check out how you would style different columns with different colors.

colored columns

Table Sort

React Bootstrap Table 2 allows sortable columns. This is done by giving an attribute  of sort: true in the columns definition.

Selecting Rows

Once you have your data in a table, you may want to select some rows to perform some operations on them. React Bootstrap Table 2 provides a wide variety of selection options. All the options are organized in a single object you pass to the component as the selectRow attribute. Here are some of the selection options:

  • single selection mode (radio button)
  • multi-selection mode (checkbox)
  • configurable column selection width
  • select on row click: by default you must click the selector (radio button or checkbox)
  • hide selection column (useful if select on row click is true)
  • change background color on selection
  • initial selected rows
  • selection hooks (on single row or when all rows are selected).

The following components demonstrate many of these options:

edit the table

Other Libraries for Data Tables in React

Lets explore other open-source React table libraries.

react-virtualized

react-virtualized is  perfect for displaying a large amount of data efficiently when rendering large lists and tabular data.

react-virtualized uses a technique called virtual rendering to display extensive data efficiently. Virtual rendering only renders what is visible. For example, if you have a large list that contains a thousand items, react-virtualized will only show a fraction of the data (ones that fit on the screen) at any given moment the ones that fit on the screen) until the user scrolls to show more. Other features include:

  • supports rendering of grids, lists, tables, masonry, and collections
  • ability to auto-resize components
  • ability to display items in reverse order
  • ability to customize CSS classes and styles

react-table

react-table is a  lightweight open-source library that allows for fast and extendable datagrids for React. It also supports hooks. Some of its best features include:

  • highly customizable 
  • supports sorting, filters, row selection, column ordering, and row expansion
  • fully controllable API
  • animatable and virtualizable
  • resizable
  •  

React Data Grid

React Data Grid is another open-source library that uses bootstrap and is perfect for editing tables. It also has a stunning UI. Features include:

  • column sorting, searching, filtering, and grouping
  • ability to edit columns
  • expand columns to show more data

Conclusion

In this tutorial, we created a simple React application using react-create-app, added react-bootstrap-table2, populated a table with data, worked with columns, styled the table, and selected rows. 

In the next part, we'll continue the journey by expanding rows, adding rows, deleting rows, and covering pagination, cell editing, and advanced customization. Stay tuned. 

Viewing all 5161 articles
Browse latest View live